Creating high-converting ads is hard. You stare at a blank screen, you know your product is good, but turning that into a scroll-stopping ad is a different story. You need a strong hook, a clear benefit, good visuals, and a call to action that actually makes people click.
It is an overwhelming process, especially if you are a solopreneur or running a small business without a dedicated marketing department.
The good news is that with AI, you do not have to start from scratch anymore. You can begin from proven ad templates that already work, let AI generate variations, and then you simply refine and choose the winners.
AI tools, like the Reliablesoft AI Design Studio, can speed up the whole process and actually expand your creativity instead of replacing it.
In this post, I will walk you through a practical, step by step process to create high-converting ads with AI in minutes.
Here is the short version if you just want the process.
- Define Your Offer And Audience
- Start From a Proven Template Instead of a Blank Canvas
- Customize Your Ads With AI
- Create Different Ads Formats
- Test What Resonates With Your Audience
- Pick Your Best Performing Ads and Create More Variations
In the steps below, I will show you how this looks in practice using Reliablesoft AI Design Studio, but you can follow the same logic with any good AI ad creator.
Step 1: Define Your Offer And Audience
AI is powerful, but it is not magical. Before creating your ads, you first need to define your audience, your ad message and set your campaign goals.
Define your audience: Who exactly is this ad for
You are not just “running ads to everyone.” You are talking to a very specific person with a specific problem, situation, and desire.
As explained in our digital marketing course, marketing to everyone is like marketing to no one.
Go beyond “people who want to lose weight” or “people who need marketing.” That is too broad for both you and the AI.
Think about:
- Who they are in their daily life (student, busy parent, small business owner, new freelancer).
- What they are struggling with right now.
- What they have already tried that did not work.
- How aware they are of the solution (do they know your type of product exists, or not yet).
For example:
- Working parents who want to lose weight without spending hours in the gym
- Freelancers over 40 who want to learn digital marketing and change careers
When you define your audience like this, your ad feels like a message to someone, not a generic announcement.
That clarity will guide how you design the structure and messaging of your ad. It will help you decide whether to start with a pain point, a bold promise, a quick tip, or a strong offer.
2. What is the main benefit of your offer
Every ad should have one clear promise at the center. If you try to say everything, people notice nothing.
Ask yourself:
If someone sees your ad for just 2 seconds, what is the one thing I want them to remember. Make it a benefit, not a feature. So instead of saying what your tool or product can do, focus on what actual problems it helps people solve.
Here are some examples of benefit driven ads:
- “Get clients without cold calling”
- “Lose 5 kg in 8 weeks without giving up your favorite foods”
- “Pass your certification on the first attempt”
This “main benefit” will become your hook, your headline, and often the main visual message in your ad.
3. What action do you want them to take
This is where you connect your ad with your campaign goals.
Ask: What is the next step I want this person to take if the ad works.
Different goals need different types of ads. For example:
Brand Awareness - You want people to discover your brand or offer. Your ads will focus more on storytelling, problems, and big picture benefits, with a softer call to action like “Learn more.”
Website Traffic - You want people to visit your website or landing page. Your ads will use strong hooks and curiosity or benefit driven angles and a clear “Click to learn more” style CTA.
Lead generation - You want people to sign up for something, like a free guide, webinar, or email series. Your ads will highlight the value of the free resource, reduce friction, and make the next step feel safe and easy.
Increase Sales - You want people to buy now. Your ads will lean more on the offer itself, price, urgency, bonuses, and social proof, because you are asking for a bigger commitment.
Retargeting - You want people who already know your brand to come back and convert. Your ads might focus on overcoming objections, reminding them about products they have already seen, or showing testimonials and guarantees.
Step 2: Start From a Proven Template Instead of a Blank Canvas
Now that you know who you are talking to, what you are promising, and what goal you are aiming for, the next question is: “What should this ad actually look like”.
This is where most people get stuck. You open a design tool, see an empty canvas, and suddenly all your good ideas disappear.
Instead of inventing everything from zero, you can start from ad templates that are already proven to work.
Why starting from proven templates is a game changer
When you use a high-converting template as your starting point, you are not just picking something that “looks nice.” You are borrowing a structure that has already been tested in the real world.
So instead of worrying, “Will this layout even work for my audience”, you start from something with built-in best practices and simply adapt it to your offer.
It also solves a very real problem for solopreneurs and small teams: you do not need to be a designer or copywriter to get to a solid ad. The template and AI handle the heavy lifting for structure, and you plug in what you already defined in Step 1.
Here is how to do it:
Open Reliablesoft AI Studio (you can create a free account and replicate this tutorial).
Click 'Generate Ads' and search for templates matching your product, style or purpose. In this example I will search for 'shoes' to create an ad for my imaginary line of shoes.
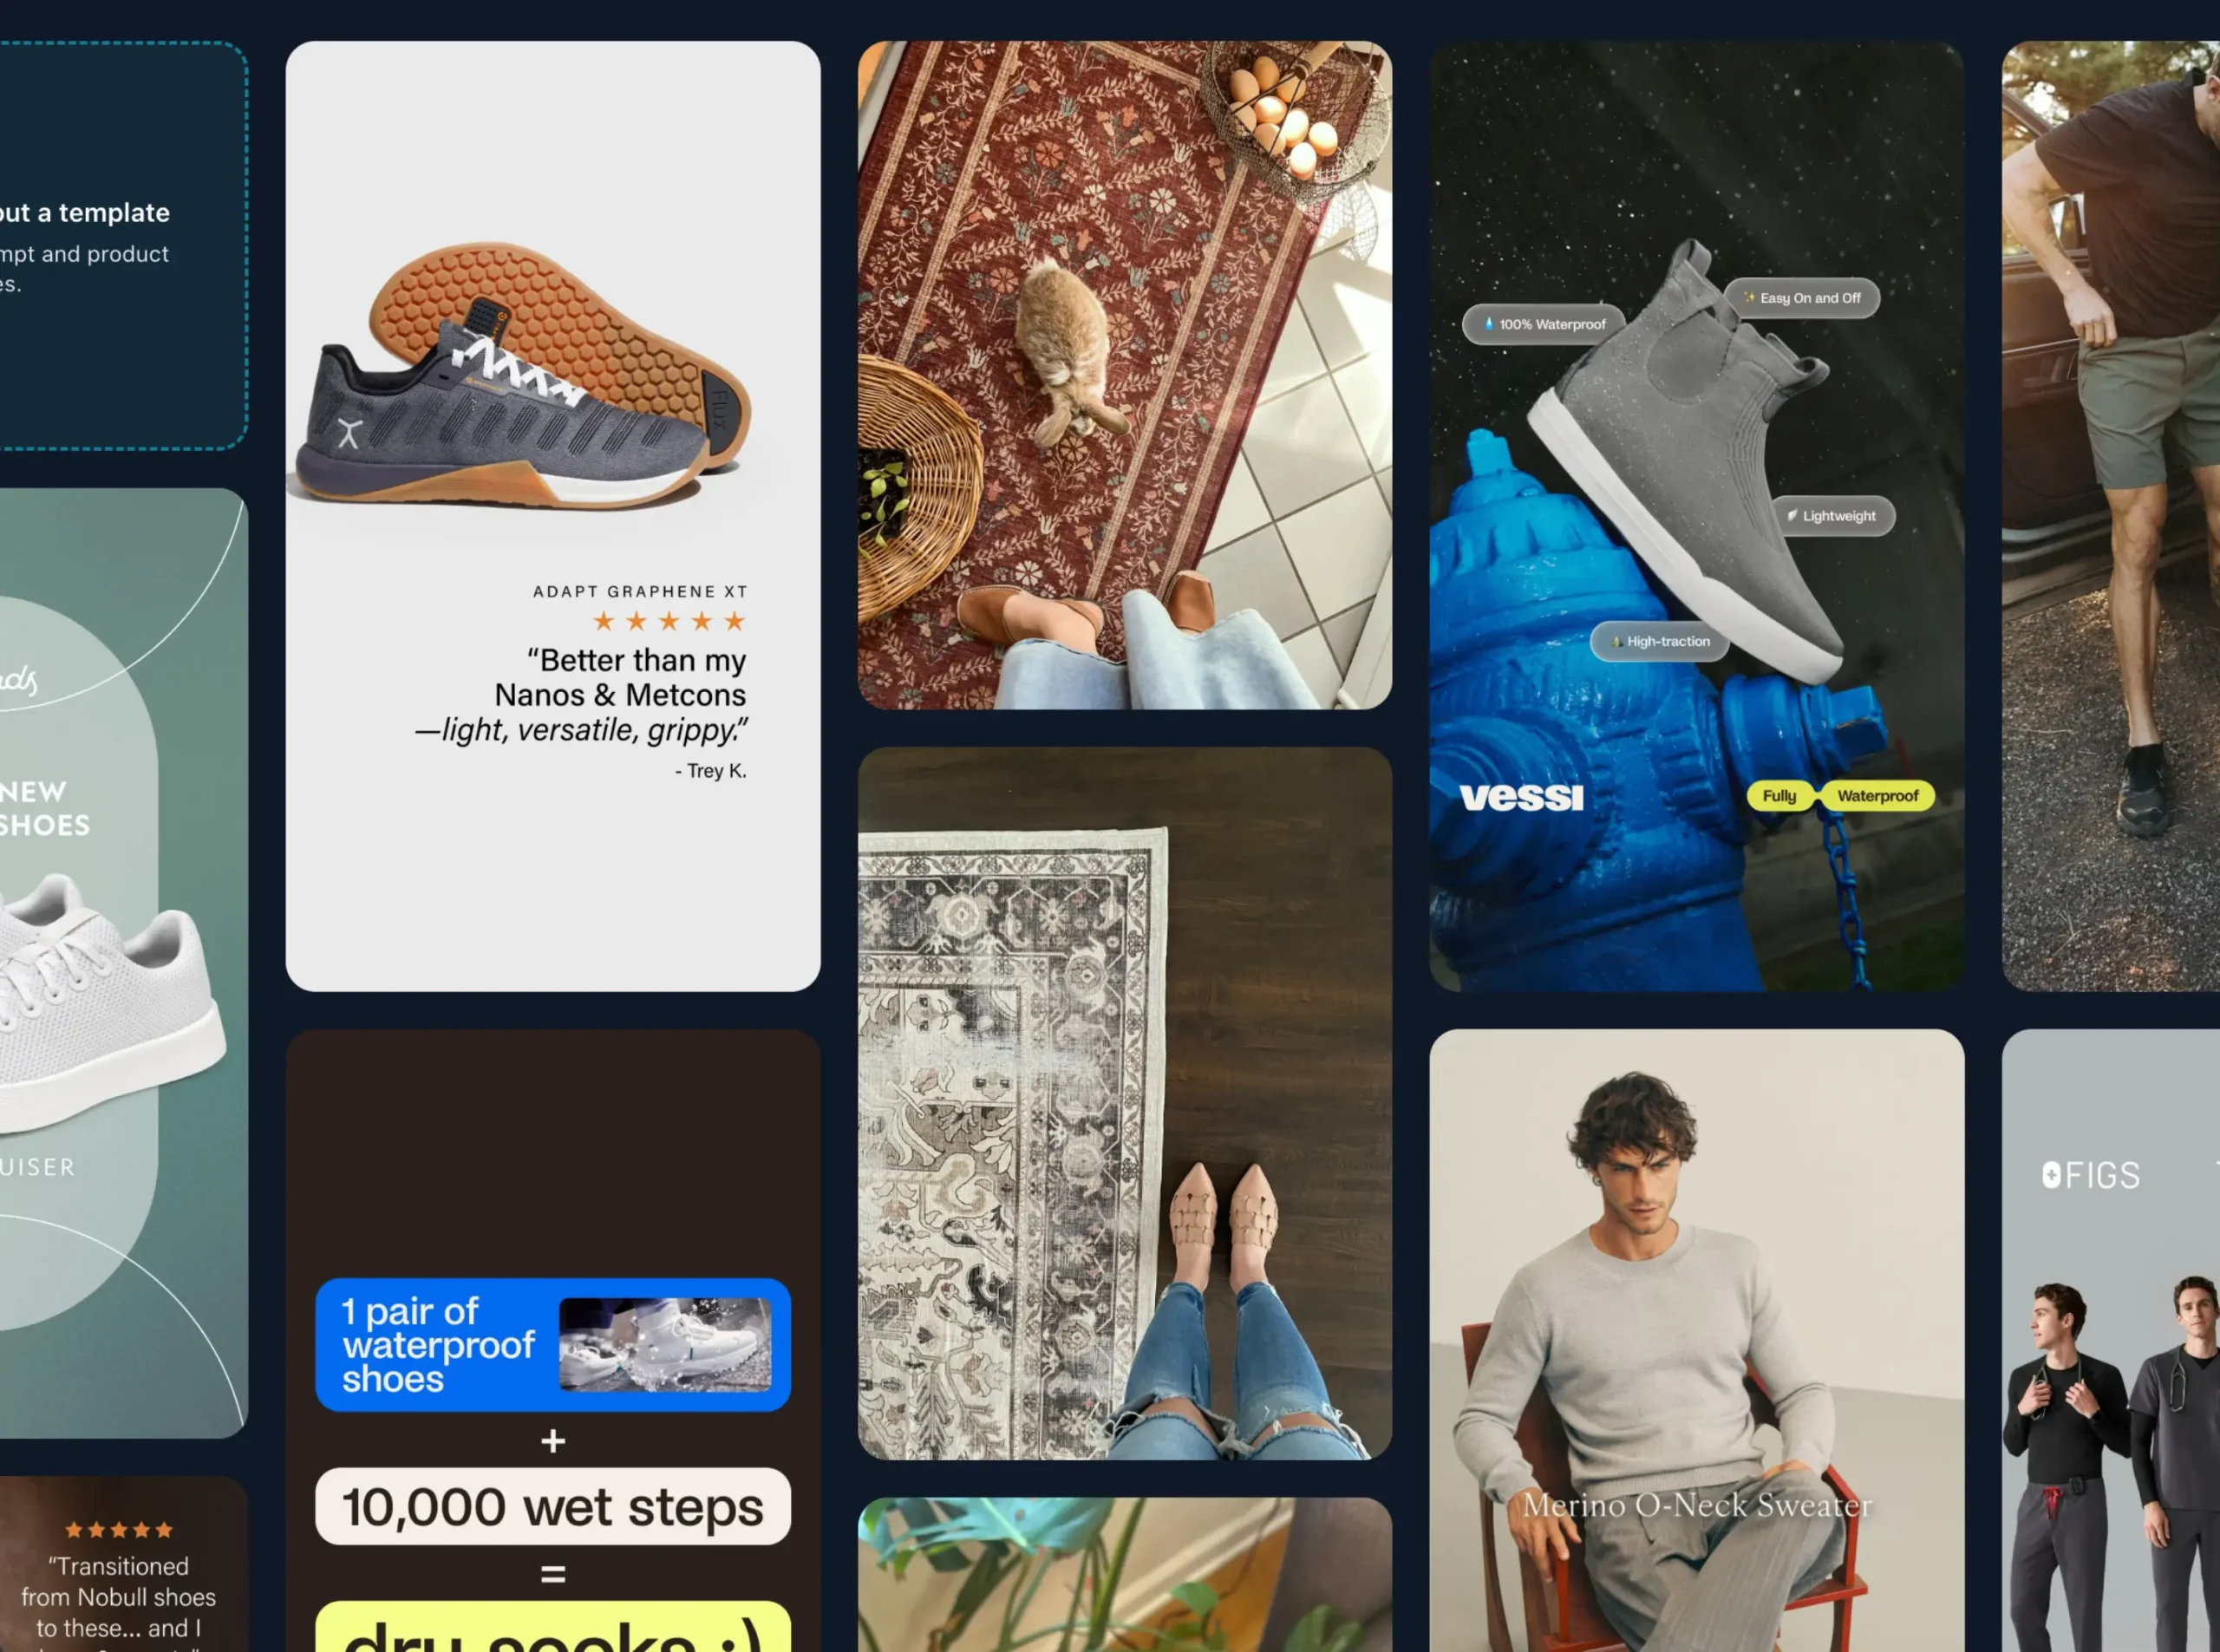
In the background, our AI will intelligently search our ads database to find templates matching 'shoes'.
Choose the one your like and let's move on to the customization stage.
Step 3: Customize Your Ads With AI
Once you have chosen your starting template, the next step is to make it yours. This is where you upload images of your product and let AI do the heavy lifting for you.
In my case, I used a simple product shot of an imaginary pair of shoes and asked AI to create variations of the same ad, including a 25% off Christmas offer.
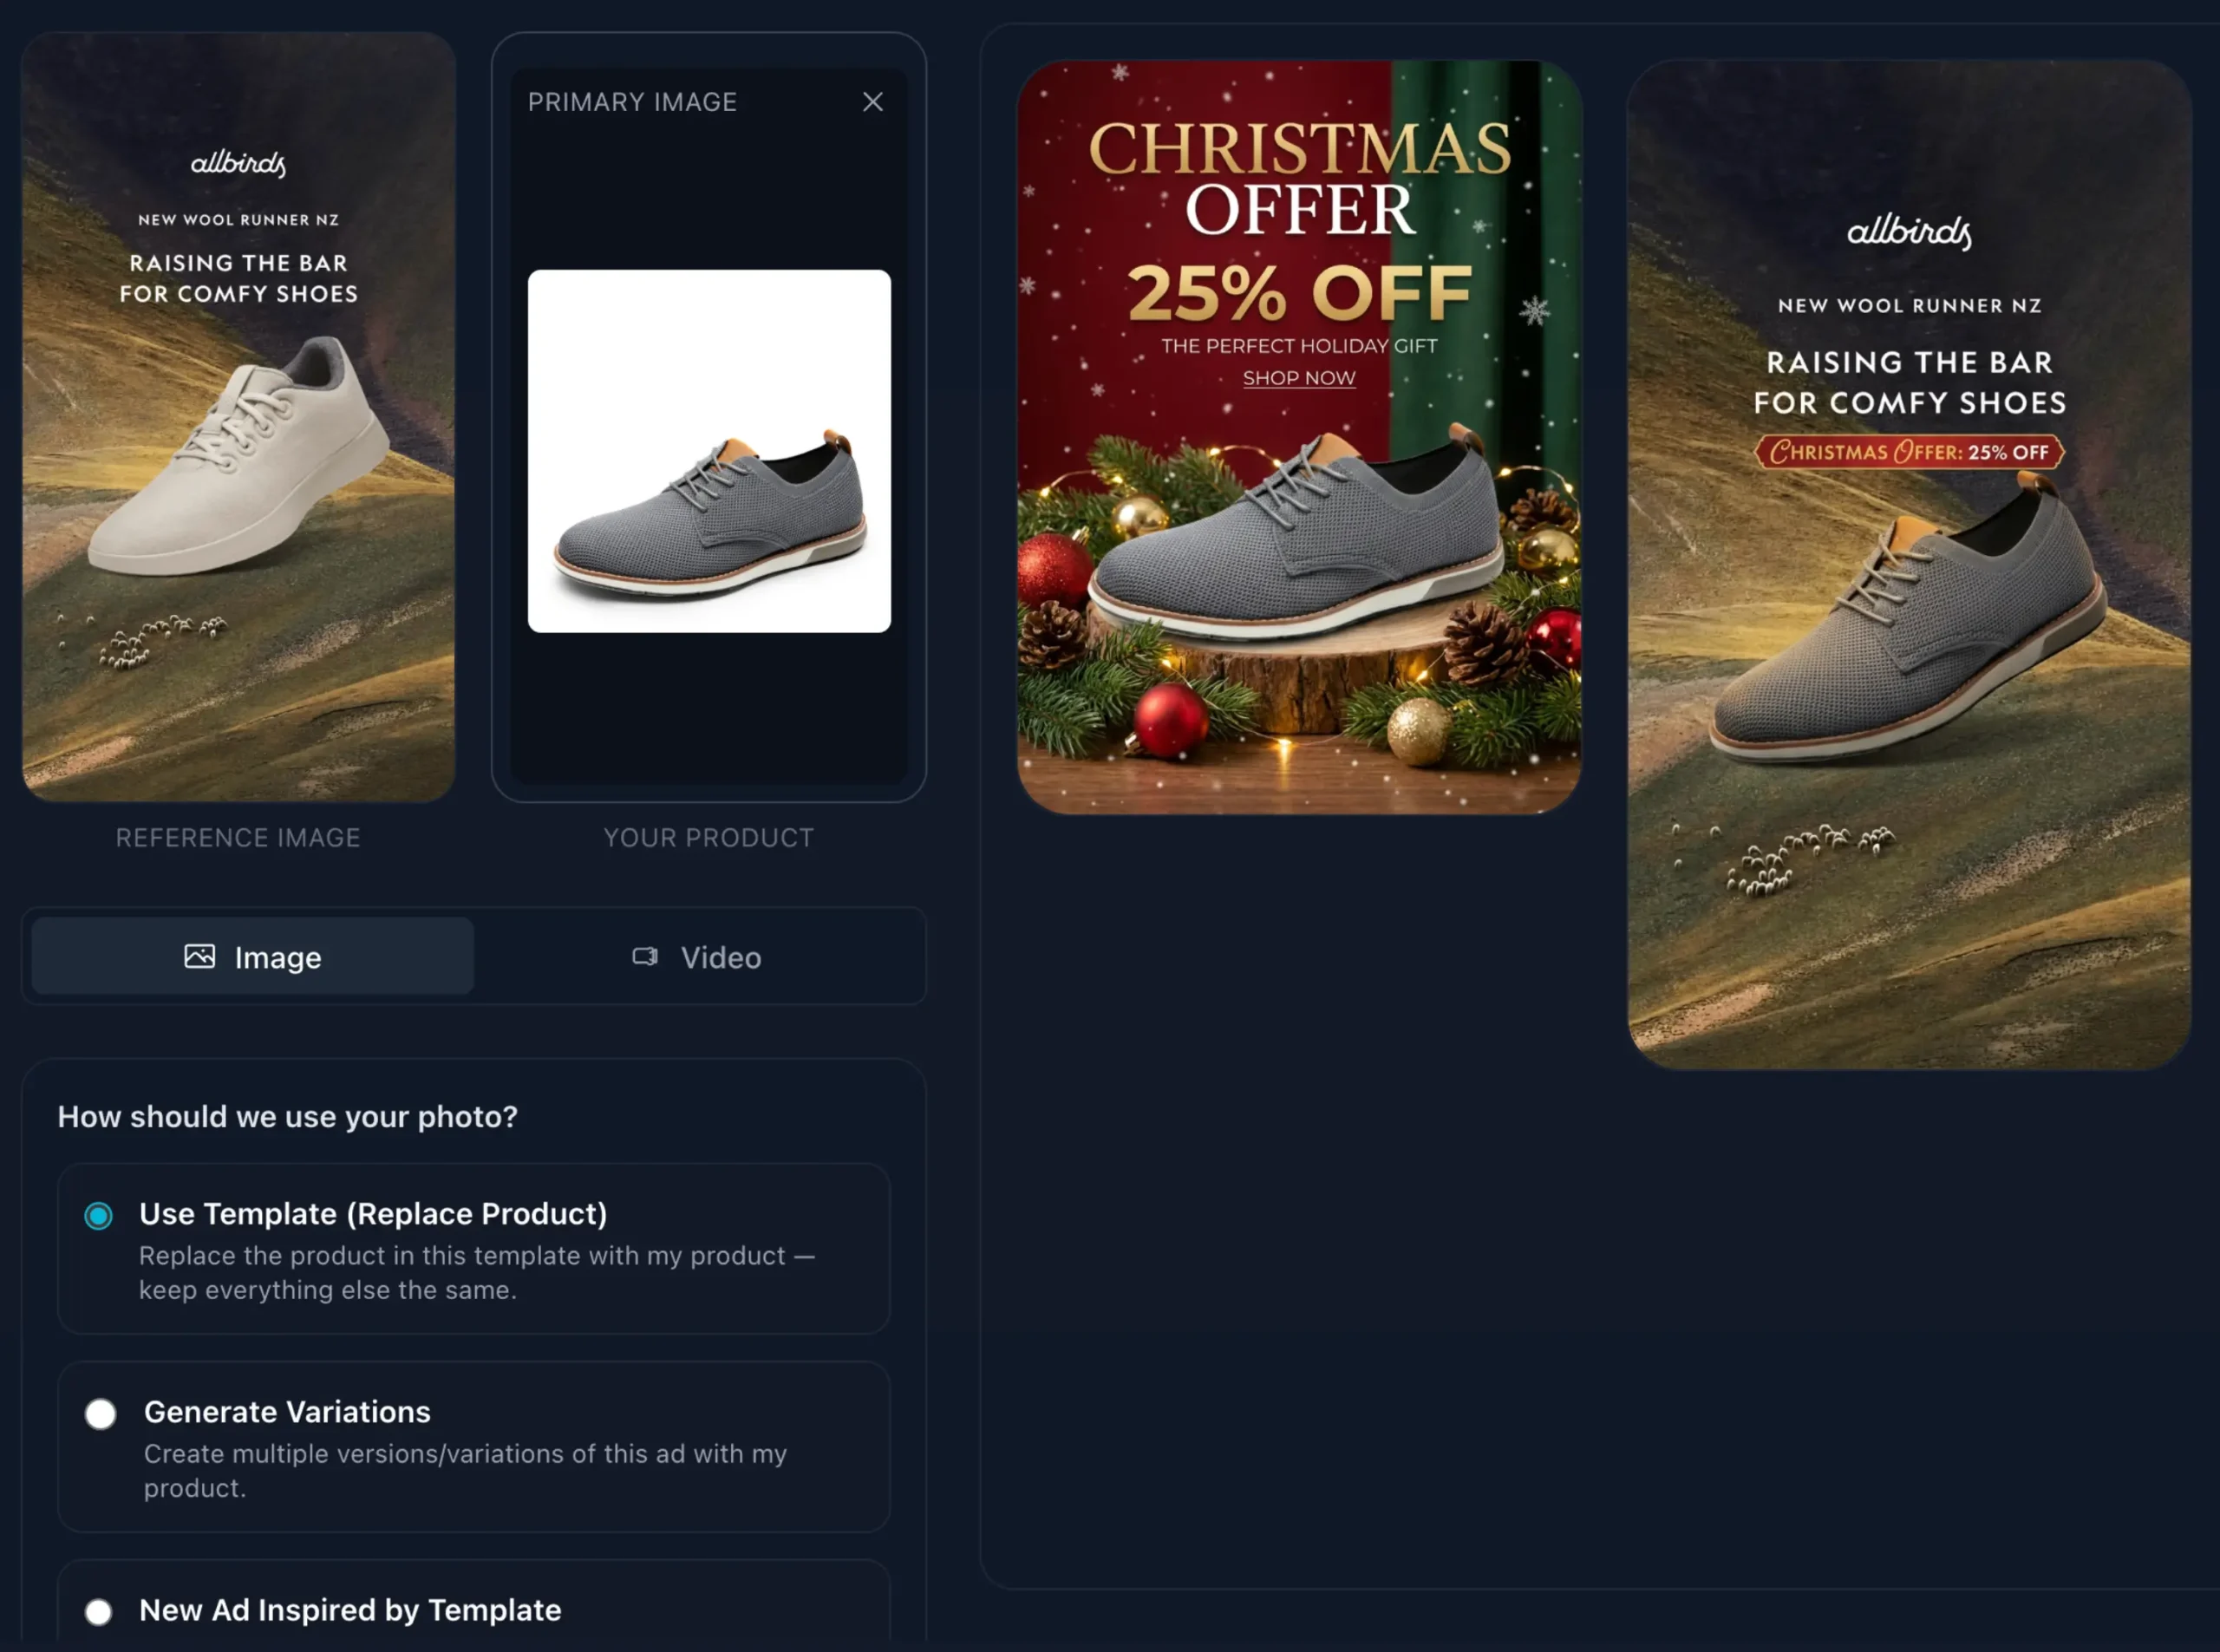
I did not redesign the ad from scratch or manually move elements around. I just selected the template, uploaded the product image, selected from a pre-defined set of options and gave a short instruction telling AI about the offer.
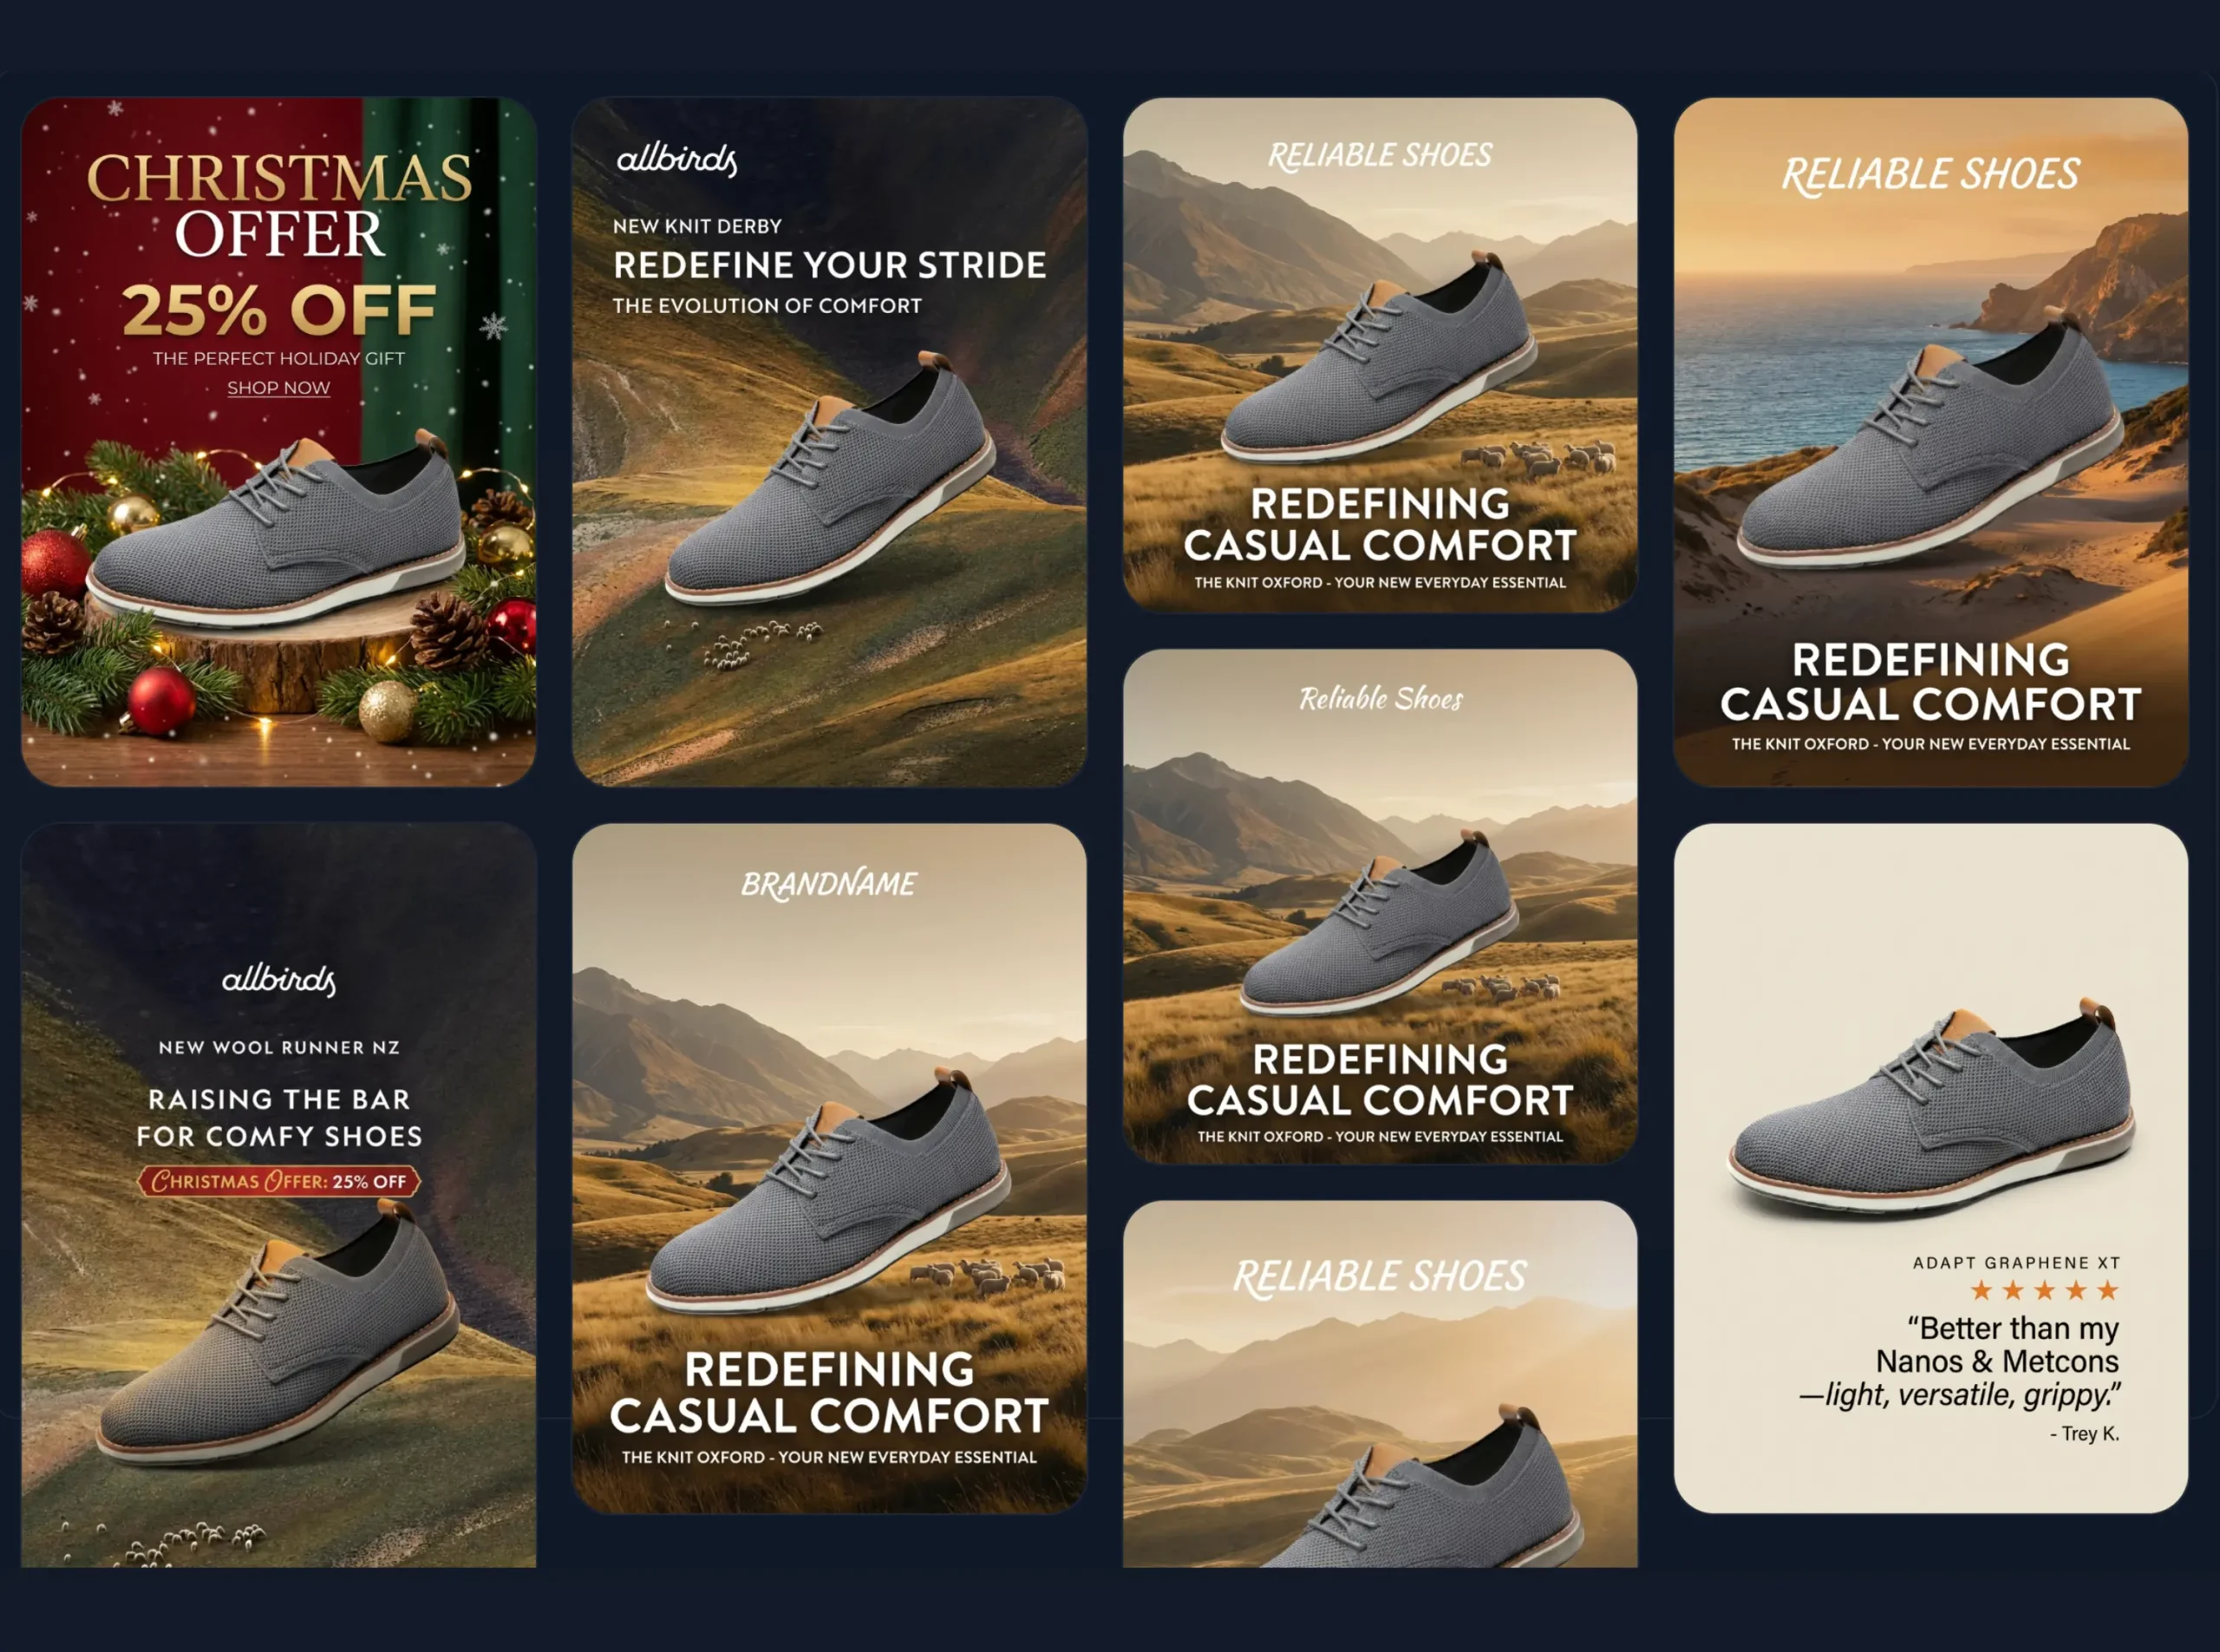
Within a few minutes, I had several options on the screen. Some versions looked identical to the original template, just updated with my shoes and offer.
Others kept the overall structure but played with different layouts, colors, or backgrounds so the ad felt fresh while still on brand.
A few versions leaned more into the Christmas angle, with seasonal elements added around the main visual and message.
From there, I simply picked the version I liked the most and refined it further.
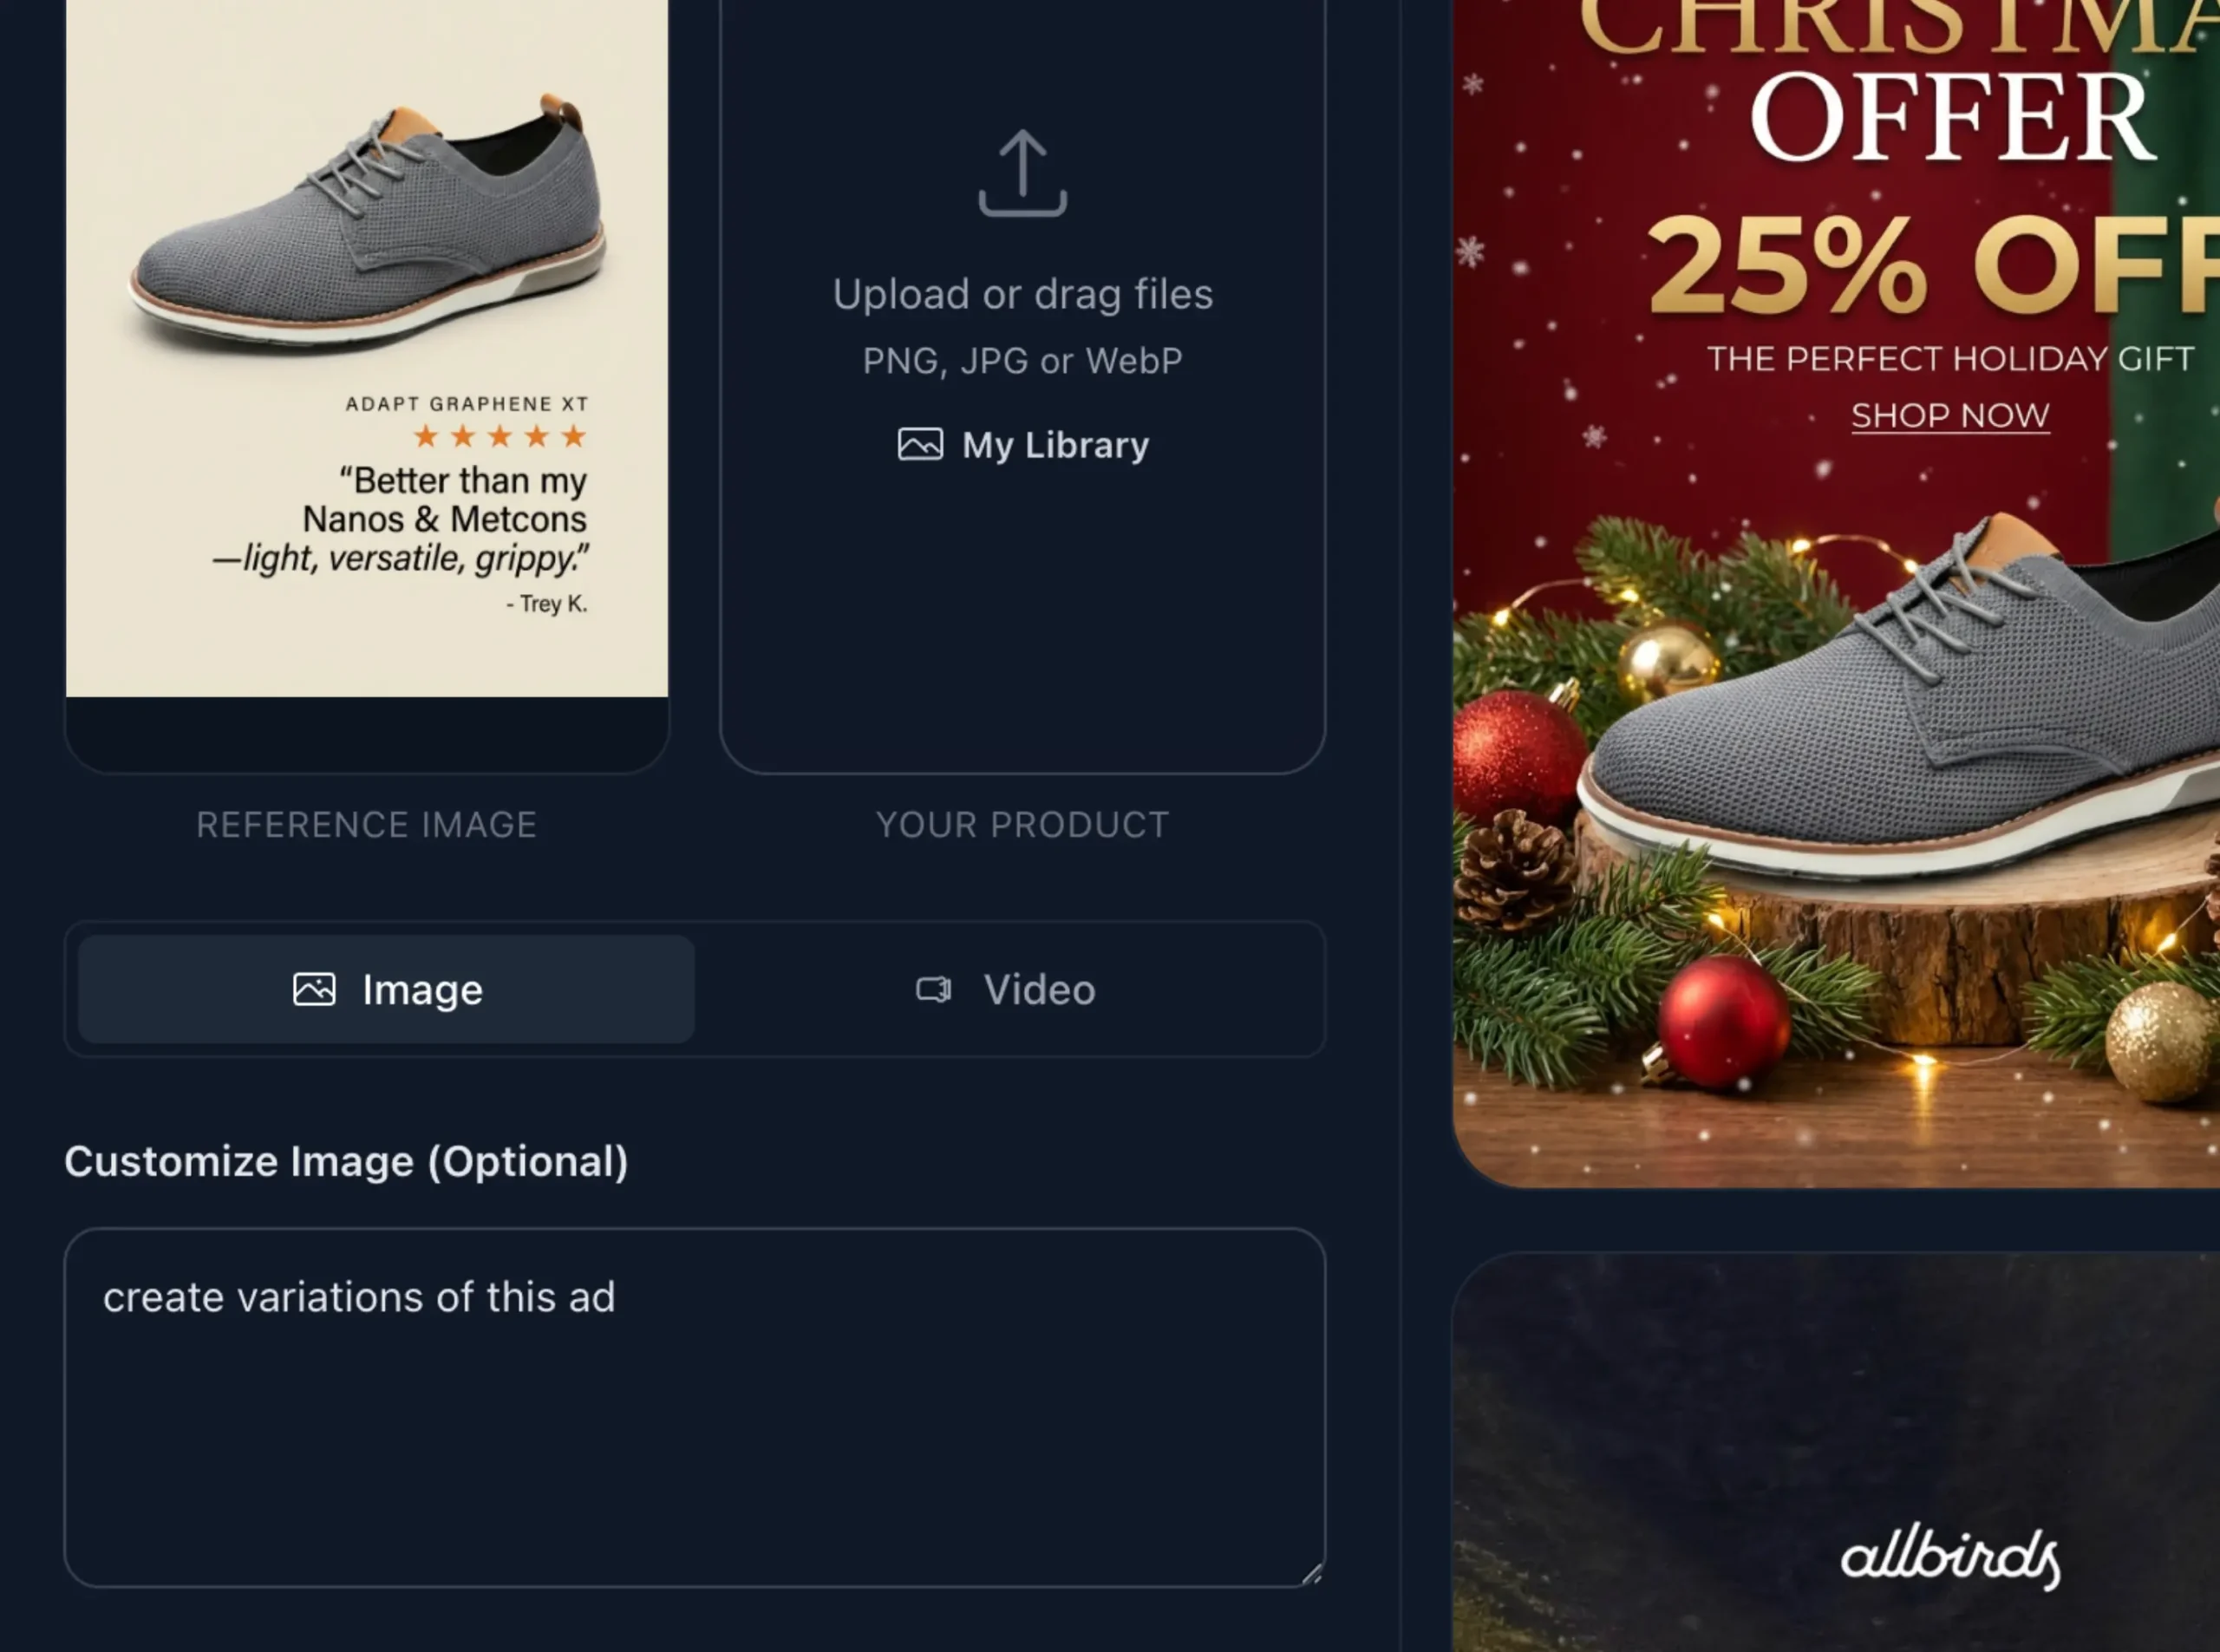
I asked AI to add my brand name and slogan in a clear, visible spot, and it adjusted the text placement for me.
If I wanted to tweak the headline or change a color, I could do that with very simple instructions instead of complicated design work.
The result is that you move from a generic template to a branded, polished ad in a very short time, without needing advanced design skills.
Step 4: Create Different Ads Formats
After you have a first version you are happy with, it is time to think about formats. Platforms like Facebook and Instagram now recommend using multiple ad sizes and types in the same campaign.
Instead of relying on a single square image, you get better results when you give the system a mix of square posts, vertical stories, reels, and even short video or animated formats. Meta’s AI can then decide which ad to show to which user and in which placement, based on what is more likely to perform.
You do not have to redesign each format from zero. You can start from your main ad and ask AI to adapt it into different sizes and placements, keeping the same core message and look.
The image you used for the feed can be repurposed into a vertical story with the call to action moved to the bottom, while the same concept can become a realistic UGC video with AI actors showcasing how your product is used or providing testimonials.
This is also a good moment to experiment with different creative themes around the same offer. One set of ads can focus heavily on the discount and urgency, another on lifestyle and how the product fits into your customer’s day, and another on social proof with testimonials or ratings.
You are still promoting the same product and benefit you defined in Step 1, but you are giving the algorithm more creative angles and formats to work with, which increases your chances of connecting with different segments of your audience.
Step 5: Test What Resonates With Your Audience
Once you have a set of ads and formats ready, the next step is to see what your audience actually responds to. This is where you move into your ad account, create a campaign on Facebook or Instagram, and upload the different creatives you prepared.
Try not to judge the ads too early. Give the campaign enough time and data so the system can learn. A good rule of thumb is to let your ads run for at least two weeks, assuming your budget is reasonable for your audience size.
During this period, your main job is to monitor the performance without constantly changing everything. After your ads have been running for a while, you can look at the reports and see which ones are getting the most clicks, generating the lowest cost per result, or leading to actual conversions on your website.
Sometimes a design you liked less at the beginning ends up becoming the top performer, because it resonates better with your audience or stands out more in the feed.
The point of this step is not to run a complex scientific experiment. It is simply to compare your different creatives in the real world and learn from what happens.
Step 6: Pick Your Best Performing Ads and Create More Variations
After your initial test, you will start to see clear patterns. One or two ads usually rise to the top. They get more engagement, more clicks, or more sales than the rest. Those are your winners, and they are the perfect input creating more ads.
Instead of going back to the drawing board, you can now use your best performing ads as references. You take the winning creative, feed it back into Reliablesoft AI Design Studio, and ask it to produce more variations in the same style.
Because the ad has already proven itself with your audience, you want to keep the overall structure and look, while experimenting with small changes. You might test new headlines that focus on slightly different benefits, alternate images that show the product from another angle, or new seasonal twists that keep the ad fresh without losing what works.
This creates a simple but powerful loop. You define your strategy, build your first set of creatives, test them, then let AI scale whatever your audience actually responds to.
Conclusion
You do not need to be a designer to create high-converting ads anymore. If you define your offer and audience clearly, start from proven templates, and let AI handle the heavy lifting, you can go from “blank screen” to polished campaigns in minutes.
The real power comes from the loop you just saw: you create your first ads, test what resonates, then feed your winners back into AI to generate even better variations. Each round gets easier, faster, and more profitable because you are building on what already works instead of guessing.