Starting a website from scratch is not difficult; it’s a very easy task, even for beginners. You don’t need to know web development or have any coding skills.
We've built hundreds of websites for our clients, and in this guide, you’ll learn how to start your first website step-by-step.
By the end of this tutorial, you’ll have a beautiful and professional website on your own domain. The whole process will take less than 30 minutes, and all steps are included in this tutorial.
1. Sign Up For Web Hosting
The first step to creating a website is to sign up for web hosting. Web hosting gives you the tools to set up a website and make it available online.
While you can choose any company to host your website, in this tutorial, we will use our personal favorite, Bluehost. It's one of the most affordable and reliable companies and has great offers with huge discounts and freebies for beginners.
When you sign up for a new plan, you get a free domain (for 1 year), a free SSL for your hosting account plus other benefits like 1-click WordPress Install, 24/7 support, and more.
Click this link to go to Bluehost to claim your special offer, and then click the green GET STARTED NOW button.

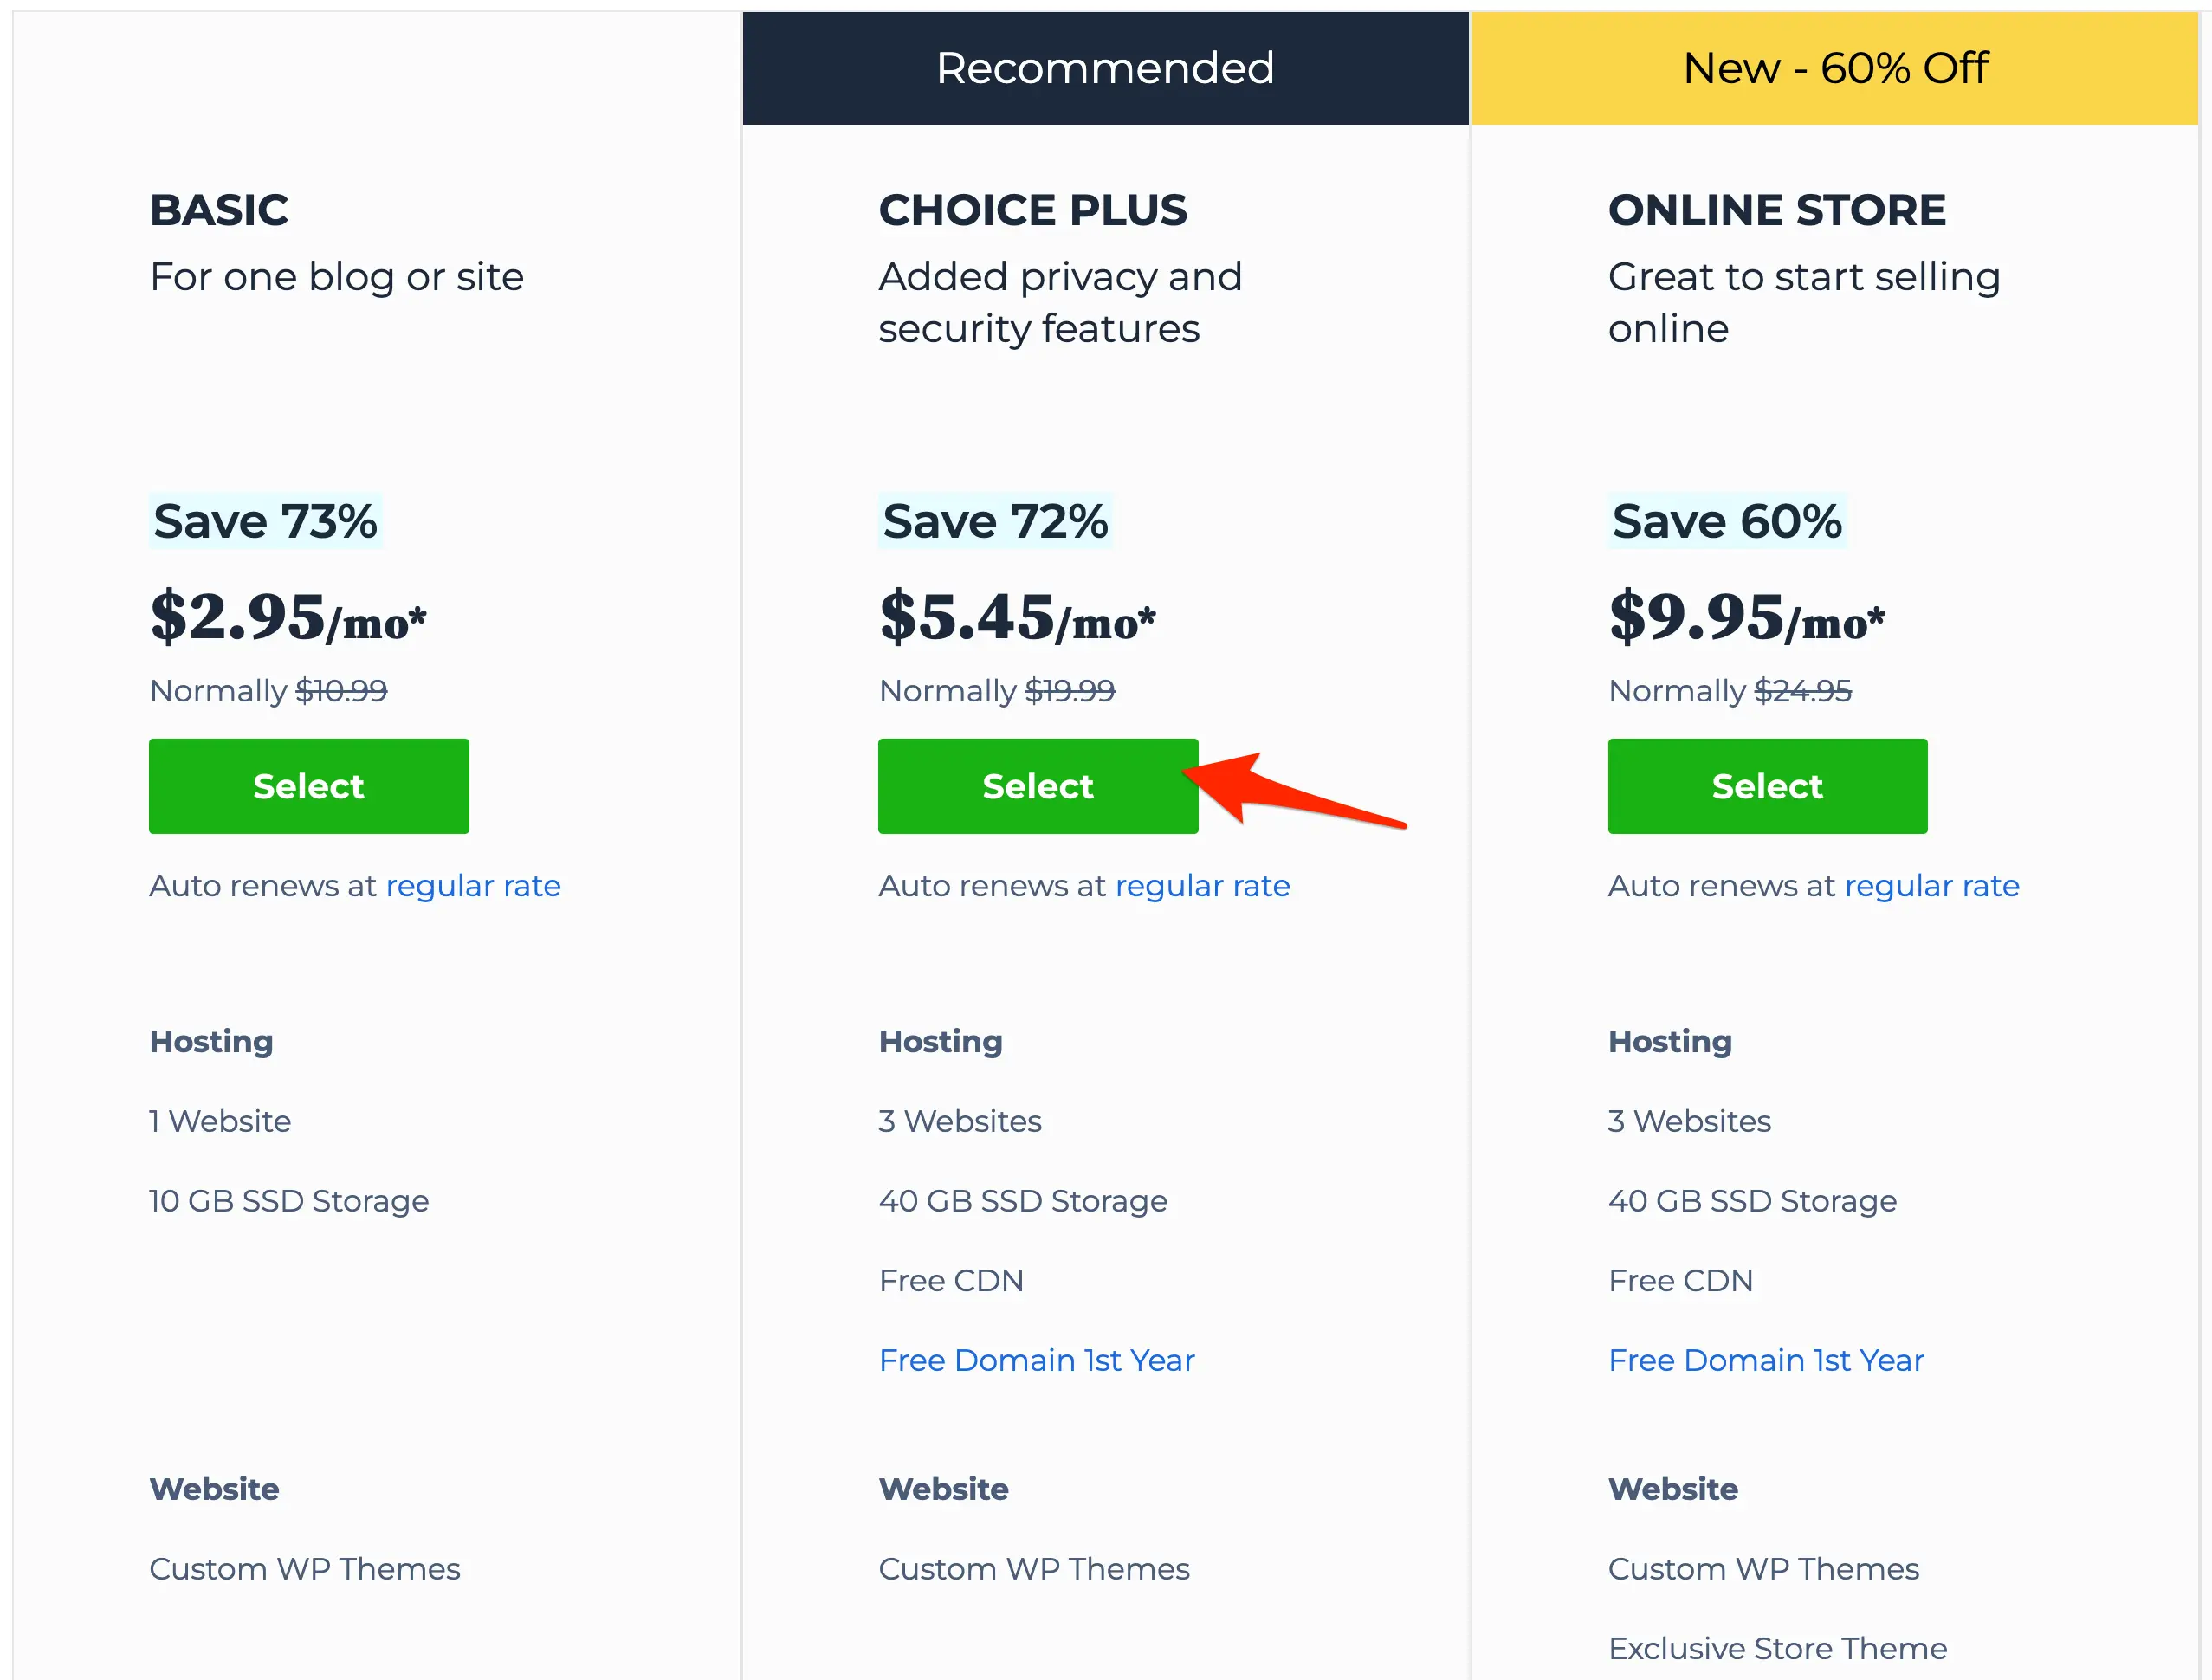
On the next screen, click the SELECT button under the CHOICE PLUS plan. The plan costs $5.45 monthly but includes everything you need to create your first website.
As your website grows and you'll need more space and computer power, you can easily upgrade to a more powerful plan from your hosting account.
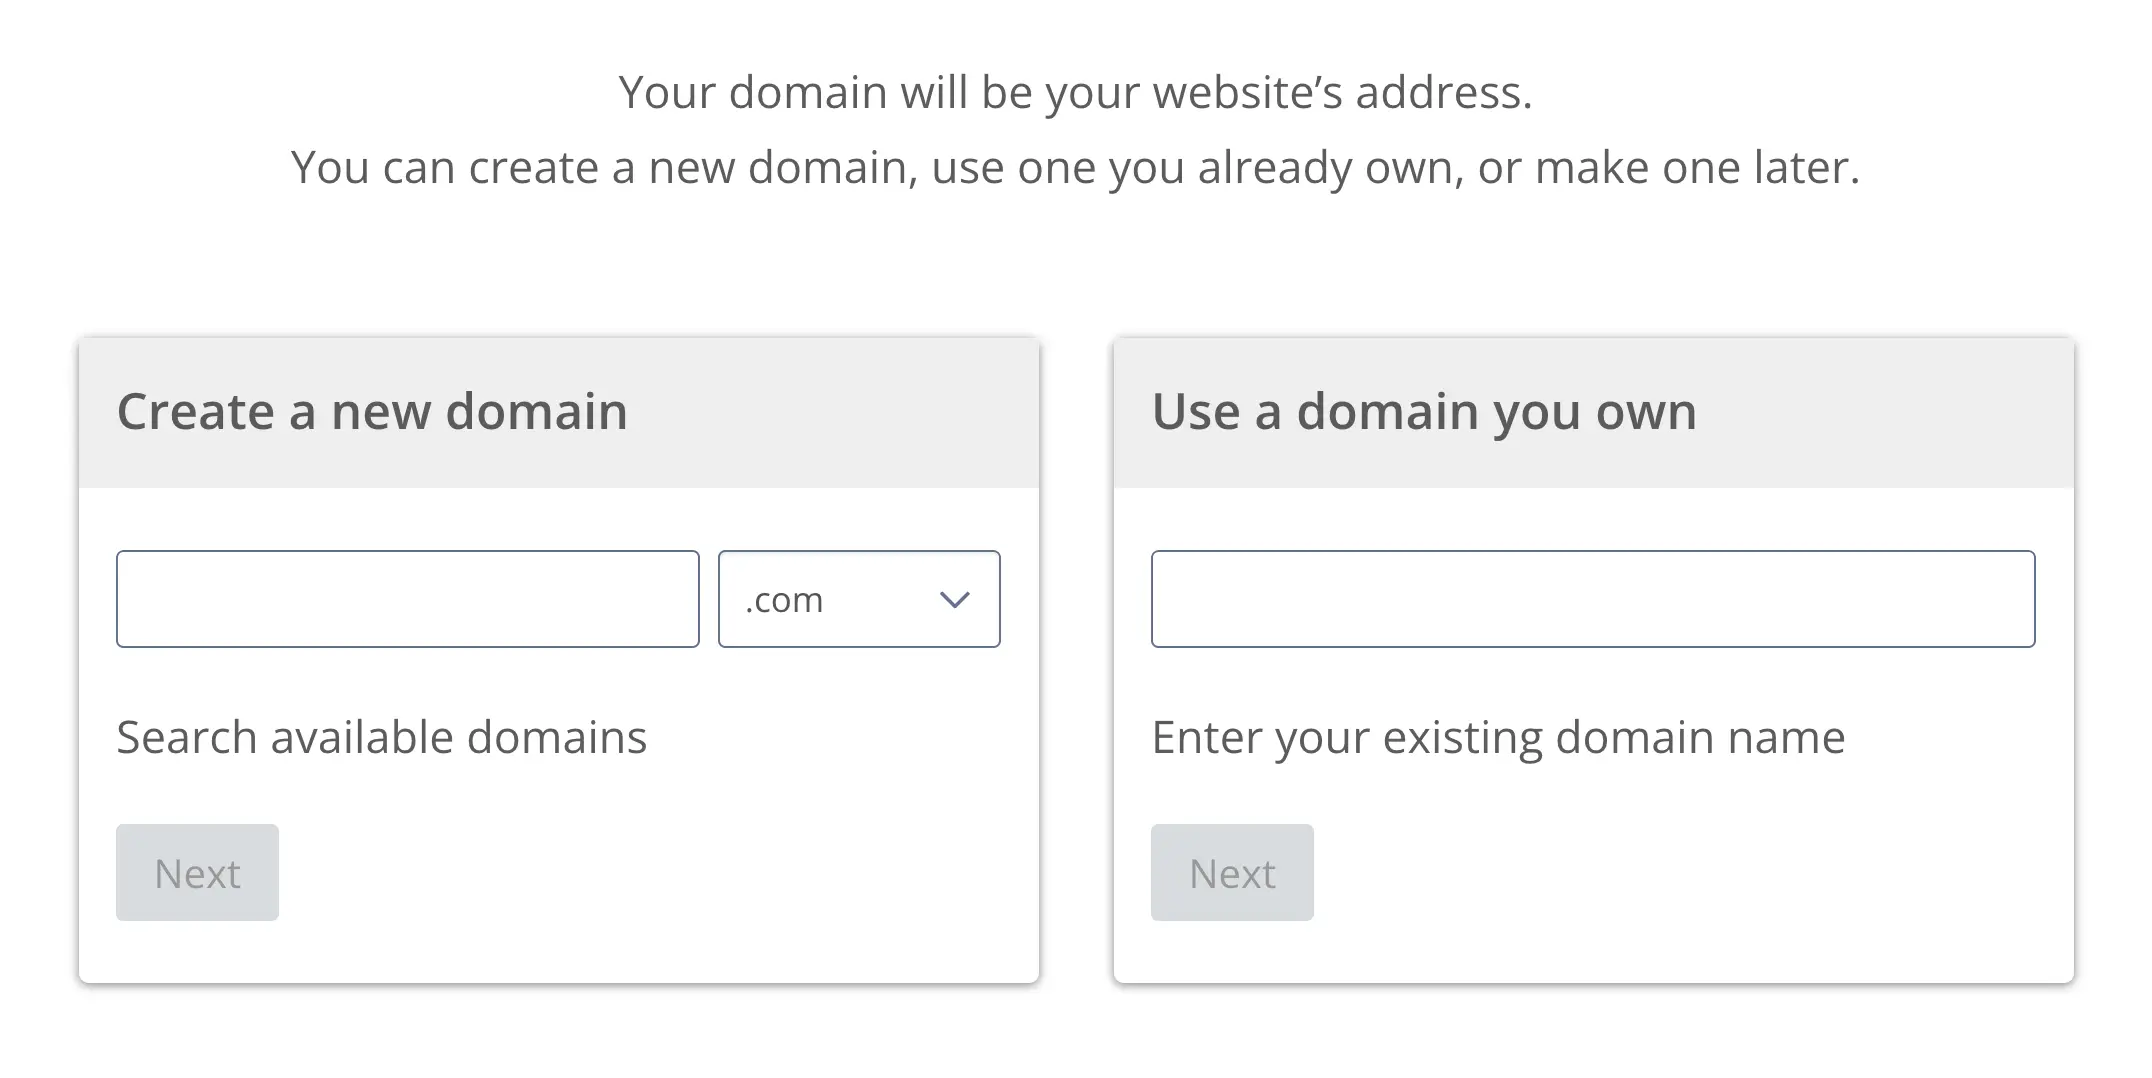
The next step is to specify the domain name for your website. In simple terms, a domain name is how you want your website to be known online. It’s the unique internet address of your site.
If you already own a domain name: type it into the "Use a domain you own" box and click NEXT.
If you don't own a domain name: type your preferred domain in the "Create a new domain" box and click NEXT.
If you want to choose a domain name later: click the "I’ll create my domain later" link and proceed to the next step.
What is a domain name?
This is the name you have to type on Google or directly to the browser search bar to visit a website. Every website on the Internet has a unique domain name.
The domain name has two parts. The first part is the name of the website and the second part is the extension.
Together they form the domain name.www. mydomainname . extension
For example:
- nike.com
- reliablesoft.net
- mercedes-benz.com
- wordpress.org
Tips on selecting a good domain name
- Think of a catchy name, something that people will remember.
- Maximum of two short words without spaces.
- Choose a known extension like a .com or .net.
- It should be the same as your brand name (if you plan on creating a business website).
- Avoid having underscores (_) in the name
How to register a domain name?
You can register a domain name through a domain registrar or your hosting company. Once you register a domain, you own it as long as you pay the yearly fee.
The normal cost is around $15 per year but if you follow the instructions in this tutorial, you’ll get a free domain registration for one year!
When a domain expires and it’s not renewed by the owner, it becomes available to the market.
Before we proceed, you should know the following: There are more than 400 million registered domain names to date so It is most likely that the first names that come to your mind, are already taken.
No worries though, with a bit of research you can find an available domain name to register for your brand new website.
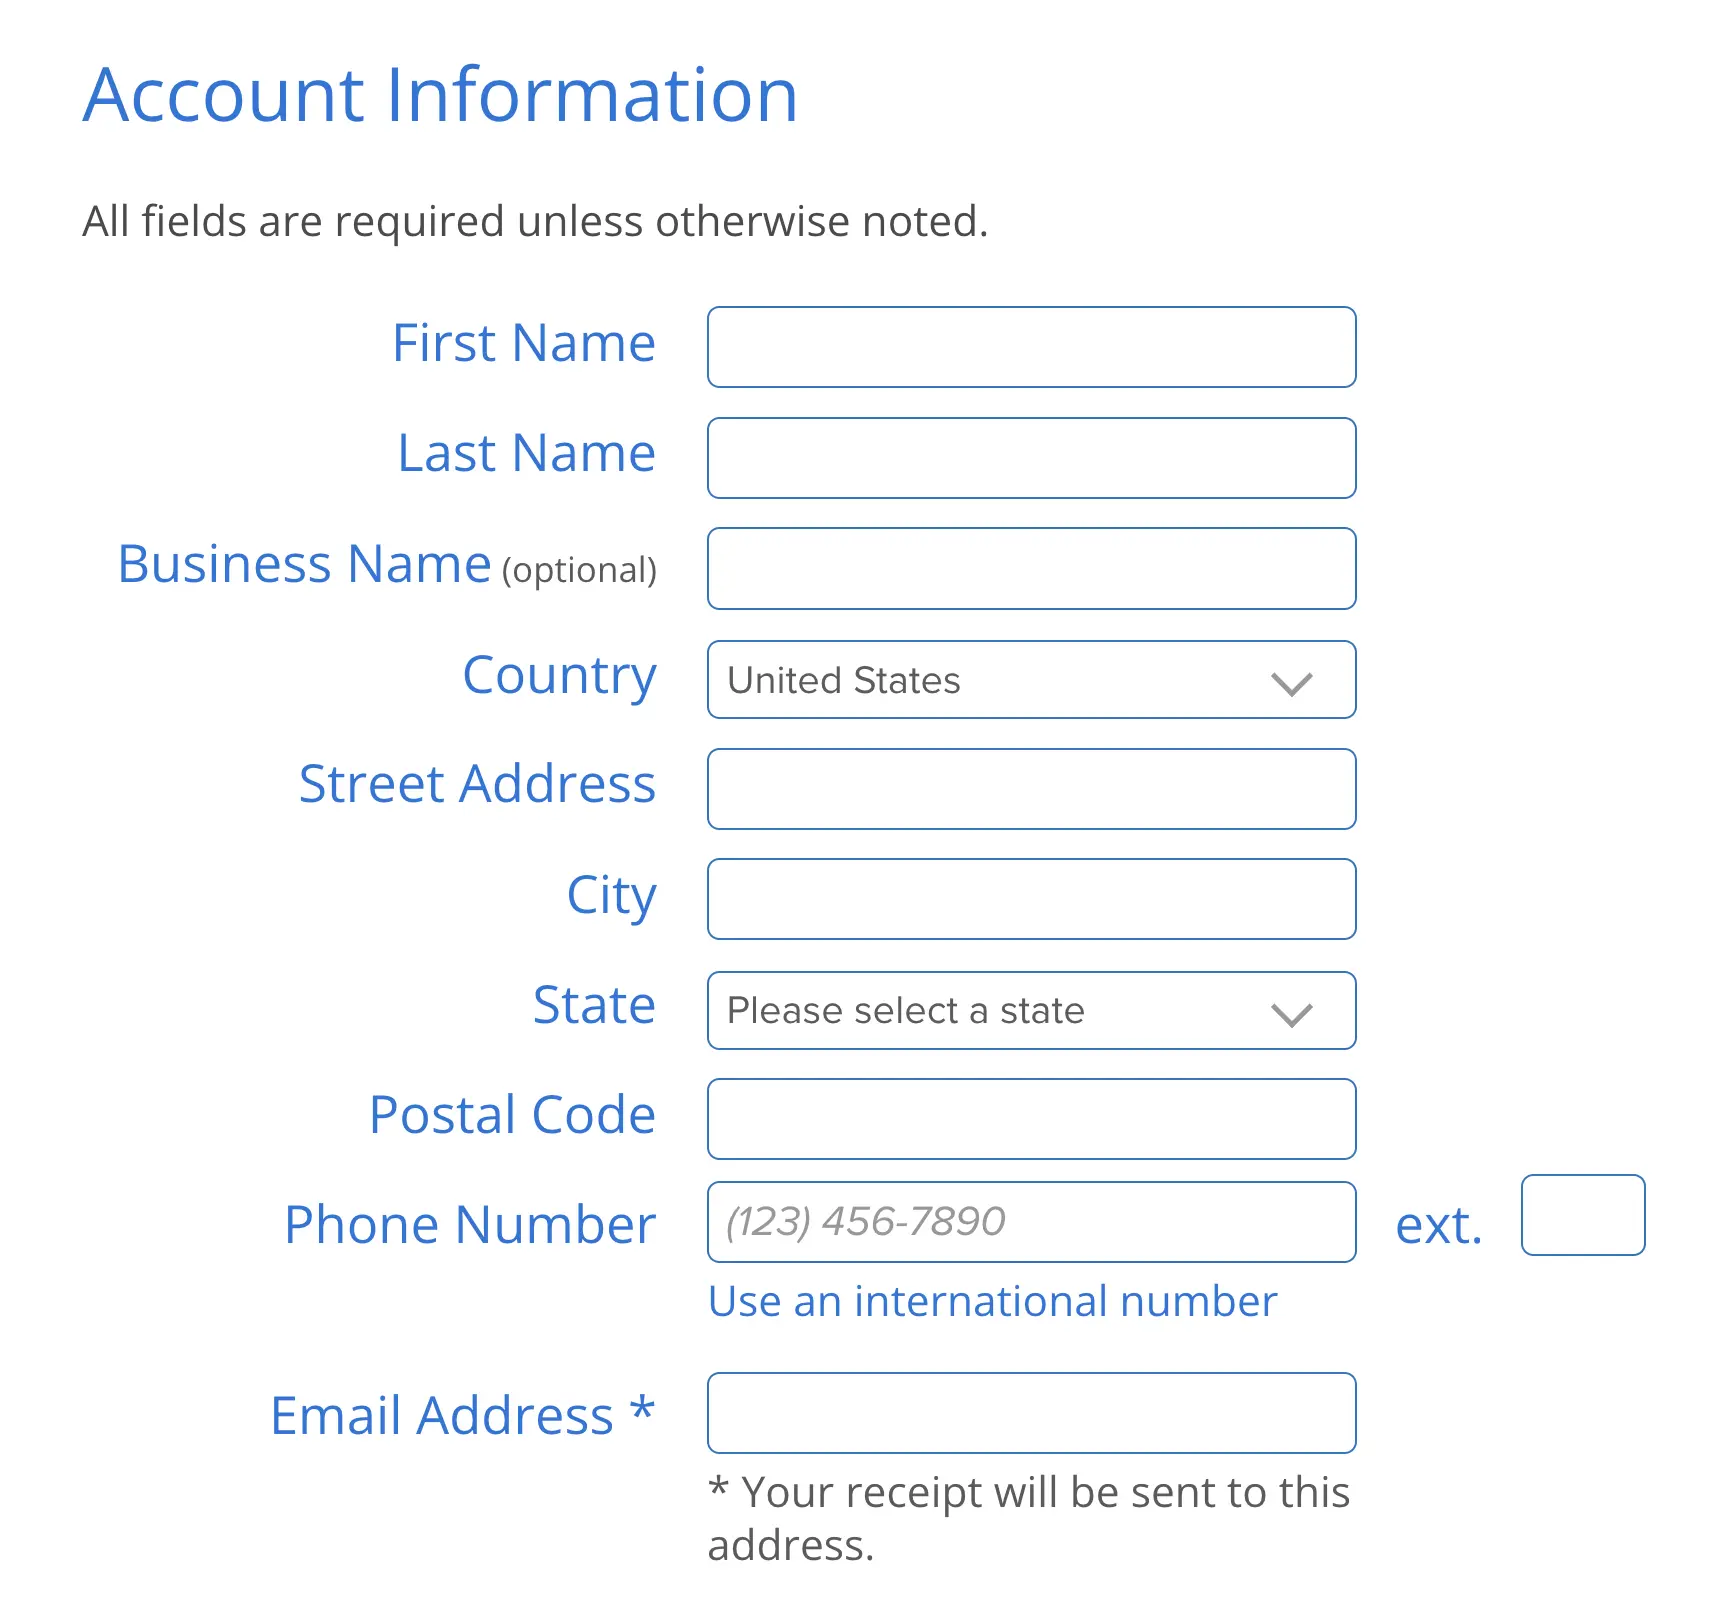
Account Information
The next step is to provide details about your account.
Fill in all required fields and make sure that the email address is correct. You’ll use the email address to log in and manage your account so double-check that before proceeding.
Package Information and Package Extras
From the Account Plan, select the duration of your hosting plan. By default is set to 12 months.
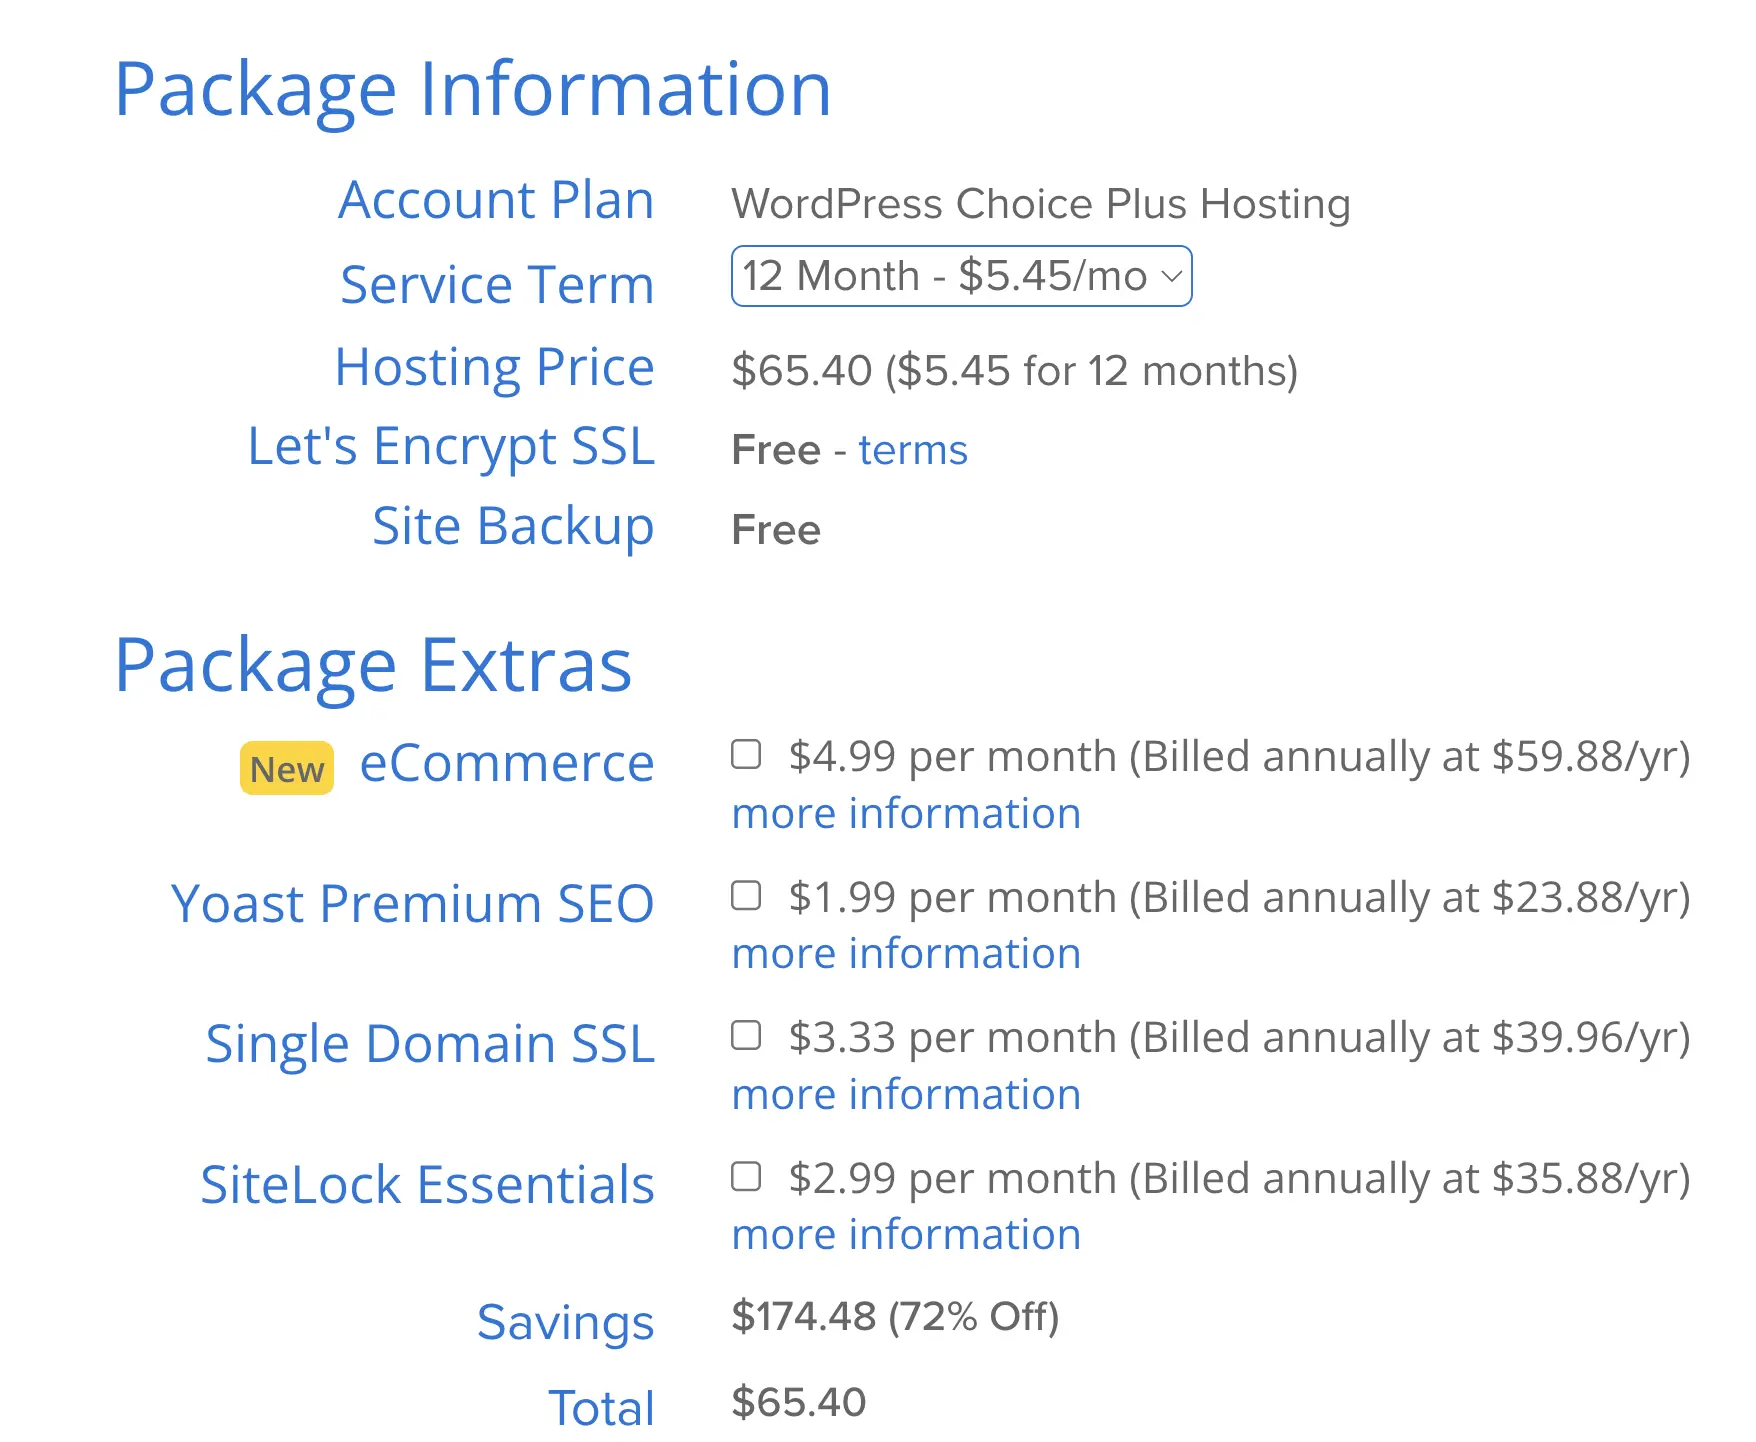
Click the ‘Account Plan’ dropdown and select one of three options.
- Basic - 12 months
- Basic - 24 months
- Basic - 36 months
What you should know about the ‘Account Plan’ is the following:
- The ‘Account Plan’ is the period you want to pay for hosting. In order for your website to be available on the Internet, it needs to have a valid hosting plan.
- The longer the duration of the hosting plan, the greater is the amount you'll save.
With any of the account plans, you also get a free domain name and a free SSL (secure certificate). The SSL will be automatically added to your website to make it more secure. Users will see the little padlock icon when your website is displayed in a browser.
Package Extras
Everything displayed in the Package extras is optional and not required for creating a website. You can safely un-check all boxes and proceed to the next step.
If you change your mind, there is an easy way to add those extras at a later stage.
Payment Information
To finalize this step, you need to enter your payment details and check the “I have read and agree …” checkbox.
When you’re ready, click the SUBMIT button to finalize payment.
Congratulations! You have just bought a great domain name and hosting for your new website.
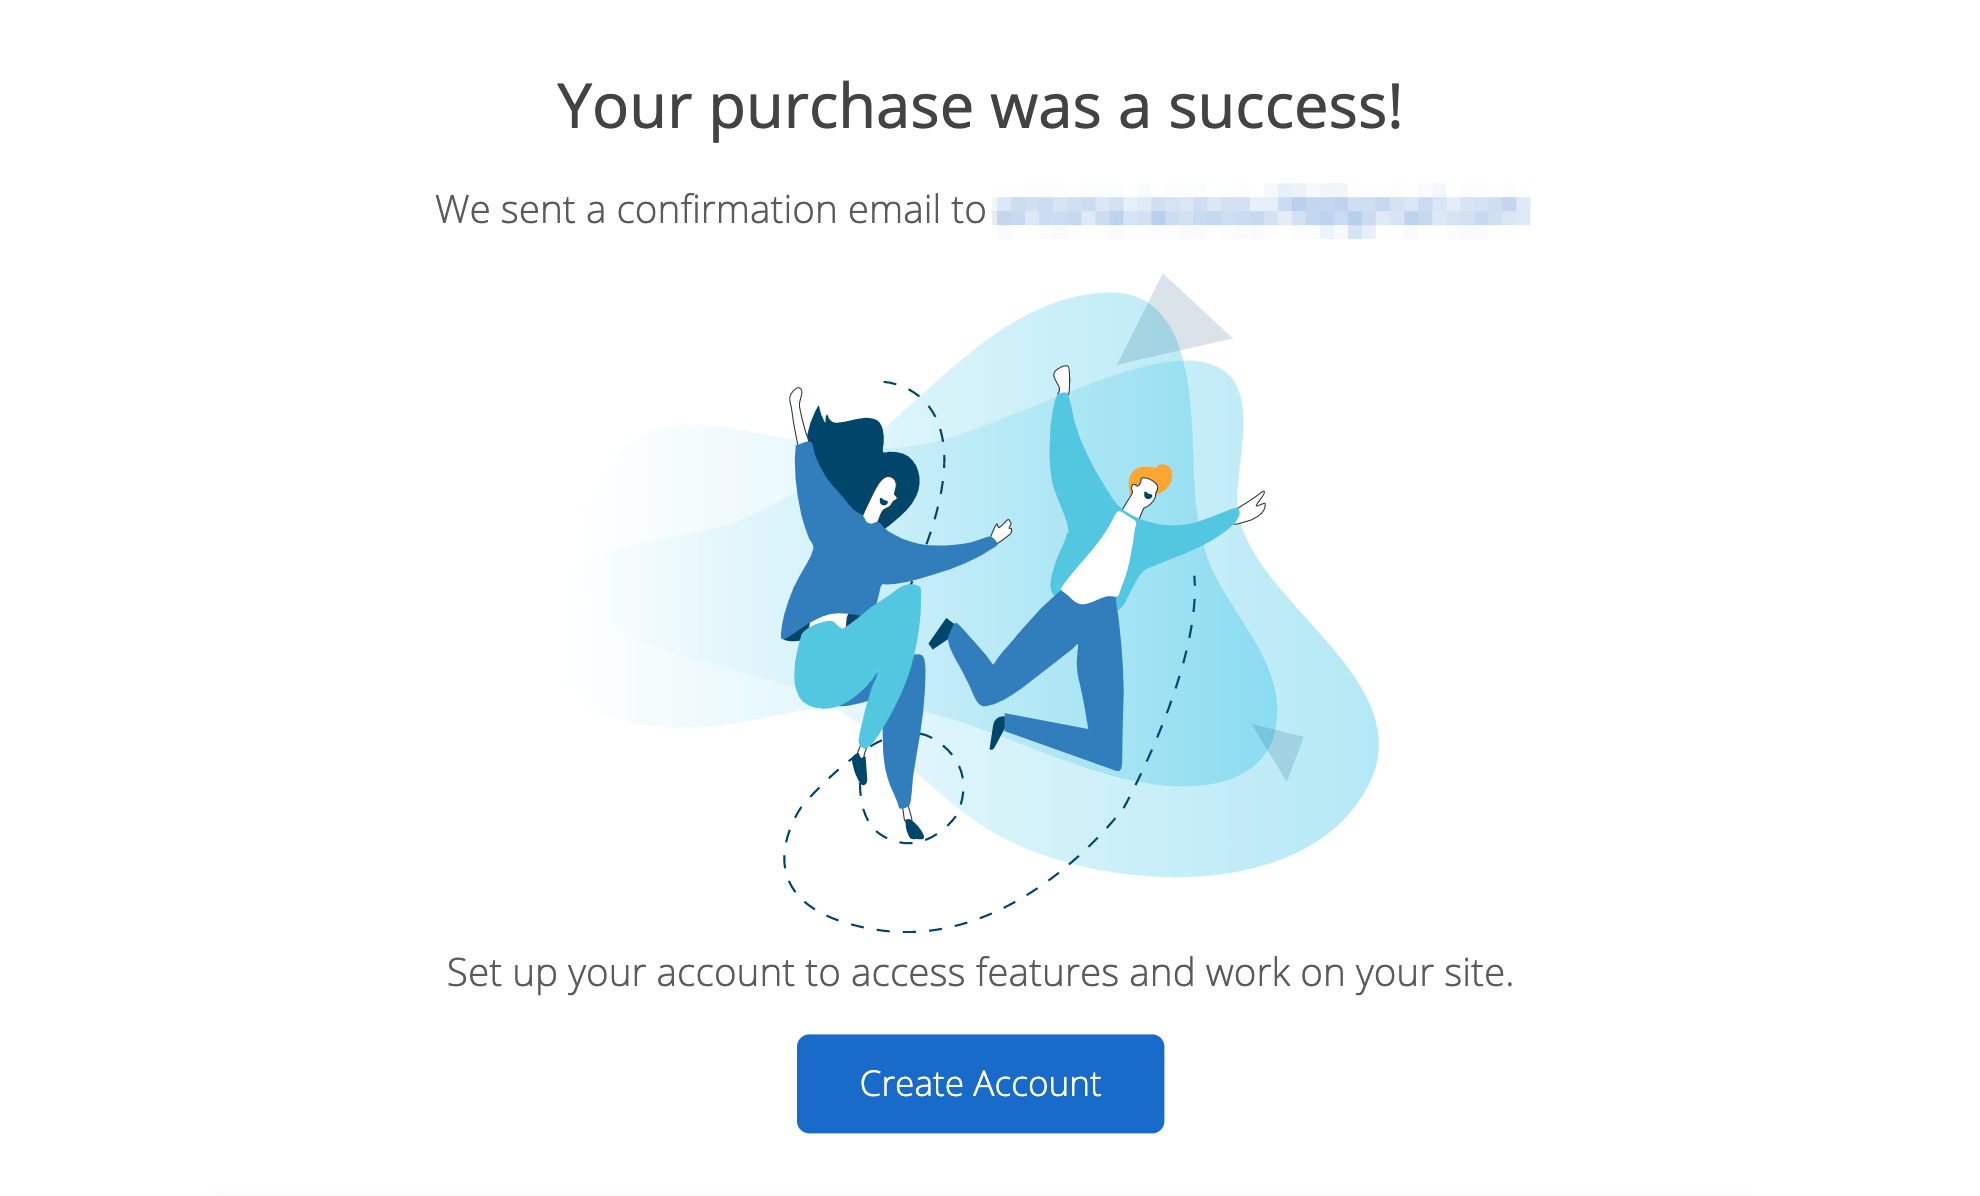
Click the CREATE ACCOUNT button and proceed to the next step, which is to create a password for your hosting account.
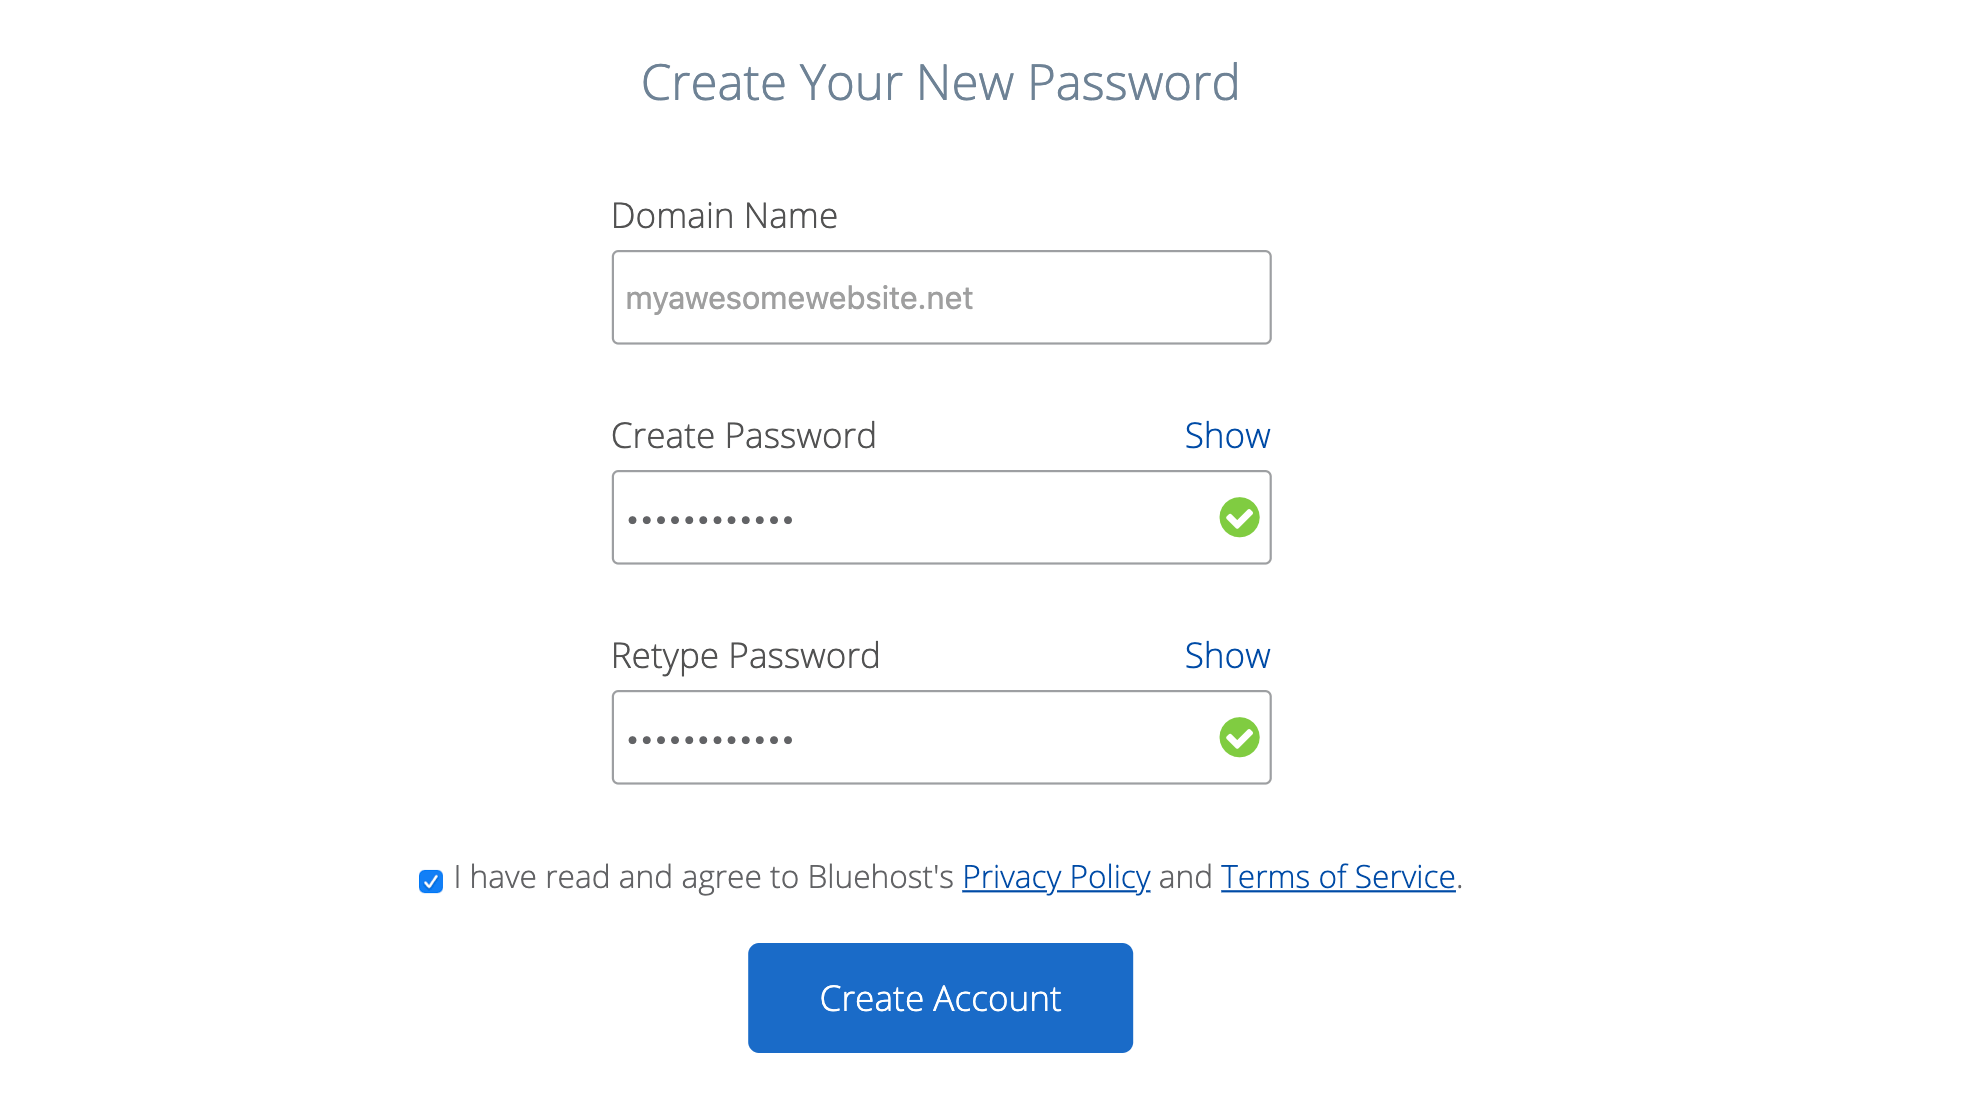
Type your recommended password in the ‘Create Password’ and ‘Retype Password’ fields and click the CREATE ACCOUNT button.
If everything is ok, you’ll get the message that your account is ready. Click the GO TO LOGIN button.

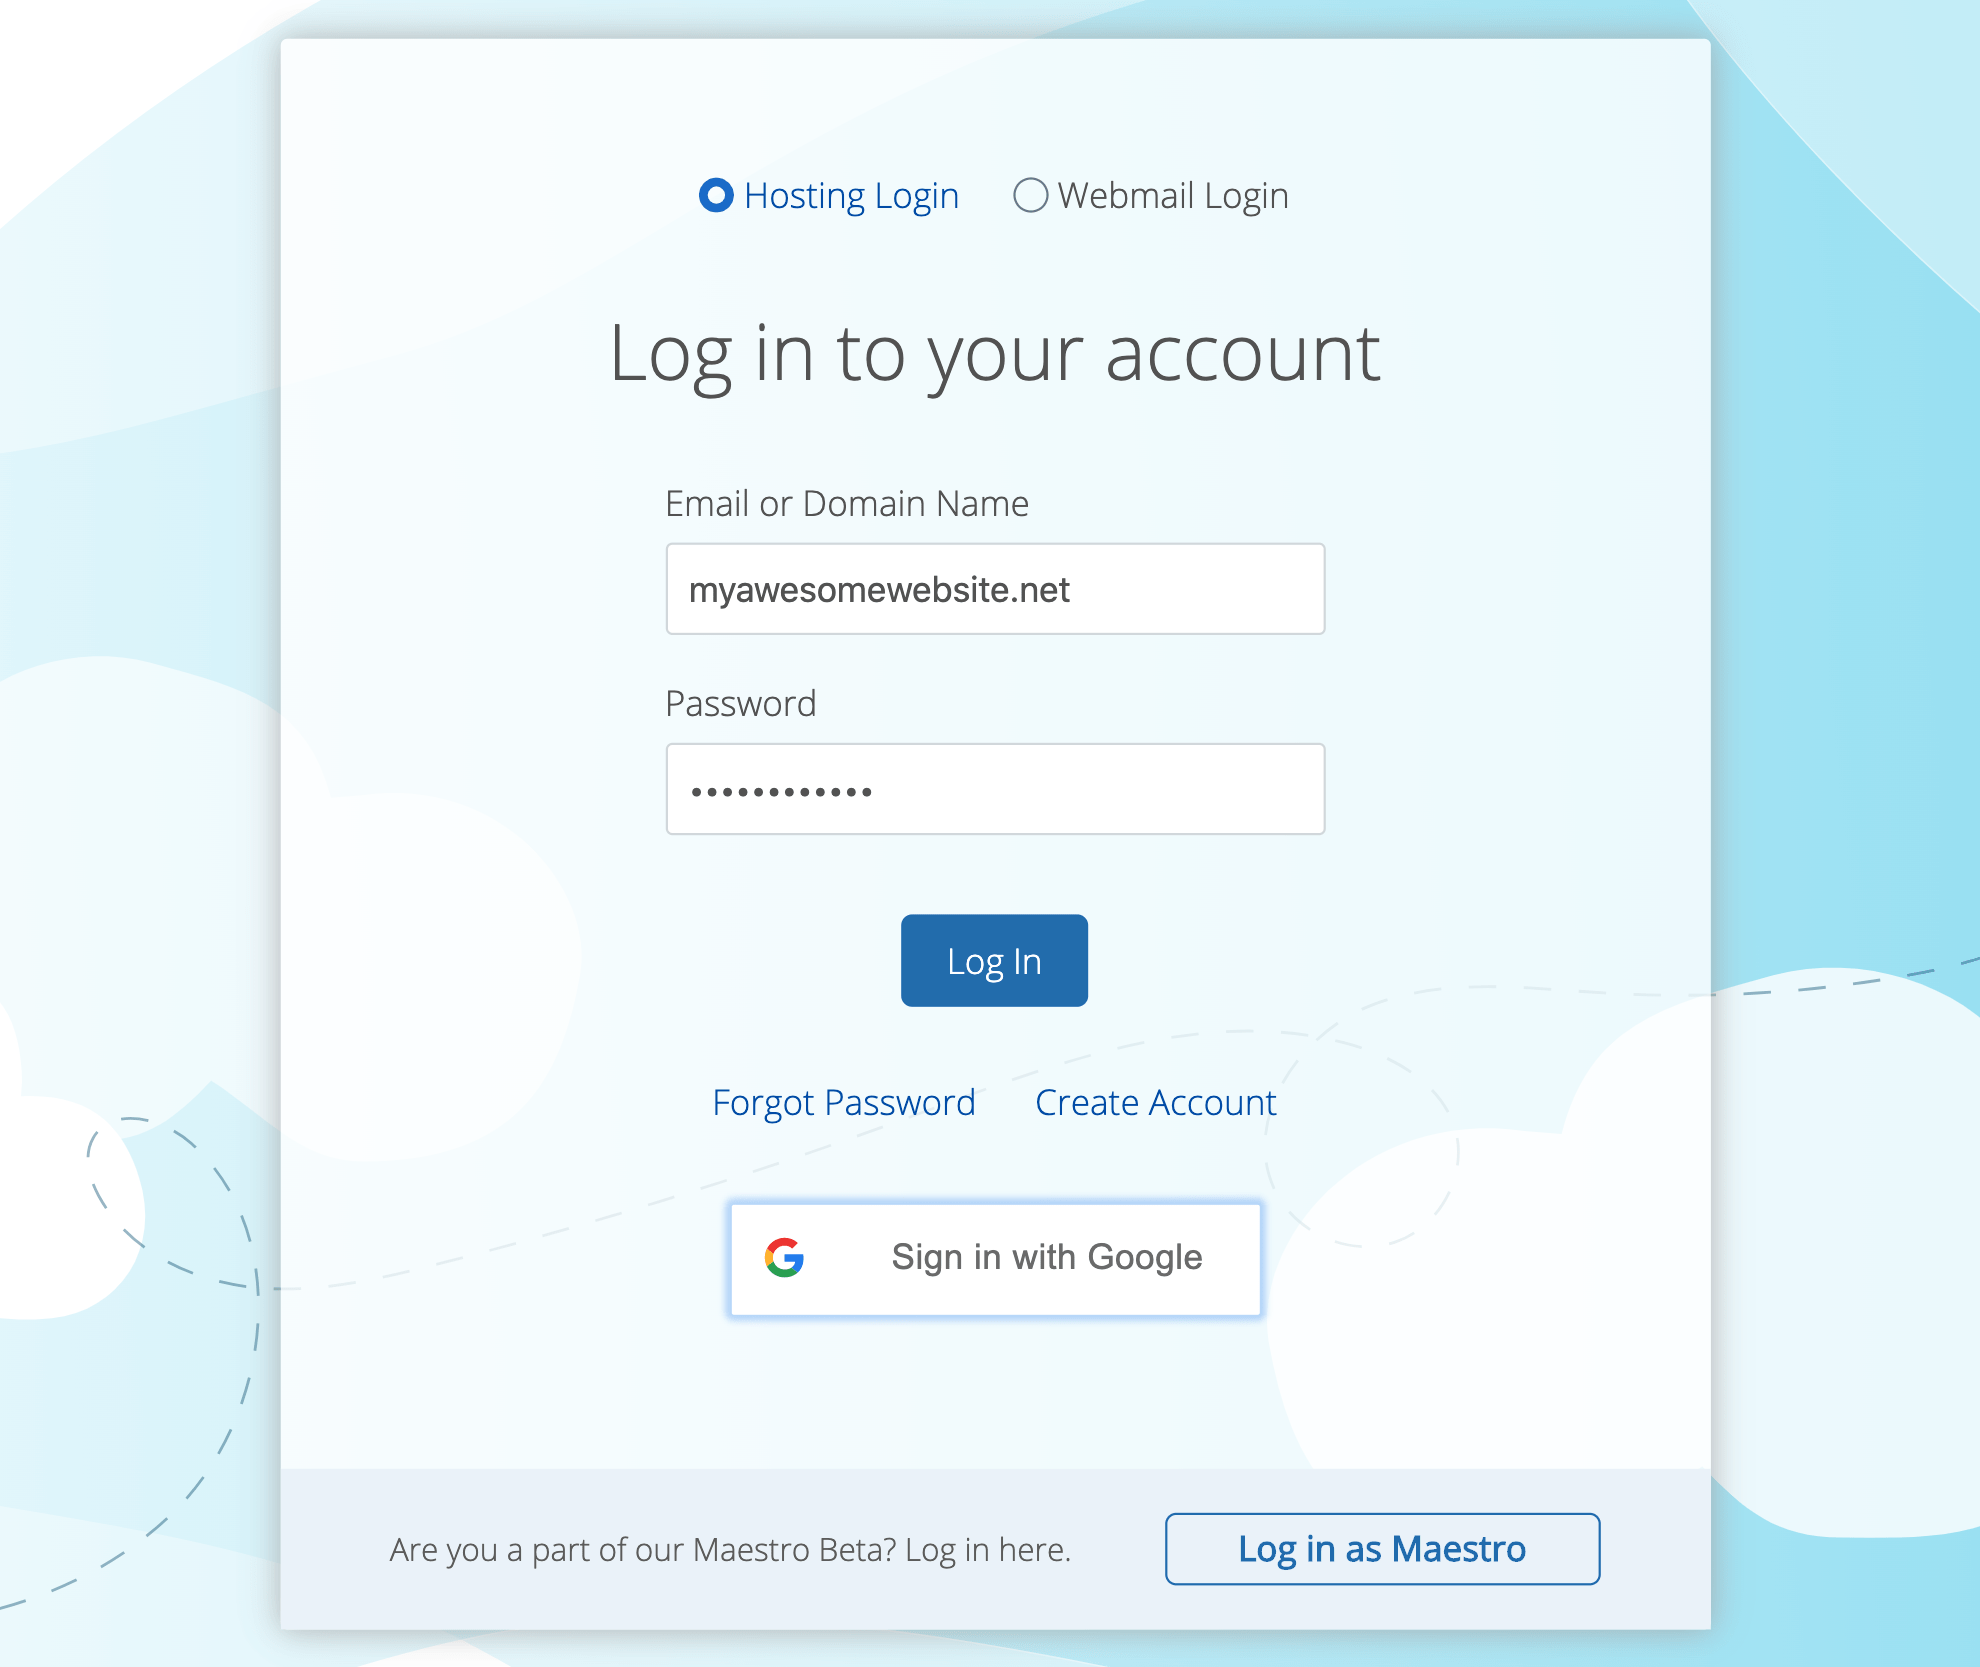
Log in to your hosting account
You’re now ready to log in to your hosting account, install WordPress, and start customizing your website.
Enter your email and password, and click LOGIN.
2. Install WordPress
Once you have registered your domain name and signed up for hosting, you can set up your website using WordPress.
To set up your website to use WordPress all you have to do is follow the simple instructions below.
You’ll be presented with a 3-step wizard. The first step is to answer a couple of questions about the purpose of your website. Don’t spend any time on this, this is just informational. Select the most appropriate options and click CONTINUE.

Go through the questions in STEP 2 and click CONTINUE TO THEME SELECTION.
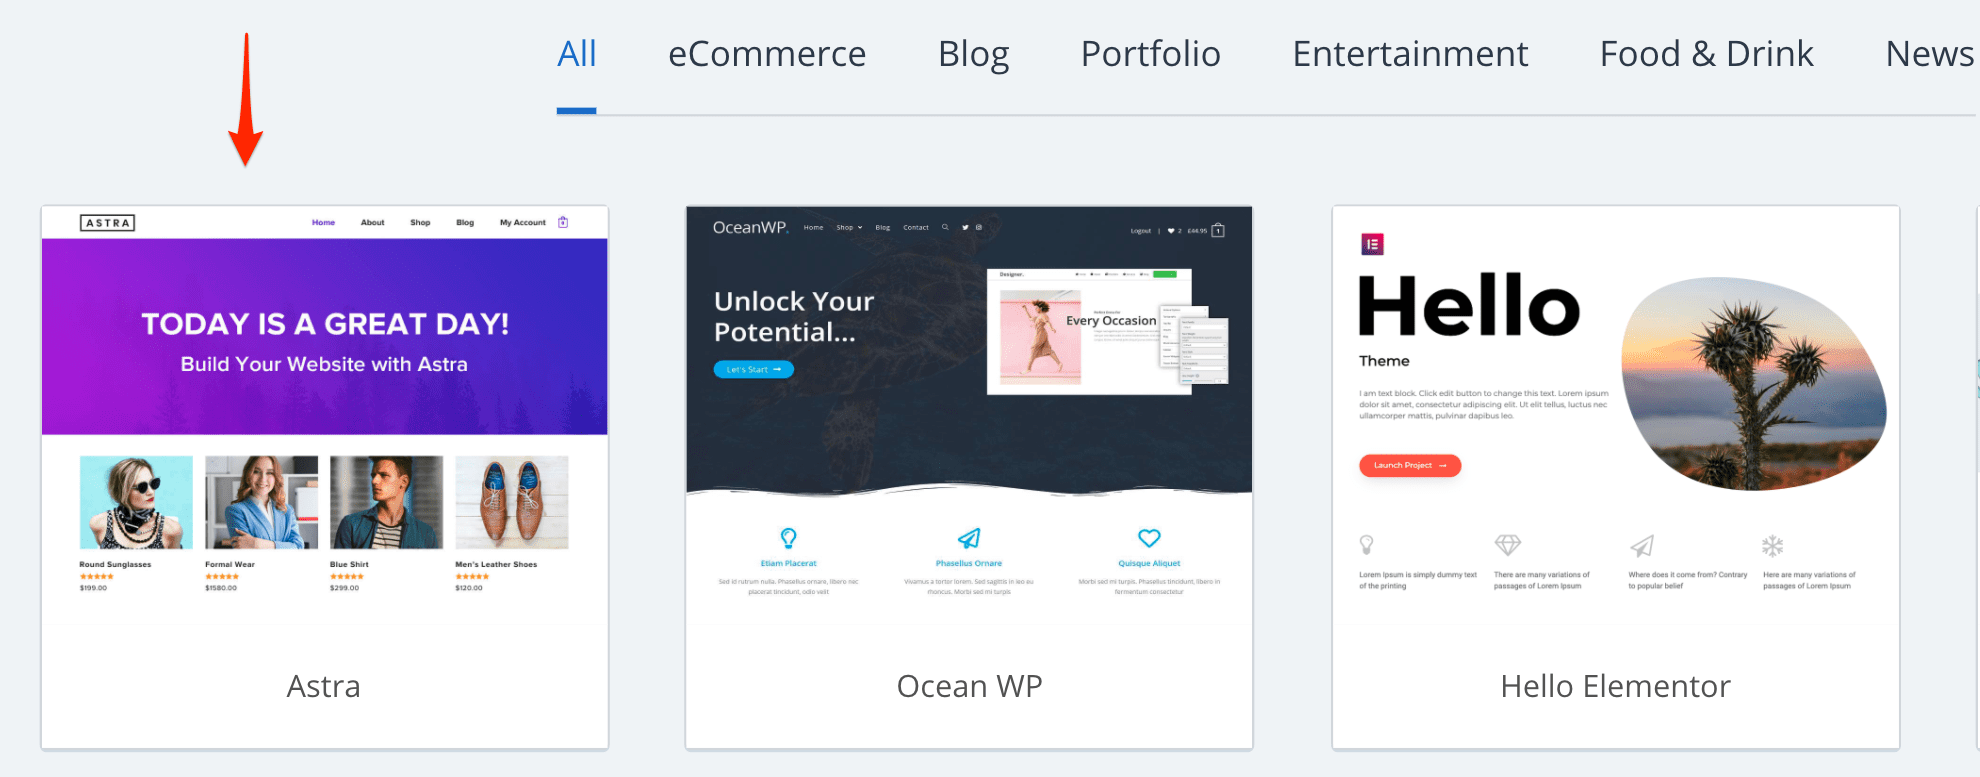
3. Add a Website Theme
The next step is to select a theme for your website. A theme defines the layout, colors, and look N feel of your site.
Don’t worry, changing a website theme is very easy, so if you change your mind, you can change it later.
For now, click the ASTRA theme and finalize the process.
That’s it, in a few minutes your new WordPress website will be ready. Continue with the next steps to see how to customize and view your new website.
4. Customize Your Website Design and Layout
Once the above process is completed, you’ll be presented with a screen like the one shown below.
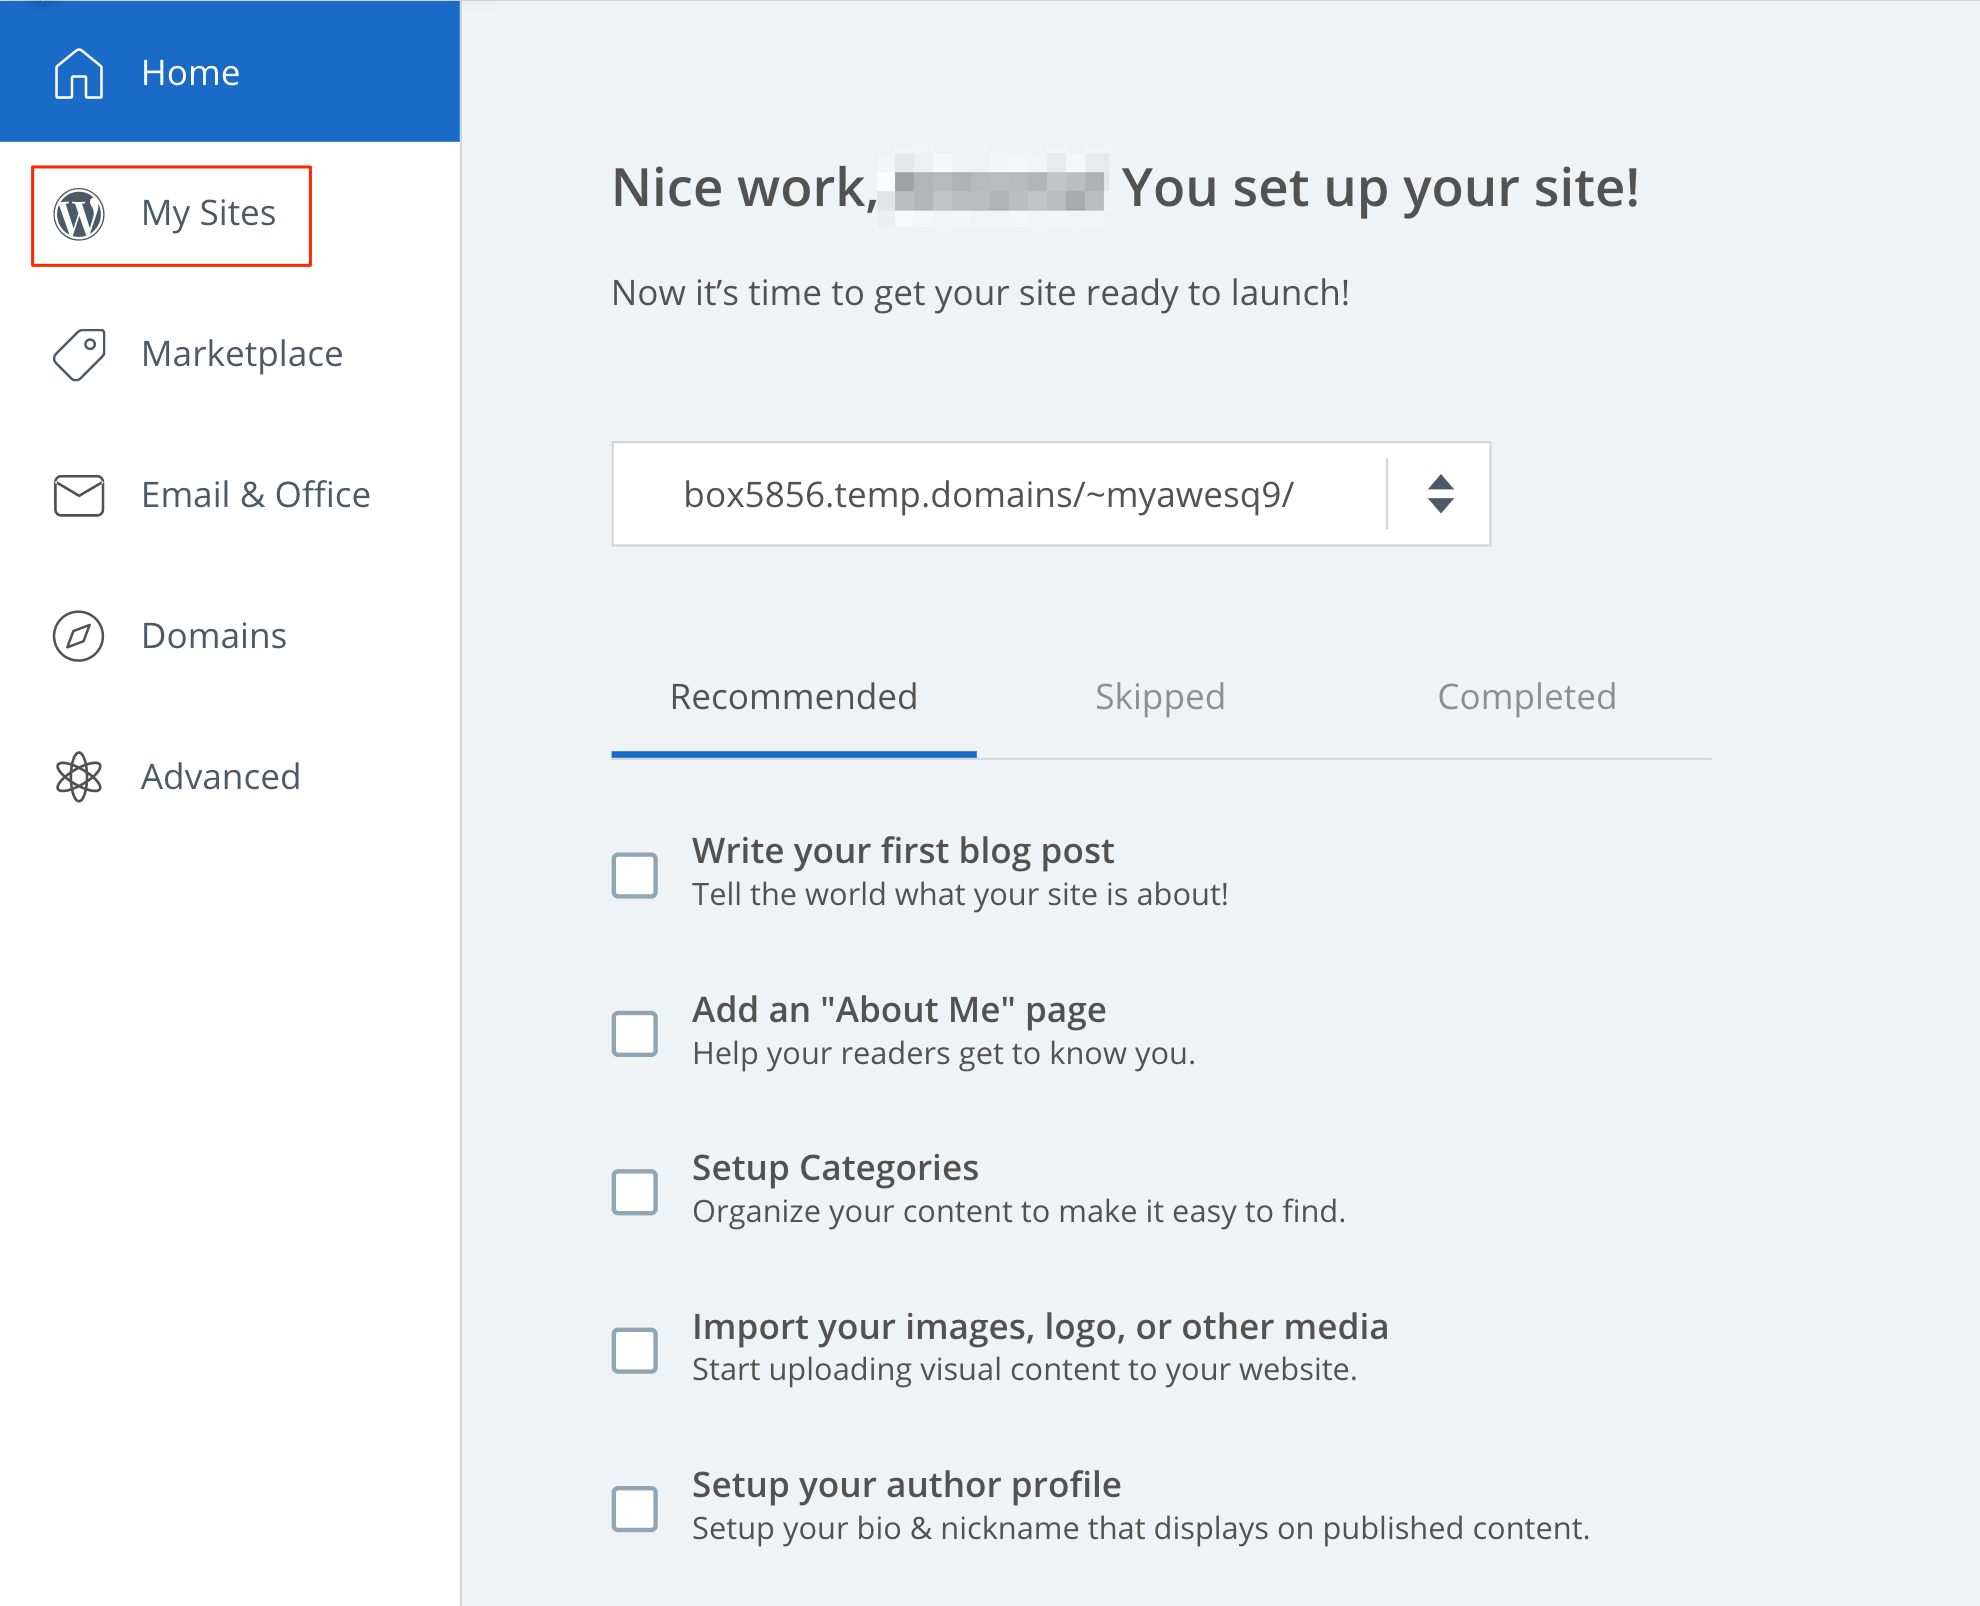
This is the home page of your hosting account. As you can see, there are different options, such as Marketplace, Email & Office, Domains, and Advanced. You don’t have to do anything with them now but feel free to familiarize yourself with each option.
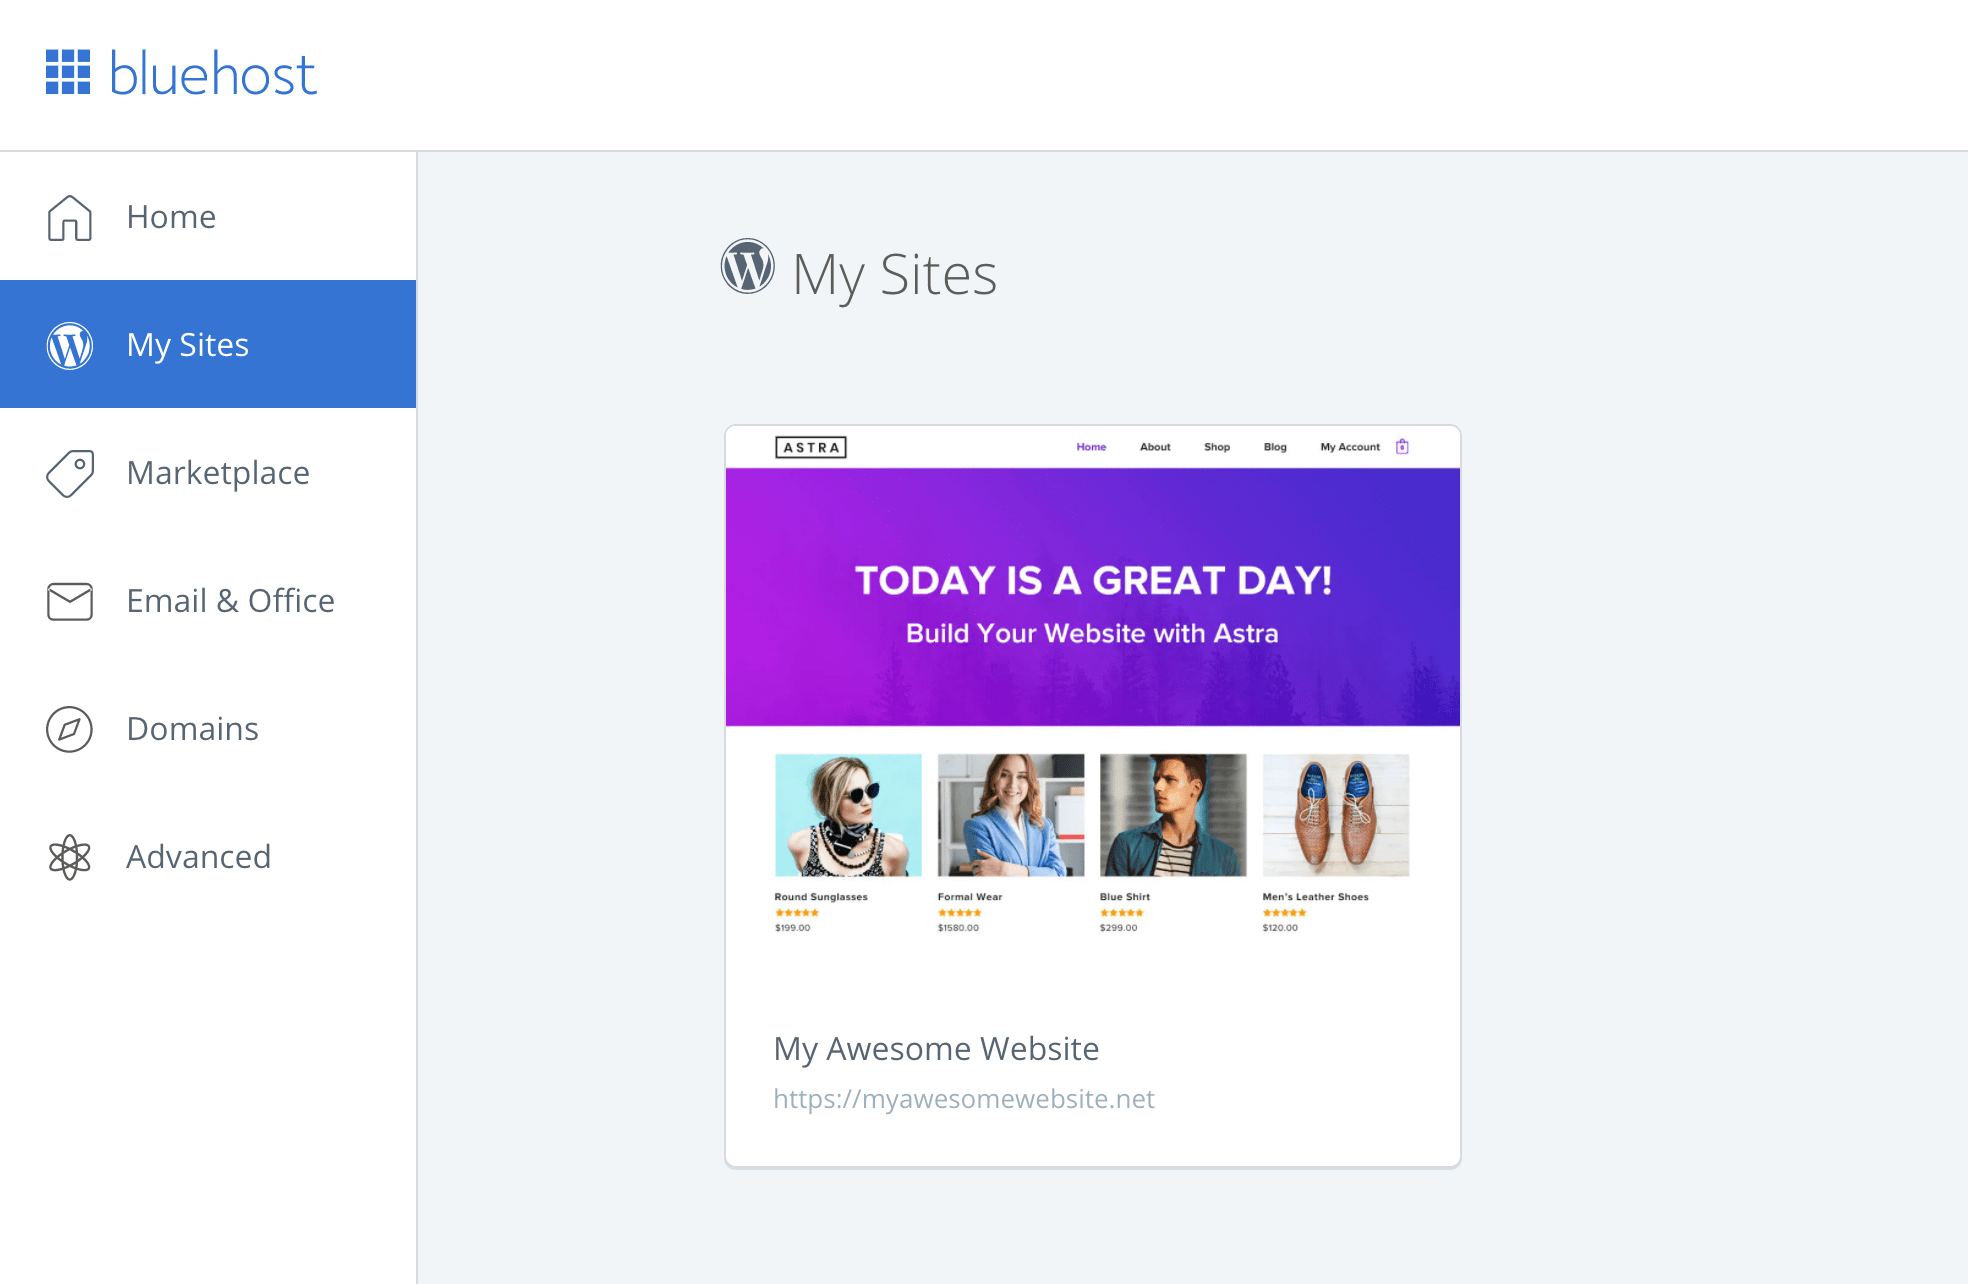
To customize your website, we need to log in to WordPress. Click MY SITES from the left menu.
Move the mouse over the website thumbnail and click LOGIN TO WORDPRESS.
What you see now is the WordPress backend. This is the software you’ll use to customize your website, add new pages, create content, and everything else that has to do with website management.
You’ll notice a button labeled ‘Coming Soon Active’ at the top. This is to warn you that your website is not yet available on the Internet but it’s shown only to you. So, the first step is to make it public.
Wait for about 5 minutes and then click the COMING SOON ACTIVE button. This is needed to complete the connection between your domain name and hosting provider successfully.

Don’t worry about the technicalities, spend a few minutes familiarizing yourself with the other options, and when ready click the ‘Coming Soon Active’ button and then the LAUNCH YOUR SITE button.
In a couple of seconds, your website will be published on the Internet, and the message below will appear. Click on the VIEW SITE button.

A new browser tab will open, and your website will look similar to this:
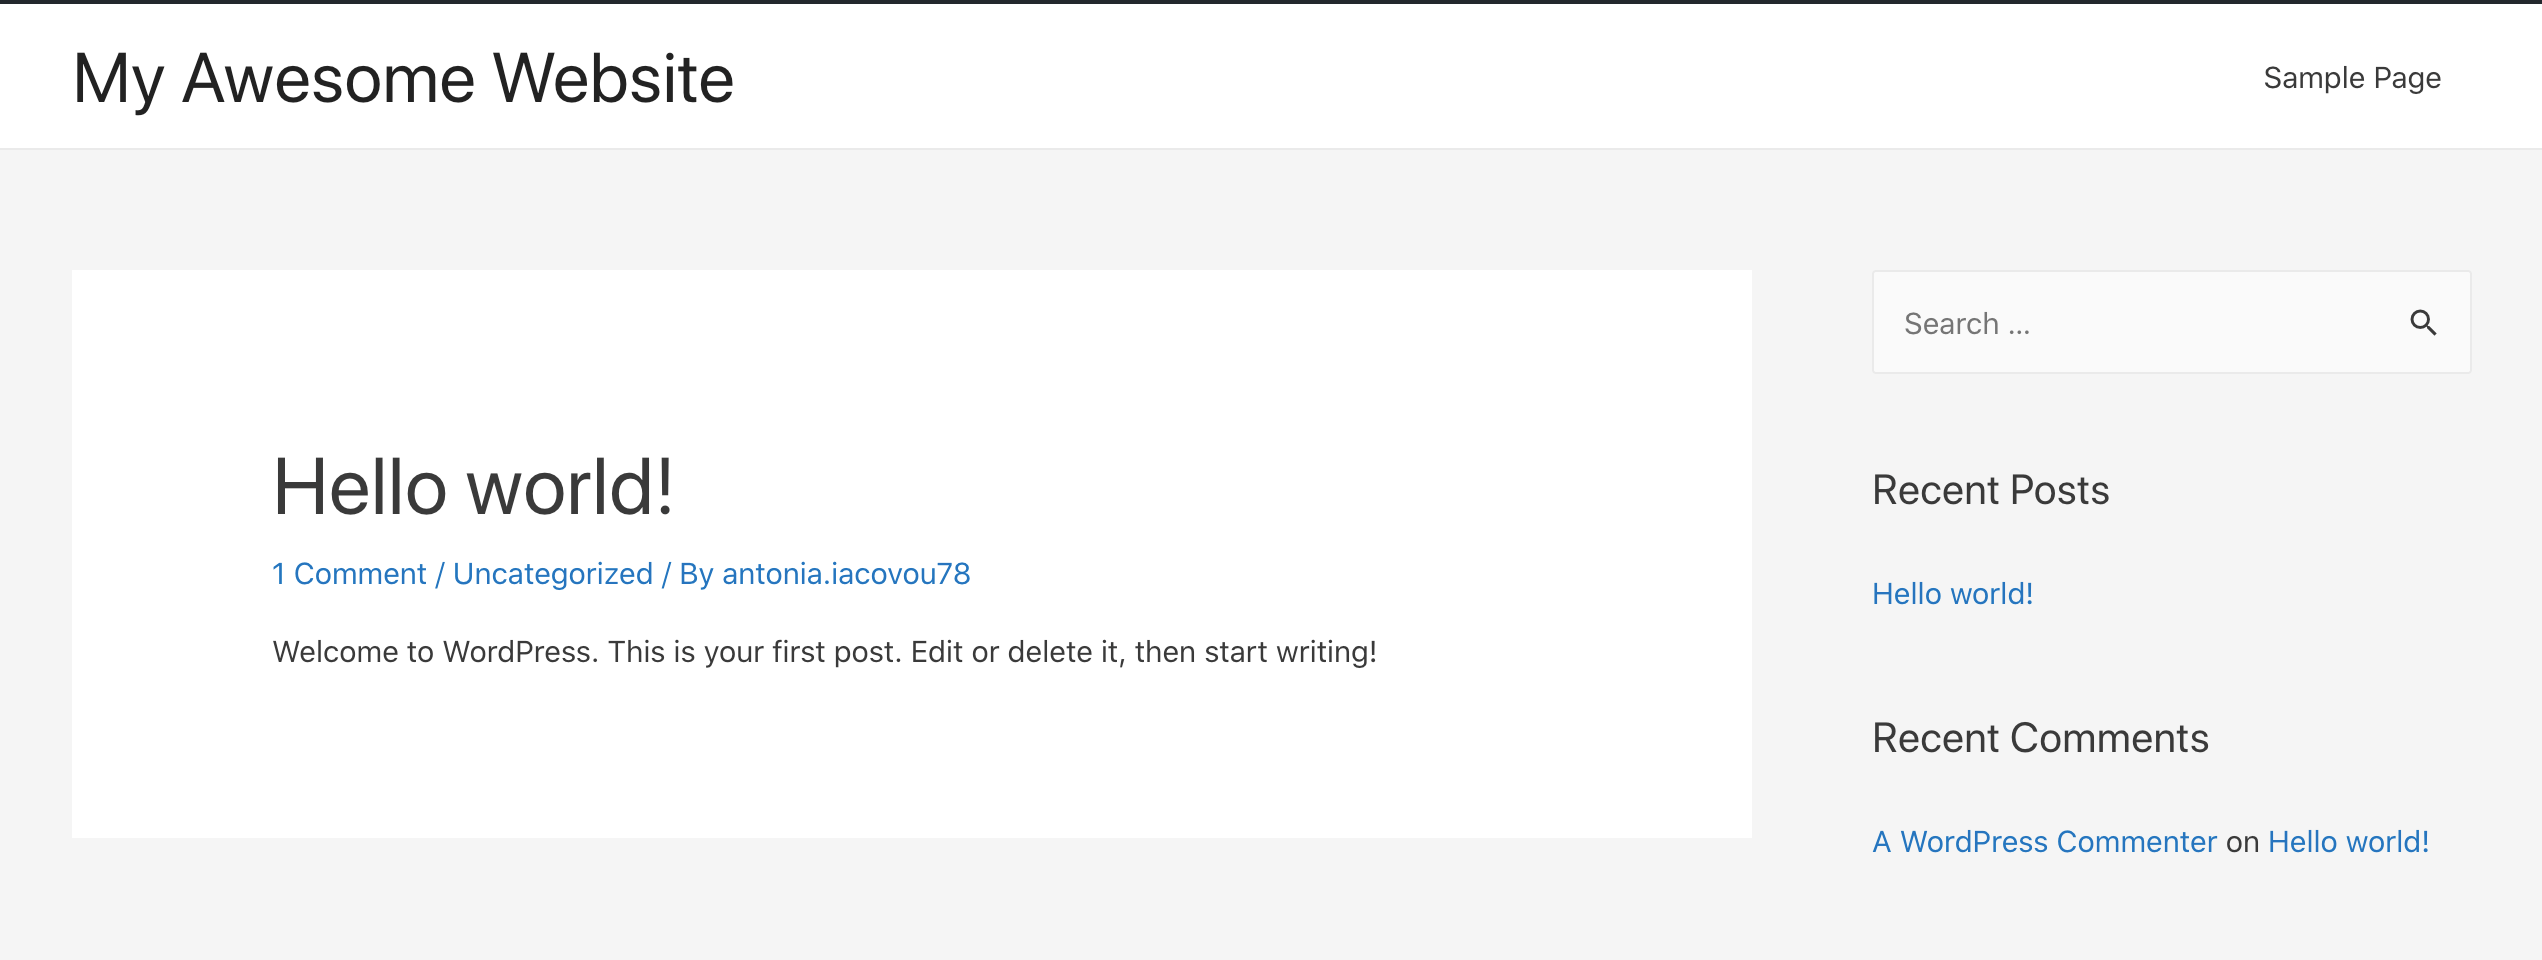
This is how the default WordPress website looks for our selected theme.
Let’s see how easy it is to customize the design of this website.
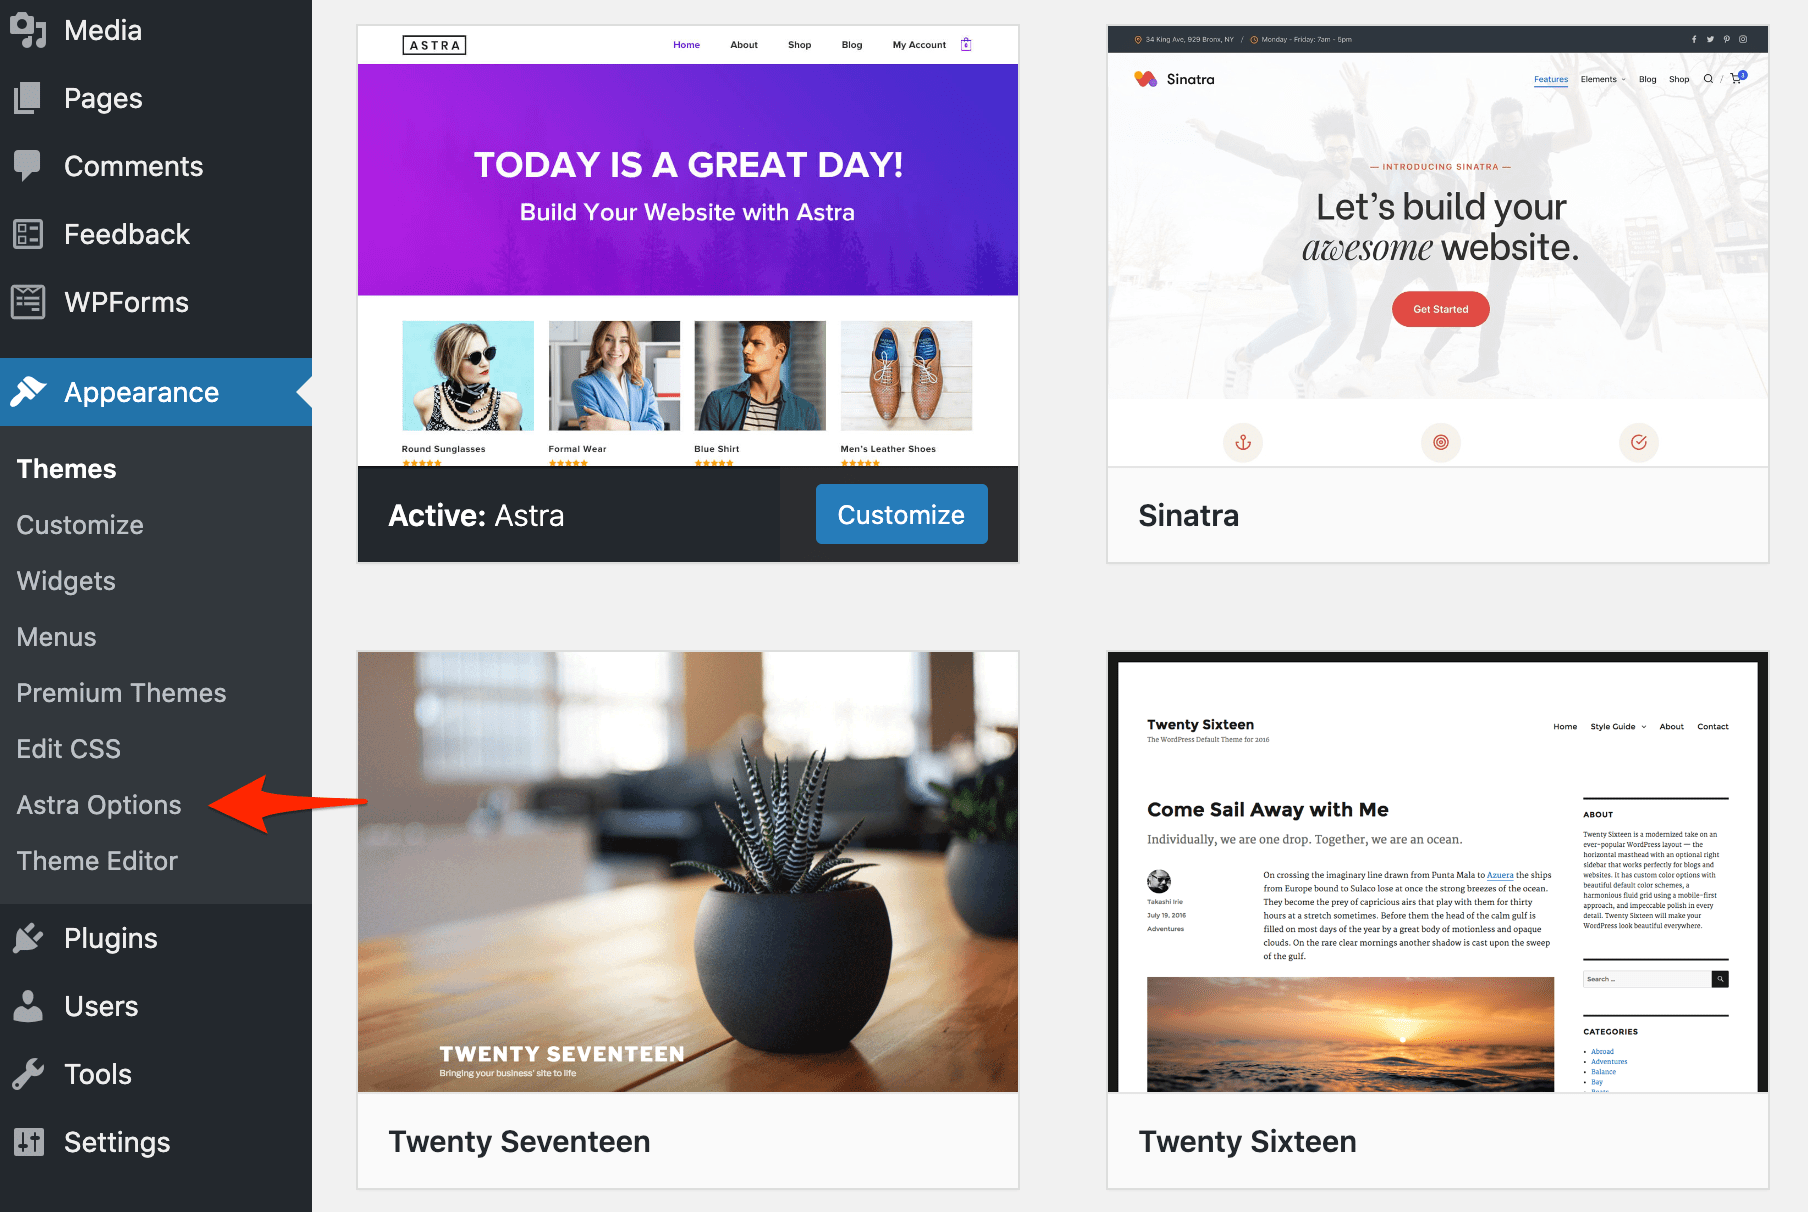
Return to the previous tab (WordPress backend) and select THEMES from the APPEARANCE menu.
This is the place you can change your theme. As you can see there are many free themes available, you can move the mouse over a theme to preview it and install it.

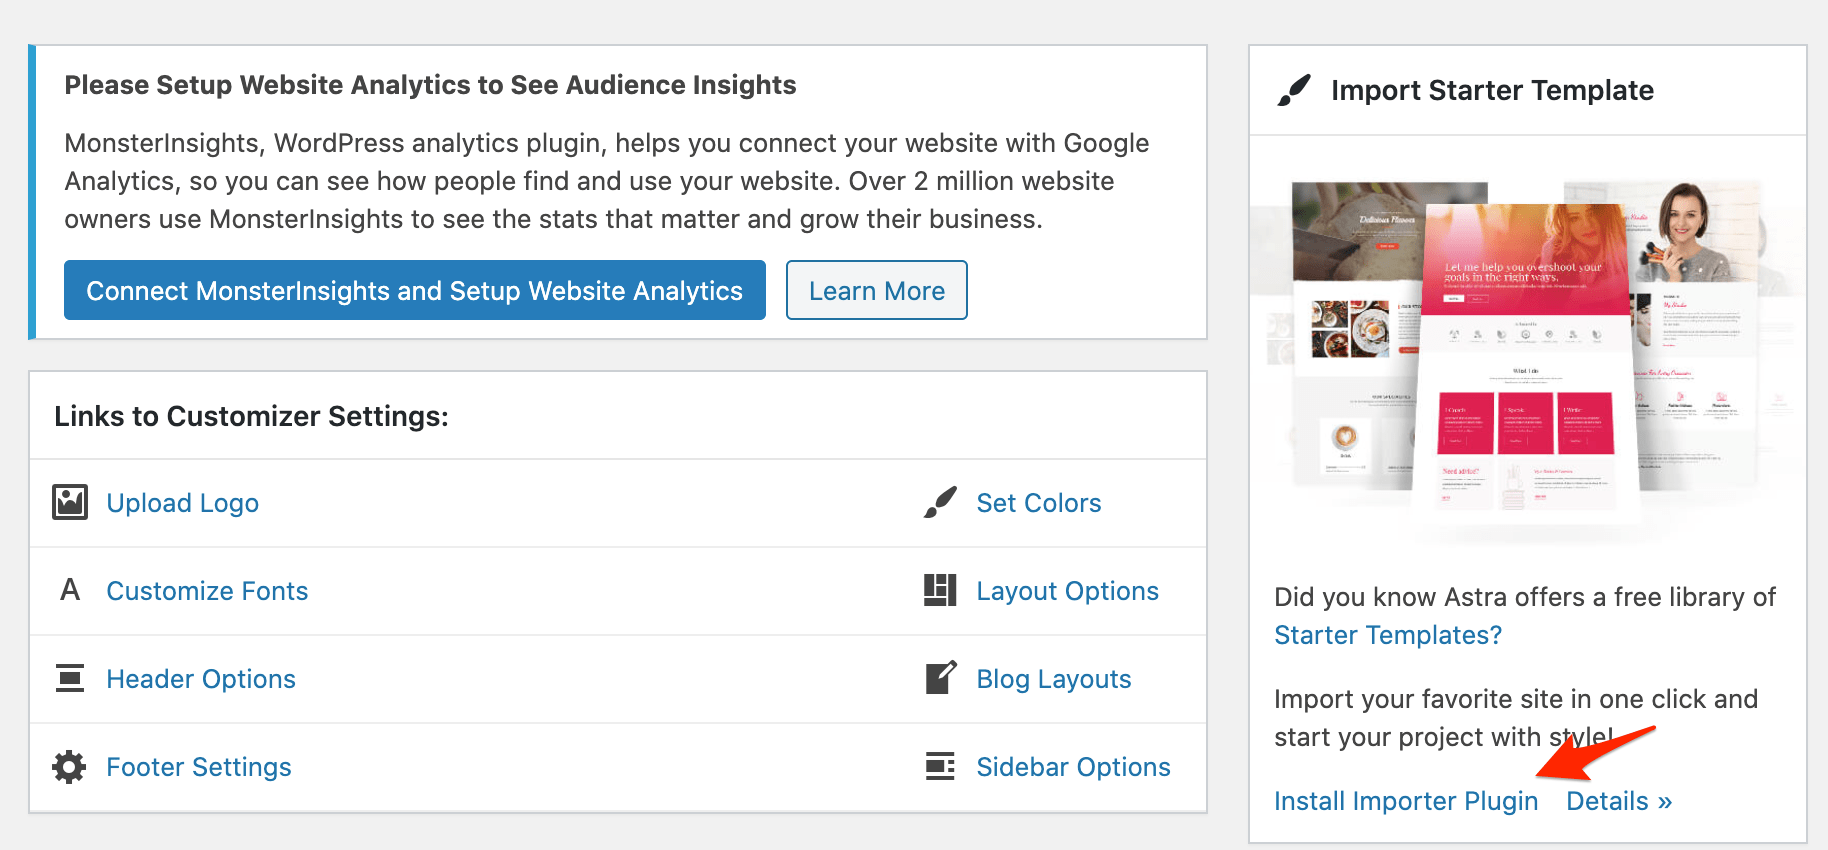
Since we already selected a theme, we’ll go directly to the theme options to customize our website. Select ASTRA OPTIONS from the left menu.
This is the place to change the colors of your website, add your own logo, change the layout of the different pages, and perform a number of other functions.
Instead of trying to build a website from scratch, you’ll use the ‘Importer Plugin’ to import the layout and content of a pre-built website.
This is easier than starting a website from zero.
Click on the INSTALL IMPORTER PLUGIN.
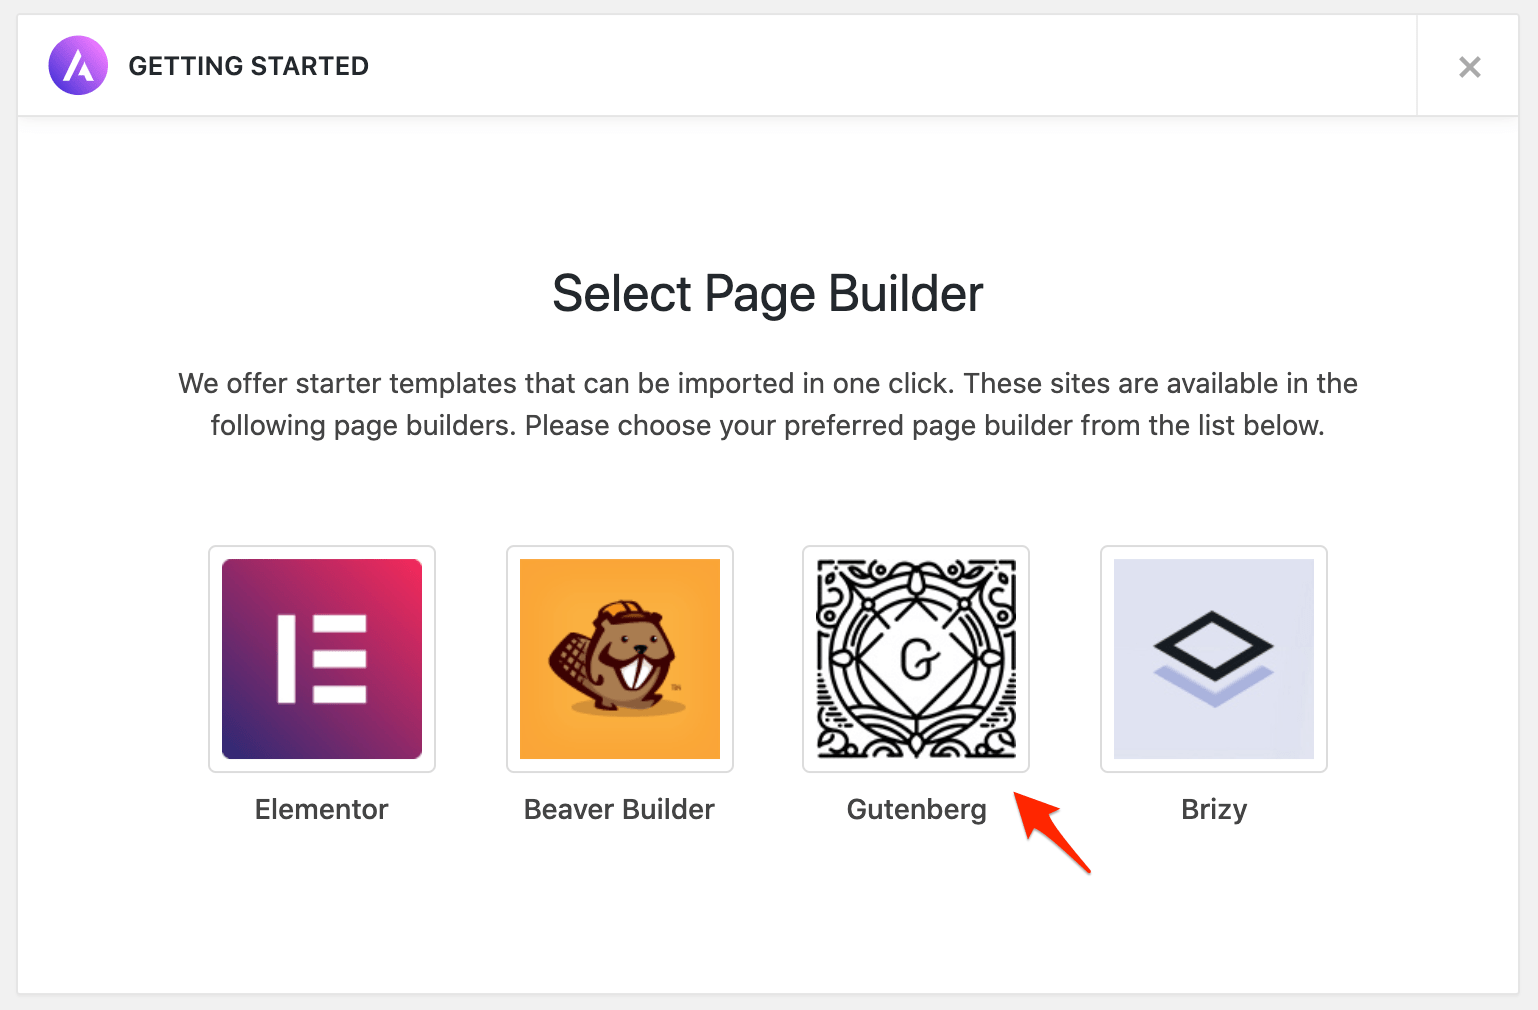
Once the plugin is installed, you'll be asked to select a Page Builder.
For this example, we’ll use GUTENBERG, the page builder that comes for free with WordPress (the WordPress team created it).
Select GUTENBERG as the page builder.
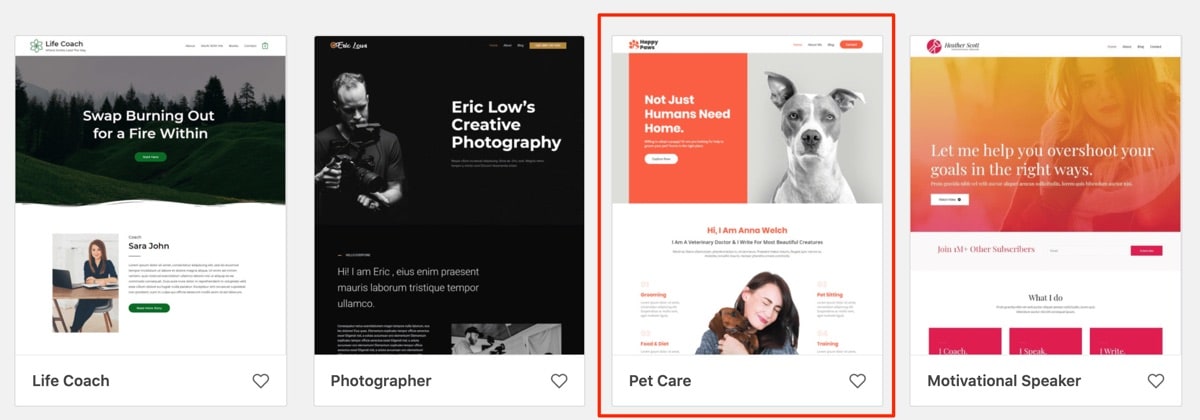
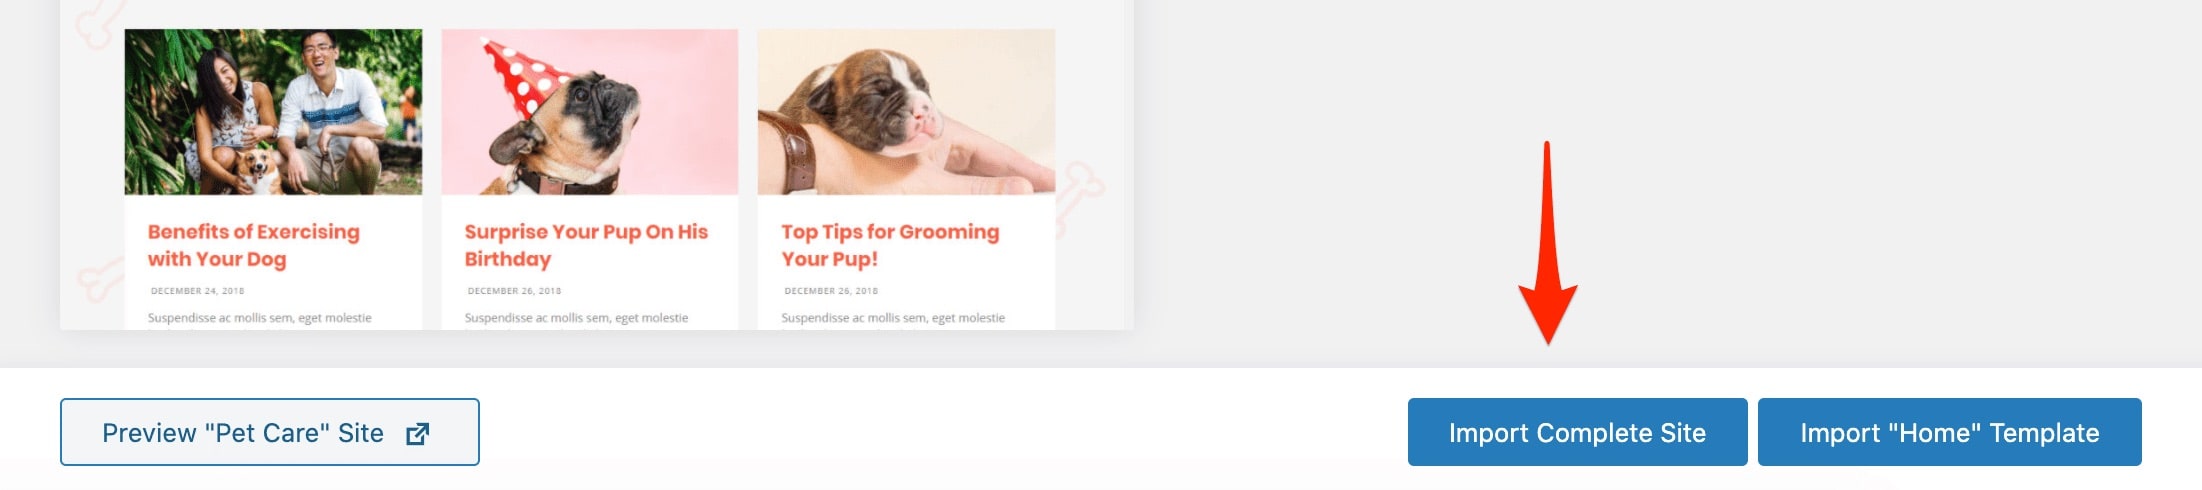
You’ll be presented with several layouts. You can choose anyone you like depending on the type of website you want to create.
Click the IMPORT COMPLETE SITE.
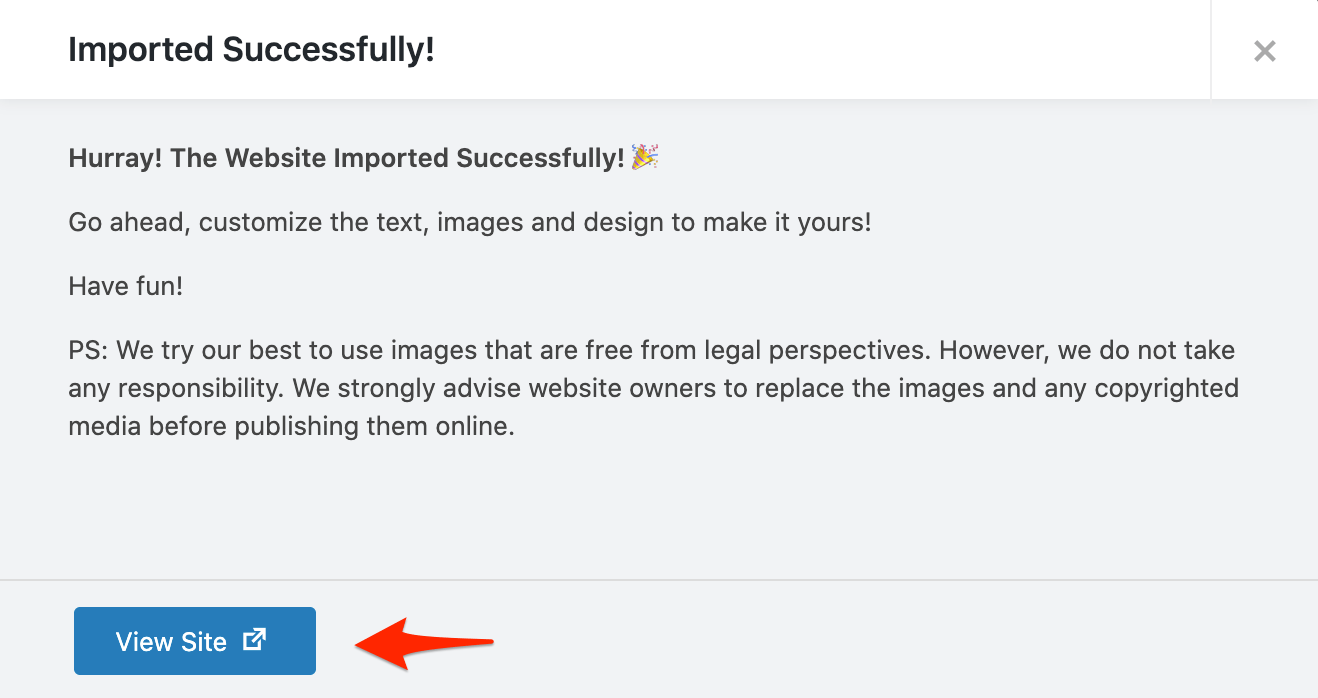
You’ll be shown a popup with some options. Make sure that you select the options as shown below and click the IMPORT button.

In a few minutes, the process will be completed. Click the VIEW SITE.
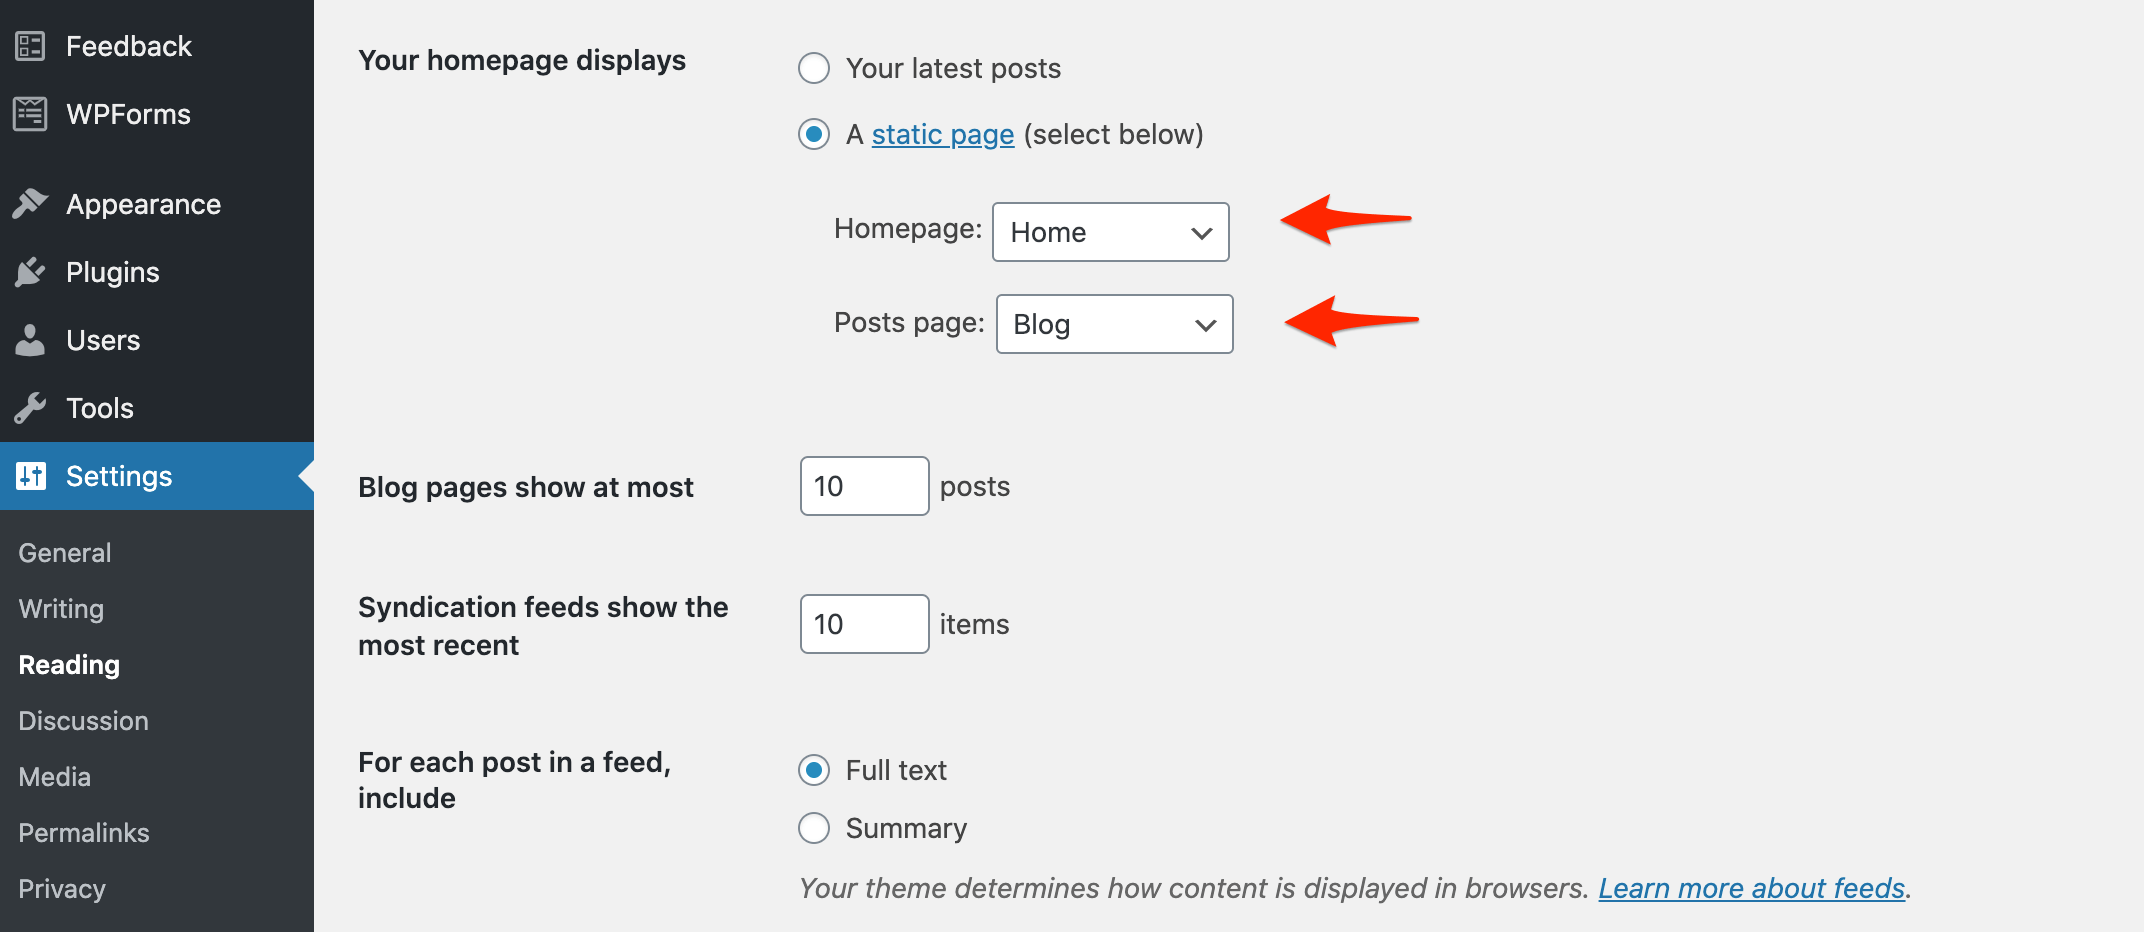
You’ll notice that your website shows the right colors but the homepage does not look the way it is supposed to look. No worries, we’ll fix this in a minute.
Go back to the WordPress admin and select SETTINGS > READING from the left menu.
Configure the HOMEPAGE and POSTS PAGE dropdowns as shown below and then click the SAVE CHANGES button.
Viola! Your new website is ready, and it looks beautiful! Well Done!
Now, open a new tab and type in your domain name. Your website should look like this:

Click the menu options (About me, Blog, Contact) to see how the pages look.
When you’re ready, continue with the rest of the steps to see how easy it is to change your homepage and the content of the pages.
5. Customize Your Homepage
To change the content, colors, or images of your homepage, follow the instructions below.
While viewing your homepage in a browser, click the EDIT PAGE button from the top bar menu. This will open the homepage in EDIT mode.

The page is divided into sections. You can select and edit a section by clicking with the mouse.
Let’s see how to change the homepage slogan to “Welcome to my awesome website”.
Click anywhere in the surrounding box, delete the existing sentence, and add your preferred wording.

To SAVE your changes, click the UPDATE button. That’s it, it’s that simple!

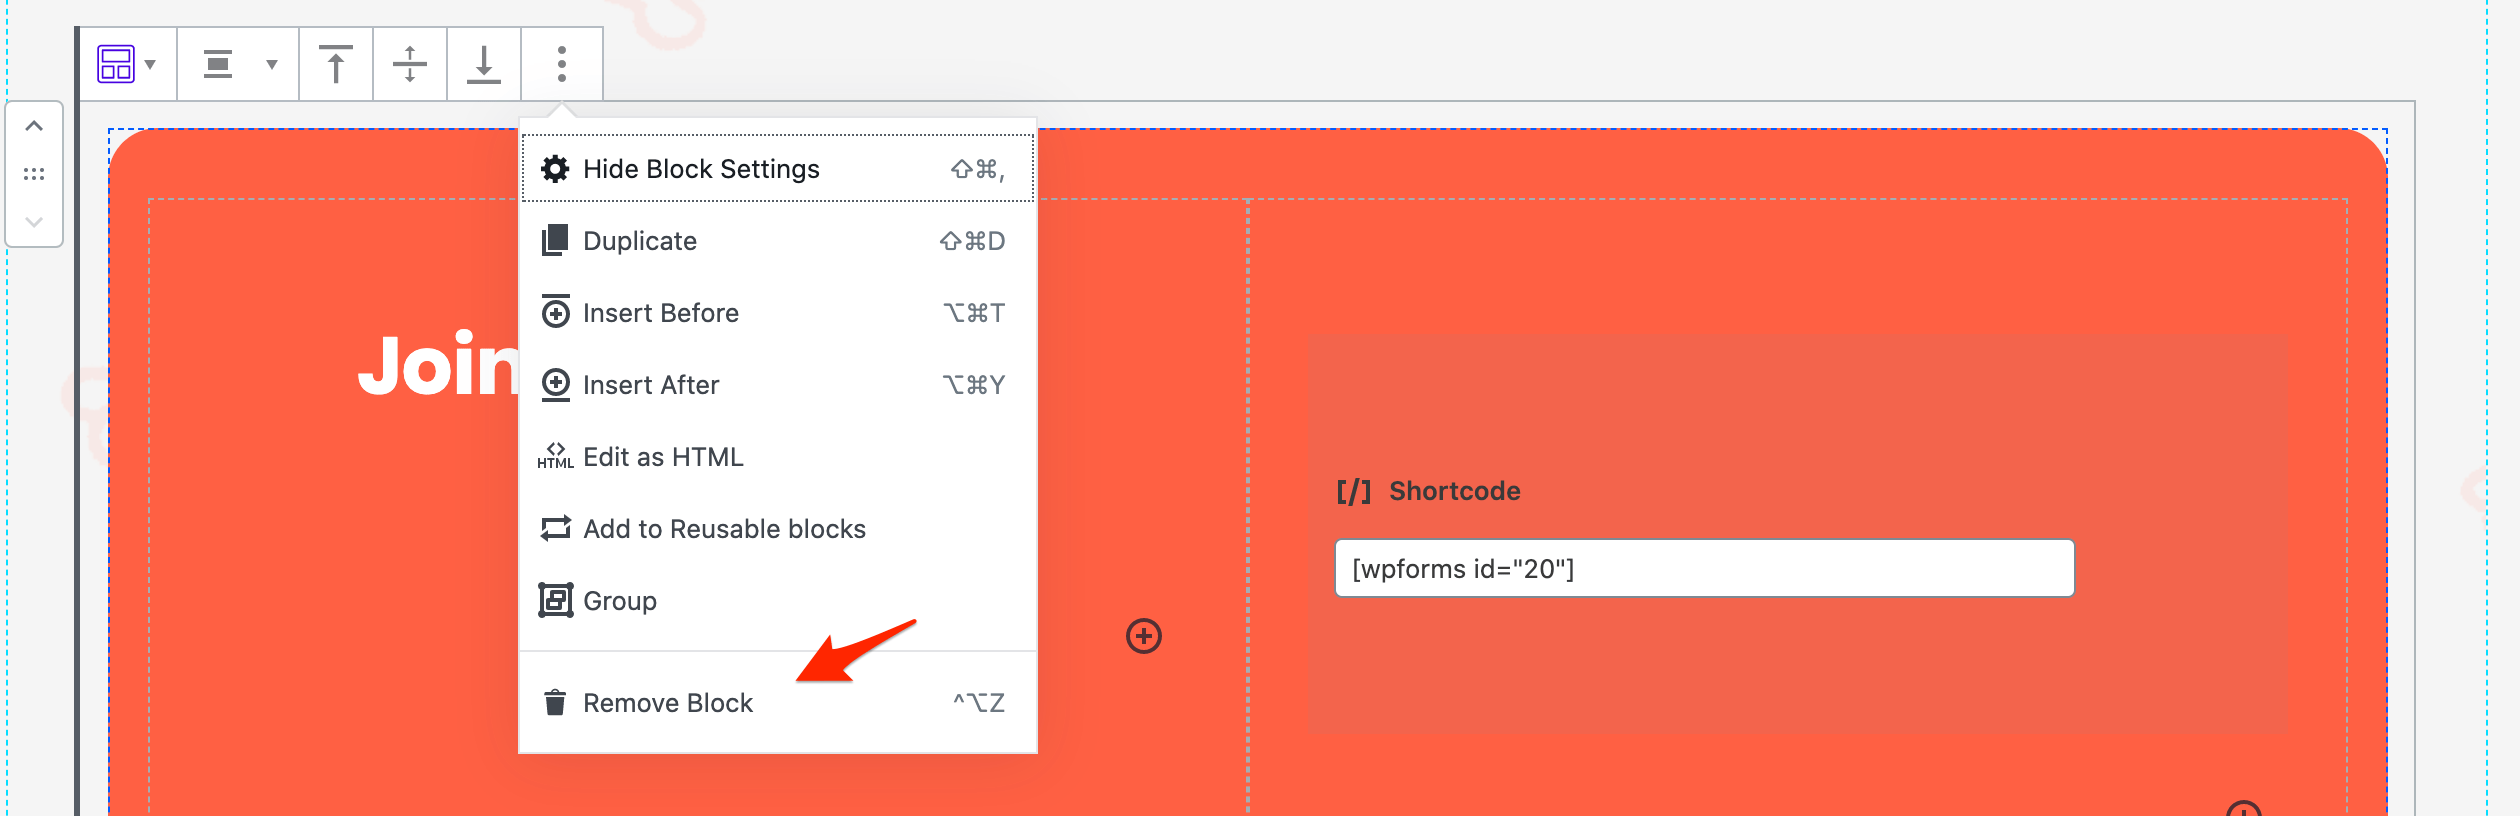
You can follow the same steps to change anything that you see on the homepage.
You can even remove a section by selecting it, clicking on the three dots menu, and then choosing REMOVE BLOCK from the menu.
6. Add a Contact Form
The CONTACT us option is available in the main menu but not yet activated. To create a contact page, we first need to create a contact form. To do this we will use a WordPress plugin.
A plugin is a piece of software that adds extra functionality to WordPress. There are hundreds of free and paid plugins you can use. You can find these by clicking the PLUGINS option from the left menu.
Here are the steps to follow:
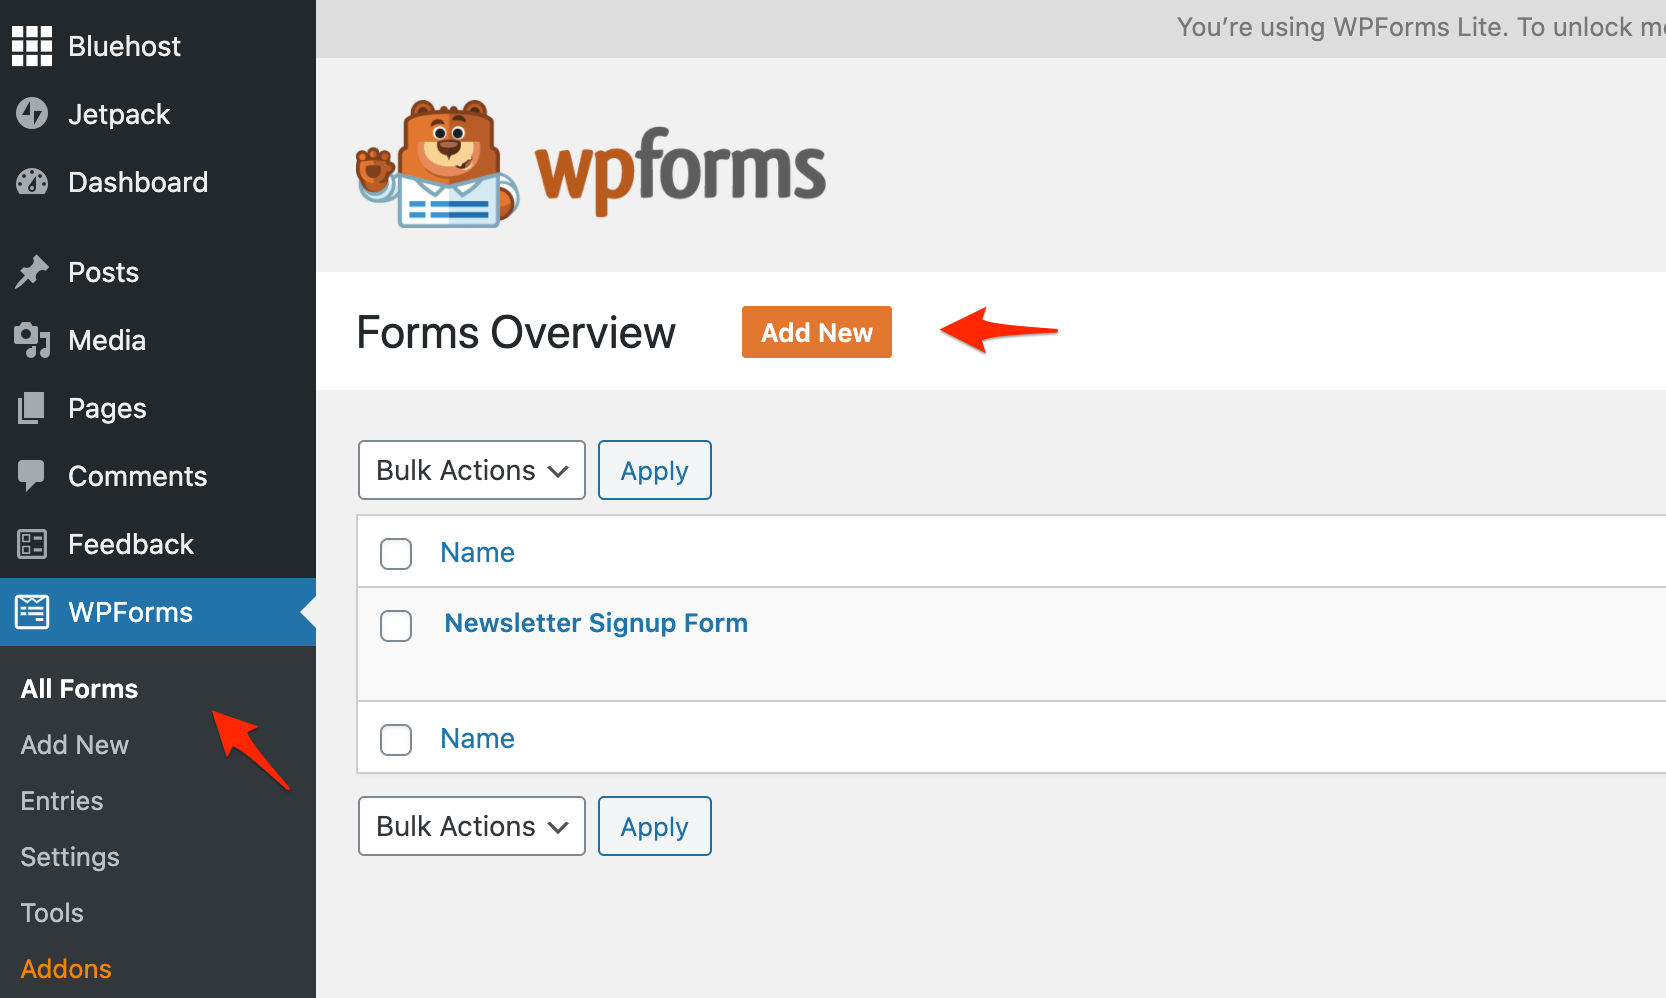
- Click WP FORMS from the left menu.
- Click ALL FORMS
- Click ADD NEW
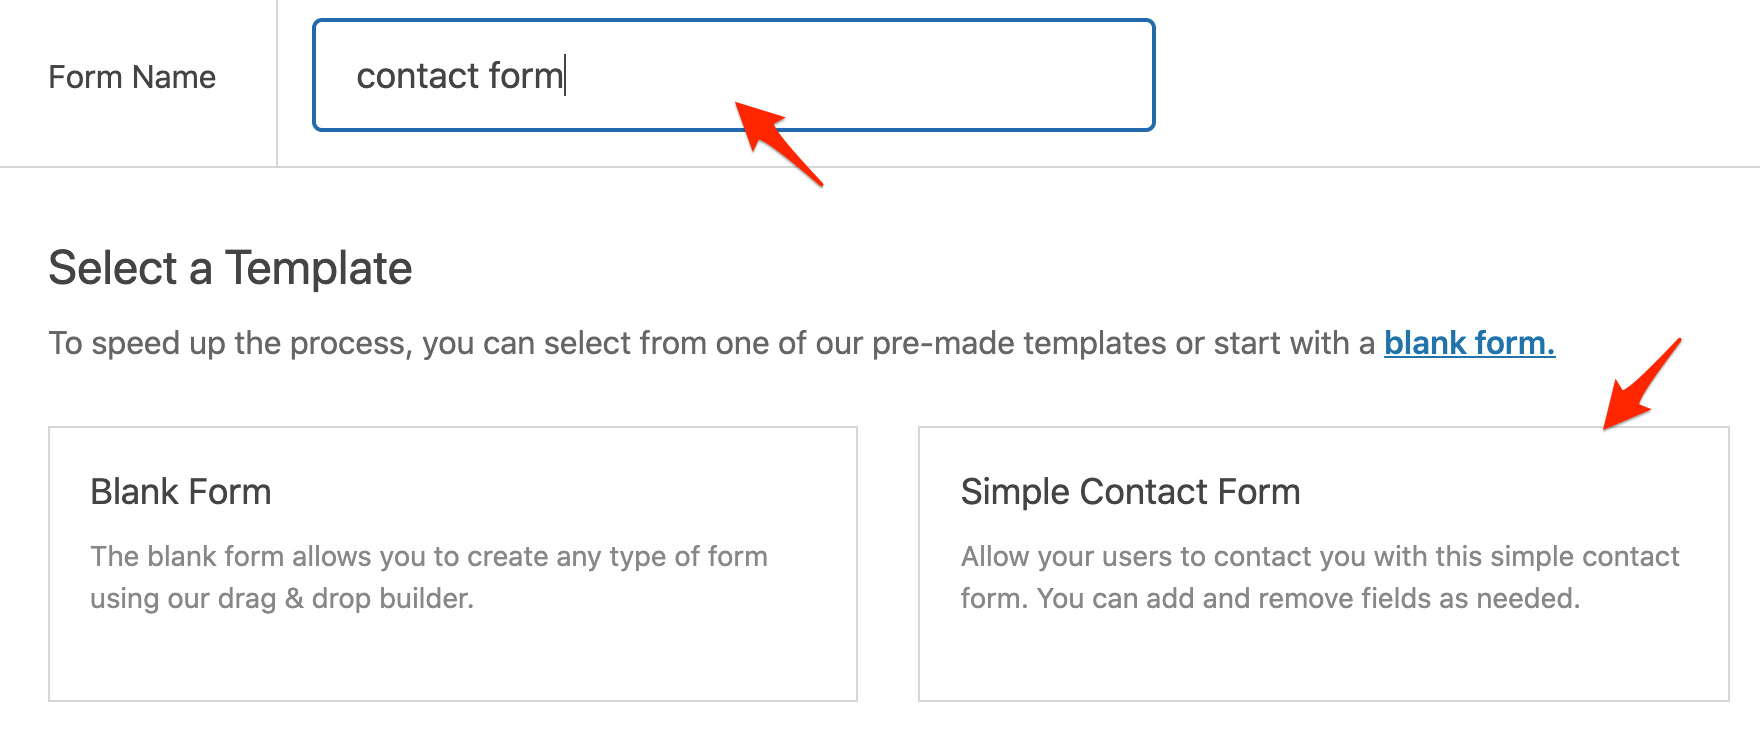
Enter a name for your form and select the SIMPLE CONTACT FORM option.
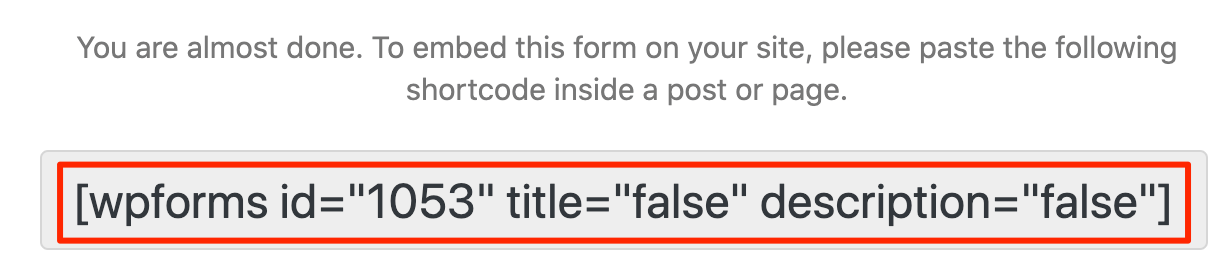
A nice form is created for you and now it needs to be added to a page.
Click the EMBED button (top right corner) and copy the form shortcode as shown below.
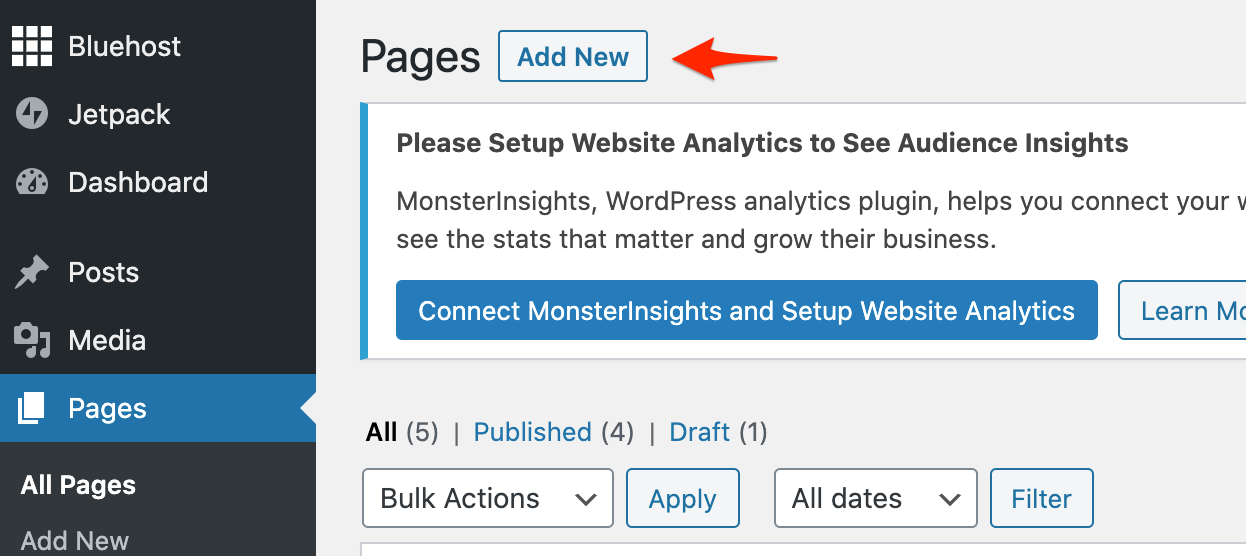
So far, we have created a new form. Now, we need to create a contact page, add our shortcode, and configure the main menu to show the page.
Click the X button (top right corner) to close the form builder and select PAGES > ALL PAGES from the left menu.
Click the ADD NEW button to create a new page.
Add a title for the page and paste the shortcode copied from the previous step.
Your page should look like this in edit mode:

Click the PUBLISH button (top right corner).
You can also click VIEW PAGE to see how your contact page looks.
The last step is to add the contact page to the menu.
- Click the WordPress ICON (top left corner) to return to the WordPress admin.
- Click the CUSTOMIZE button from the top bar menu.
- Select HEADER > PRIMARY MENU.
In the ‘Button Link’ type '/contact' (which is the name of our contact page) and click PUBLISH.

That’s it, you’ve just added a contact form to your brand new website! Go ahead and test it by clicking CONTACT from the main menu.
7. Add Content For Essential Pages
Besides a great homepage, a good website needs to have some other important pages. In particular:
- About page
- Privacy policy page
- Blog main page
Let’s see step-by-step how to add these pages to your website.
As you can see our website already has an About page. You can find it by clicking the ABOUT ME option from the main menu.
Editing the contents of this page is the same as before. Click the EDIT button from the top bar menu, make the necessary changes using the block editor and UPDATE the page.
Make sure that the About page tells your story. Explain who you are, what you do, and how your website can help your visitors.
All websites need to have a privacy policy page. Our theme has a privacy policy page but it’s not published. Let’s see how to change the contents of the page and publish it.
- Click PAGES > ALL PAGES from the left menu.
- Locate the ‘Privacy Policy - Draft ‘ and click EDIT.
- Change the contents of the page and click PUBLISH.
The process of editing a page is the same for all pages.
A blog page shows a list of your latest blog posts. All WordPress themes have a blog main page by default.
You can click BLOG from the main menu and see how your blog page looks. When you publish a new blog post, it will automatically appear there.
8. Add Your Logo
To complete your website setup, you need to upload your own logo. Your logo should be something unique and representative of your brand.
Changing your logo is easy, follow the steps below:
Click the CUSTOMIZE button from the top bar menu.

From the left menu select HEADER and then SITE IDENTITY.
Click the CHANGE LOGO button.
You’ll be prompted to choose an image from your computer.
For the best results, make sure that your logo is according to the suggested image dimensions.
To SAVE your changes, click the blue PUBLISH button at the top.
9. Get Website Traffic
You should be proud of yourself. You just learned how to create a website from scratch that looks beautiful and professional!
The next step is to learn SEO and Digital marketing. If you want to build a successful website that will attract traffic and generate money for you, you need to learn SEO and then master other digital marketing techniques.