

In this guide, you'll learn how to add the Google AdSense code to your WordPress website, with or without a plugin.
There are two recommended ways to do this on self-hosted WordPress.org websites:
- With a plugin: Site Kit by Google, the official plugin that Google recommends. It connects your site to AdSense and places the code for you.
- Without a plugin: by adding the code to your theme's header yourself (my preferred way).
Before you start, you need an AdSense account. If you don't have one yet, read how Google AdSense works and how to get approved.
If your site is on WordPress.com rather than self-hosted WordPress, you can only install plugins or add custom code on plans that support them. Otherwise, use WordPress.com's own ad program, WordAds.
1. How To Add Google AdSense To WordPress With A Plugin (Site Kit)
The official way to add AdSense code to your WordPress website is using the Site Kit by Google plugin. Google recommends it because it connects your WordPress website to your AdSense account and places the AdSense code on all your pages for you. It also shows your AdSense, Analytics, and Search Console data in your WordPress dashboard.
This is the easiest way to start showing AdSense ads on your website without coding or manually changing your website's files.
Follow these steps:

- In your WordPress dashboard, go to Plugins > Add New, search for "Site Kit by Google", and click Install Now.
- Activate the plugin.
- Click Start Setup and follow the steps to connect Site Kit with your Google account.
- On the Site Kit dashboard or the Settings tab, click Connect Service under AdSense.
- Allow Site Kit to place the AdSense code on your site.
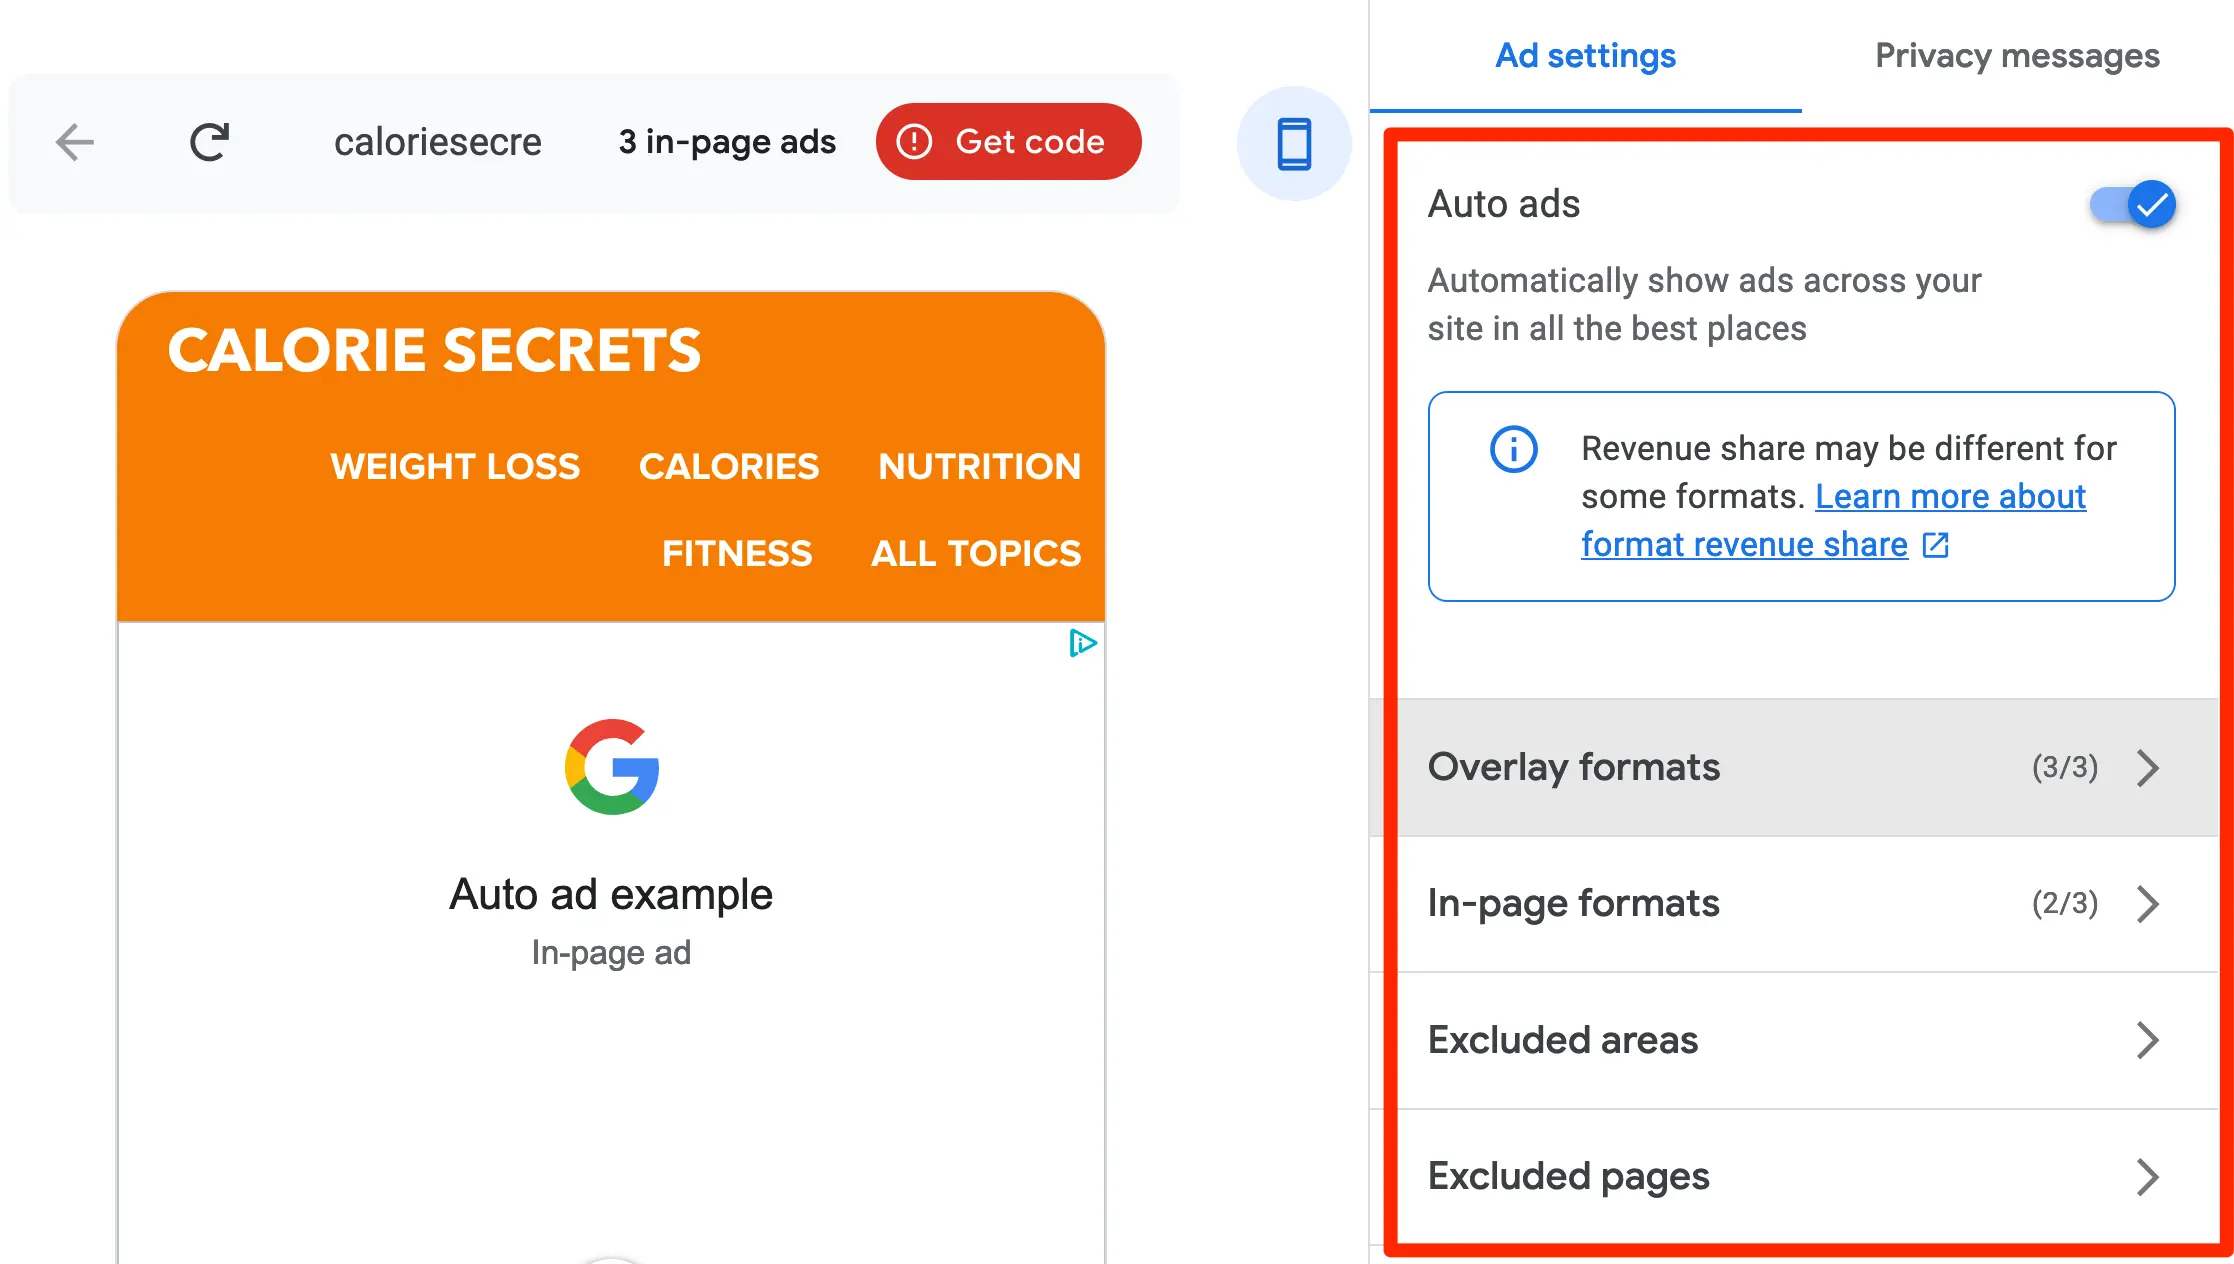
For ads to show on your website, you must enable Auto ads in your AdSense account. Here is how to do this:
- Sign in to your AdSense account and click Ads.
- In the sites table, click Edit next to your site.
- Under Ad settings, turn on Auto ads, and choose the ad formats you want.
- Click Apply to site, then Apply now, and Save.
It can take up to an hour for ads to appear on your pages.
Note: If you decide to use the plugin, make sure that you remove any AdSense ad placements that you added to your website without the plugin.
2. How To Add Google AdSense To WordPress Without A Plugin
To add the AdSense code to your WordPress website without using a plugin, follow these steps:
Step 1: Get the AdSense Code
- Sign in to your AdSense account.
- Click Ads.
- Click the Get code button.
- Click Copy code snippet.

Step 2: Add Code To WordPress
Once you have your AdSense code, you must add it to the <head> section of all your pages. How you do this depends on your theme.
Option A: Your theme's header scripts setting. Many themes have a box for header scripts in the theme options or the Customizer. For example, in a theme with this option:
- Log in to your WordPress Dashboard.
- Go to Customize under Appearance.
- Select Theme Settings.
- Select Header / Footer Scripts.
- Paste the AdSense code in the Header Scripts text box.
- Click the Publish button.

Option B: Your child theme's functions.php file. If your theme has no header scripts setting, you can add the code with a small function in your child theme's functions.php file. Use a child theme, so your changes aren't lost when the theme updates:
add_action( 'wp_head', function () { ?>
<script async src="https://pagead2.googlesyndication.com/pagead/js/adsbygoogle.js?client=ca-pub-XXXXXXXXXXXXXXXX" crossorigin="anonymous"></script>
<?php } );
Replace the script line with the exact code snippet from your AdSense account.
If you're not comfortable editing theme files, a header and footer code plugin such as WPCode is a safer option than editing your theme directly.
After adding the code, go back to your AdSense account and confirm the installation, so that AdSense can verify your site.
You must also enable Auto ads (as explained above) to start showing ads on your website. You can configure the different options (ad formats, excluded areas, excluded pages) to define how many ads to show and where.
Add an ads.txt File
Once your site is connected, AdSense will also ask you to add an ads.txt file. Ads.txt is a simple text file that tells advertisers which companies are authorized to sell ads on your site. According to Google, it's not mandatory but highly recommended, because it protects you from counterfeit ad inventory and can help you earn more.
Create a file named ads.txt with the following line, replacing the number with your own publisher ID (you can copy the exact line from your AdSense account):
google.com, pub-0000000000000000, DIRECT, f08c47fec0942fa0
Upload the file to your website's root directory, so that it's available at https://yourdomain.com/ads.txt. Many SEO plugins and ad plugins can also create and manage the ads.txt file for you.
How To Place Ad Units Manually On Your Website (Without Using Auto Ads)
If you don't want to use Auto ads and prefer to place the ads manually on your website, add the code as explained above but keep the Auto ads option disabled. You can also use both: Auto ads for most of the site and manual ad units in specific places.
On a typical WordPress blog, you can place AdSense ads in the following places:
- In the sidebar (widget).
- On top of the page (below the header).
- Between your blog posts (for example, after the 2nd paragraph).
- Below your blog posts.
Here is an example of how to place AdSense Ads in a WordPress widget
The steps to follow:
- Log in to your AdSense account and click ‘By ad unit’ under the ‘Ads’ menu.
- Select the Ad format you want (Display Ads are recommended).
- Choose the ad's orientation (square, horizontal, vertical).
- Provide a name for your ad unit.
- Choose the size (responsive is recommended).
- Click the Create button to get the code.
Log in to WordPress, go to Appearance > Widgets, and paste the code into a Custom HTML block in your sidebar. (In older versions of WordPress, use a Custom HTML widget.)
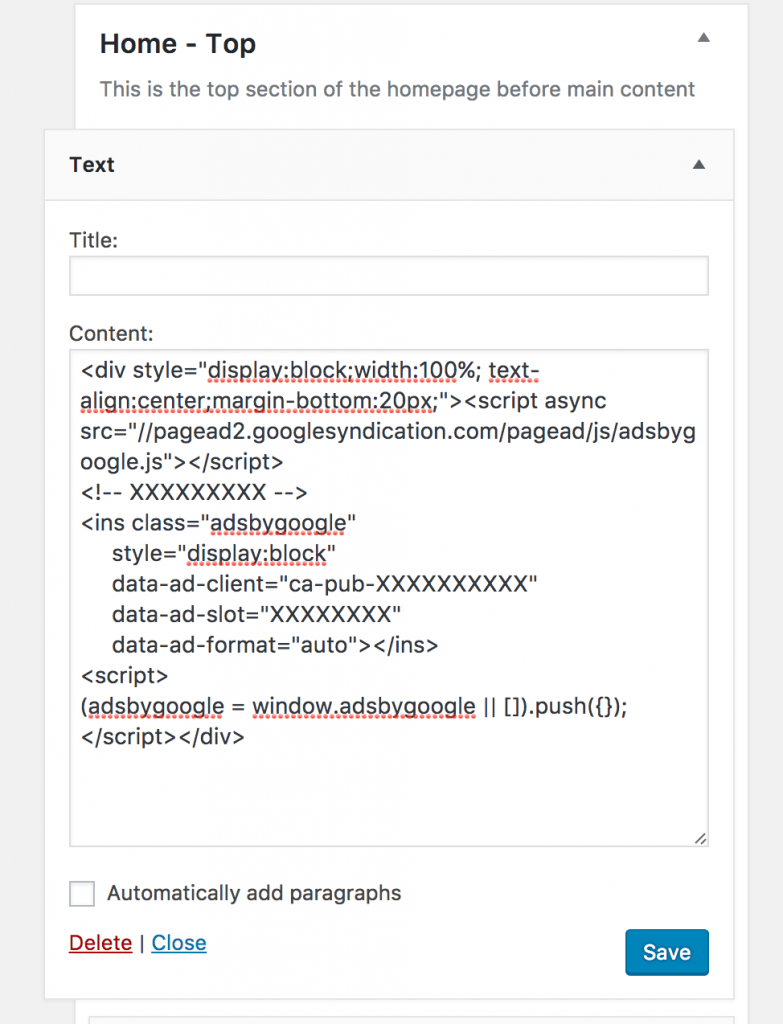
You can now SAVE the widget, and in a few minutes, AdSense will start showing on your website.
Note: You can wrap the AdSense code in a <div>, set the width to 100%, and add other styling properties to make the ads look good (see the example above).
To place ads inside your posts, for example after the 2nd paragraph, use an ad management plugin such as Advanced Ads or Ad Inserter. They let you insert ad code at specific positions without editing your theme.
This is an example of AdSense ads in the sidebar.

Conclusion
If you find the manual way confusing, then go with the first option and use Site Kit by Google to add AdSense to your WordPress blog.
Either way, enabling Auto ads is the easiest way to make sure ads show properly on both desktop and mobile. Once your ads are running, read how much Google AdSense pays to see what you can expect to earn.
In case something is not clear, let me know in the comments.