
Creating a YouTube channel for your business or personal brand is easier than you think. Creating a channel is free: all you need is a Google Account. Follow our step-by-step guide, and your channel will be ready in 10 minutes or less.
The instructions are suited for beginners without experience with YouTube channels and cover all the settings you need to customize to optimize your channel using best industry practices.
How to Make a YouTube Channel
To start your own YouTube channel, follow these steps:
- Create a YouTube Channel Account
- Verify Your Channel and Check Your Settings
- Add a Channel Description
- Choose a Channel Icon
- Customize YouTube Channel Art
- Add a Channel Trailer and a Featured Video
- Choose Your Channel Handle
- Add Sections to Your Channel Homepage
- Upload Your First Video
1. Create a YouTube Channel Account
The first step to starting a YouTube Channel is to log in and create a new channel.
You can create two types of channels: a personal channel and a channel with a business or other name (a Brand Account channel).
A personal channel uses the name and photo of your Google Account, and only you can manage it.
A Brand Account channel can have a different name from your Google Account, and it can have more than one owner or manager, which is useful when a team or an agency helps you run it.
It is highly recommended to create a brand account, even if your channel will have your own name.
For example, if you want to name your channel “Alex Chris”, don’t create a personal channel but a brand account with the name “Alex Chris”.
If this is confusing don’t worry, just follow the simple instructions below to properly create your YouTube channel account.
Go to YouTube and sign in with your Google account (that’s the personal account you use to log in to other Google services like Gmail). You can sign in by clicking the SIGN IN button from the top-right corner and selecting your personal Google account from the list.
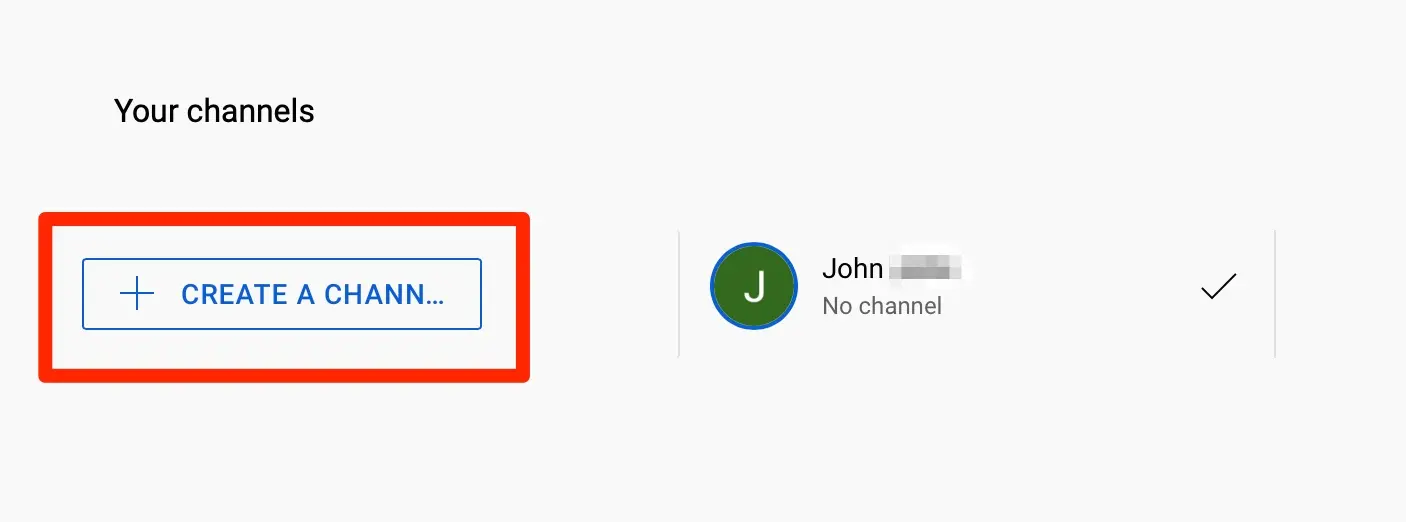
Next, go to your channel list and click Create a new channel. (To create a personal channel instead, click your profile picture, then Settings > Add or manage channel(s) > Create a channel.) The same steps work on the YouTube mobile site and app.
You’ll be prompted to choose a profile picture, a name, and a handle for your channel. Although you can change your channel name at any time, following these guidelines for choosing a great name from the beginning is recommended.
- Choose a name that is representative of your brand
- Your channel name should match your other social media profiles and domain name
- Use a short, catchy, unique, and memorable name
- Use 2-3 words max (without numbers)
For more tips, you can read our How to Choose a YouTube Channel Name guide. It’s a comprehensive guide with lots of examples and ideas on how to choose the perfect name for your channel.
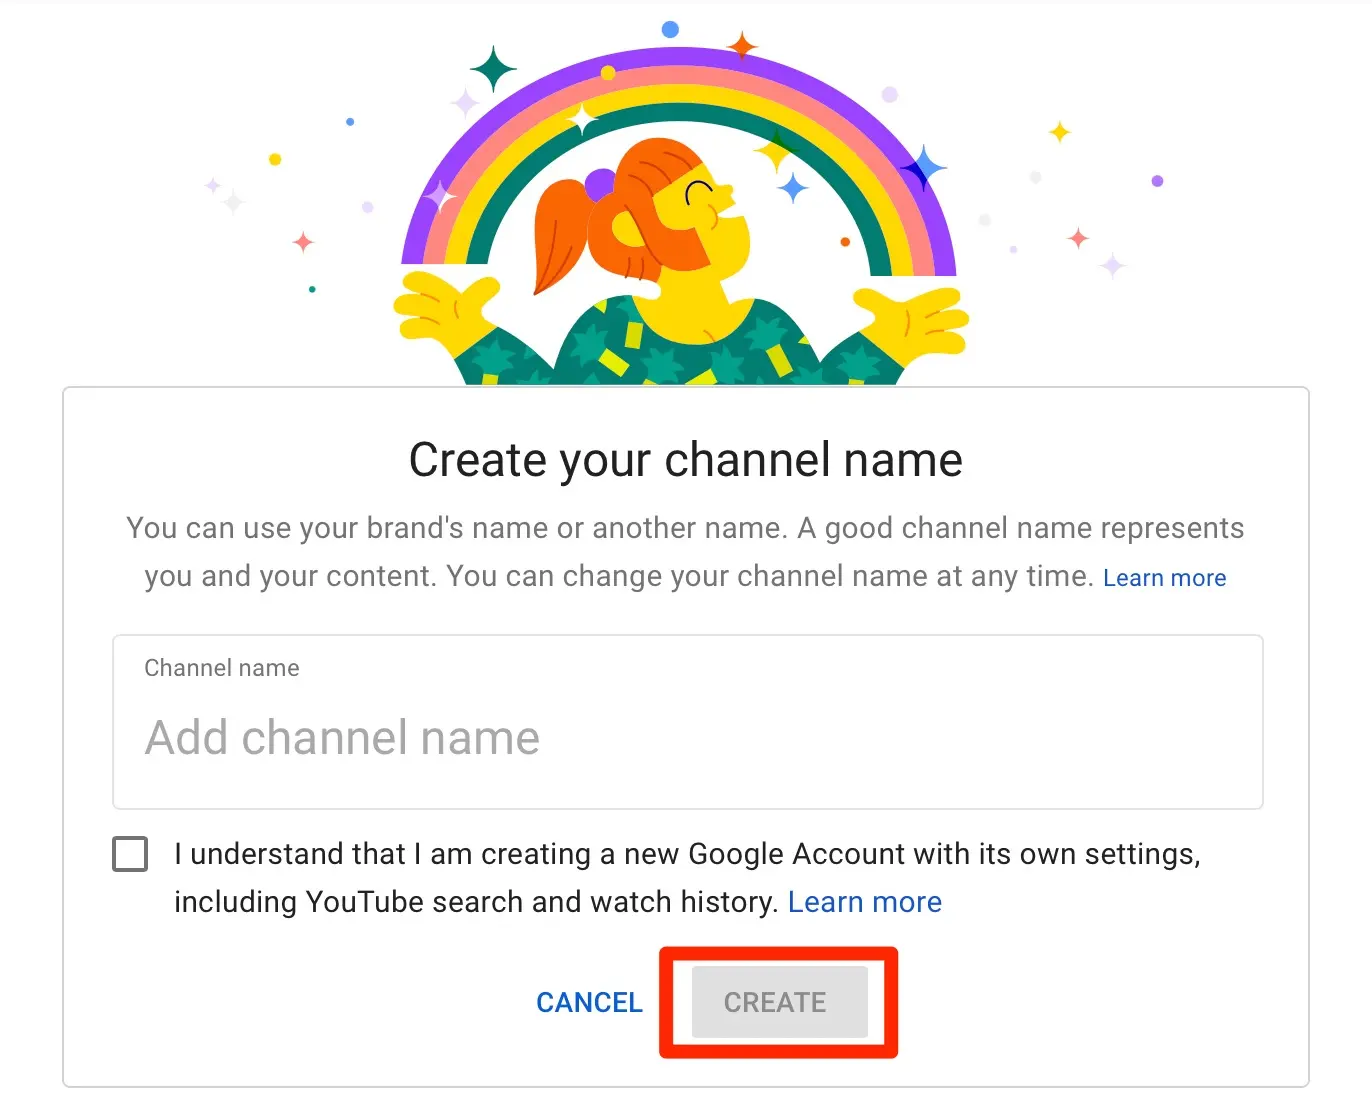
Once you set a channel name and handle (more on handles in step 7), click Create channel to finalize the channel creation process.
Your YouTube Channel is ready, but it needs some customization to make it welcoming for users and the YouTube search engine.
While on your channel’s homepage, click the Customize channel button. This will open YouTube Studio, a free tool that all YouTube creators can access.
With YouTube Studio, you can change a number of settings related to your channel, view your analytics, add or remove videos, create playlists, add branding images, and much more.
Register to our YouTube course and get step-by-step instructions and video tutorials on making a successful YouTube channel from scratch. A YouTube course aimed at beginners like you.
2. Verify Your Channel and Check Your Settings
Before you customize your channel, take a few minutes to unlock more features and set the basics in YouTube Studio.
Verify your phone number - A new channel starts with standard features, such as uploading videos and creating playlists. To upload videos longer than 15 minutes, add custom thumbnails, or live stream from a computer, you need intermediate features, which you unlock by verifying your phone number. In YouTube Studio, go to Settings > Channel > Feature eligibility.
Advanced features, such as clickable links in video descriptions and applying for monetization, come later. YouTube grants them once your channel builds enough history, or you can unlock them right away by verifying your identity with an ID or a video.
Set your audience - YouTube requires you to say whether your videos are made for kids. You can set this for the whole channel in Settings > Channel > Advanced settings, or for each video when you upload it.
Turn on 2-Step Verification - Protect your channel by turning on 2-Step Verification for your Google Account. It’s also one of the requirements for joining the YouTube Partner Program.
3. Add a Channel Description
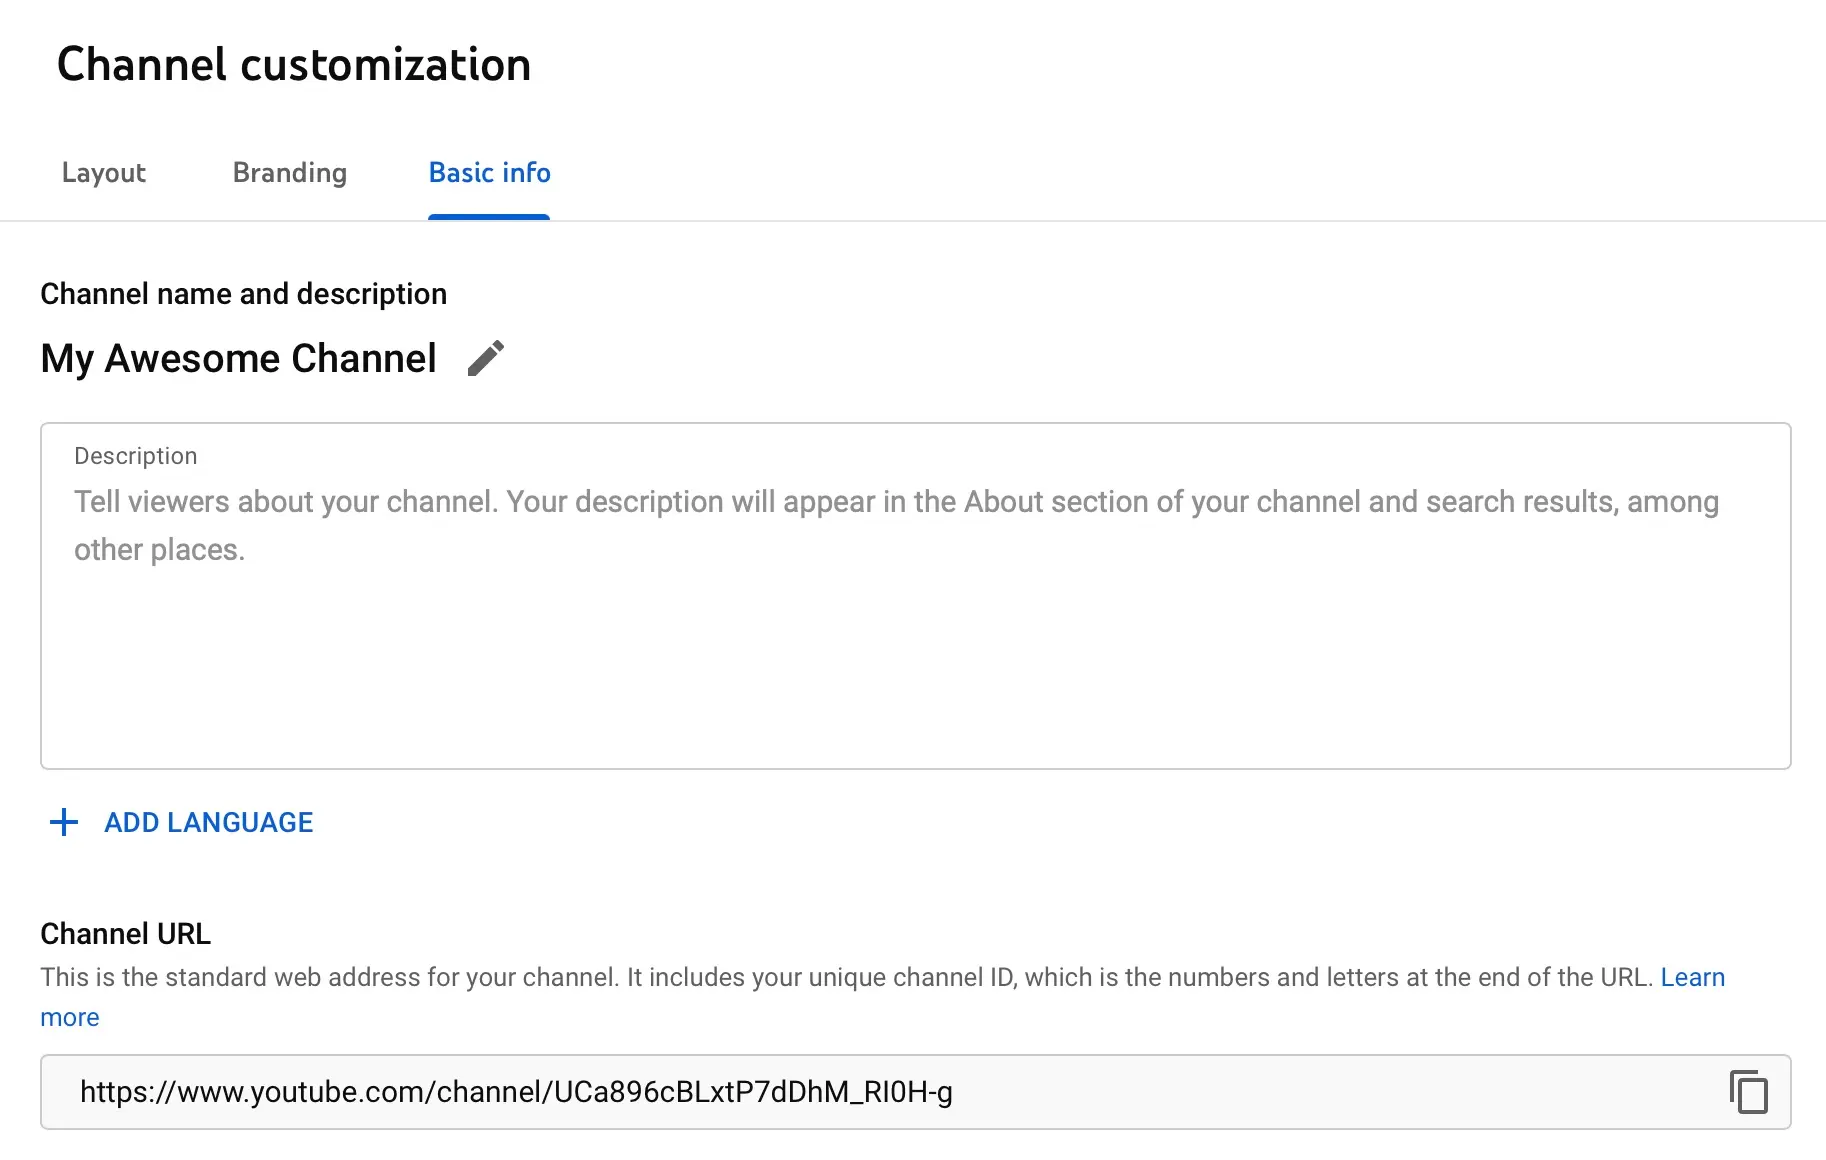
The first thing to customize is your channel’s description. It’s shown when viewers open your channel description from your channel header, and in YouTube search results when users are searching for your channel name.
To add a description to your channel, go to Customization > Profile in YouTube Studio, enter your description under Description, and click the PUBLISH button (top right corner).
Channel Description Best Practices
When crafting your channel description, follow these tips:
The first 150 characters are important - Make sure that you say what your channel is about in the first 150 characters. On average, this is what is shown on YouTube search results.
Think of this as the “meta description” of your channel. Besides YouTube search results, the first 150 characters are shown in Google search results for searches related to your brand.

Use keywords - Keyword usage in the channel description is recommended but don’t overdo it. Mentioning the keywords you want your channel to rank for a few times in the description is enough to give search engines a clue about what your channel is all about.
Think of terms people might use to find your channel on YouTube and use them in your content. Adding the keywords as high on the content as possible is an added bonus.
Ask people to subscribe - The best place for your website and social media links is the Links section of your profile (see step 5). In the description, you can still ask people to subscribe to your channel, add other calls to action, or mention your website address.
Write a compelling description - Your description doesn’t have to be too long but it should be long enough so that you can have your keywords naturally in the text and compelling enough for people to follow or engage with your content.
Visit your favorite YouTube channels and open their channel description to get some ideas on how to make your description stand out.
Here is an example that I really like and has all the optimization features.
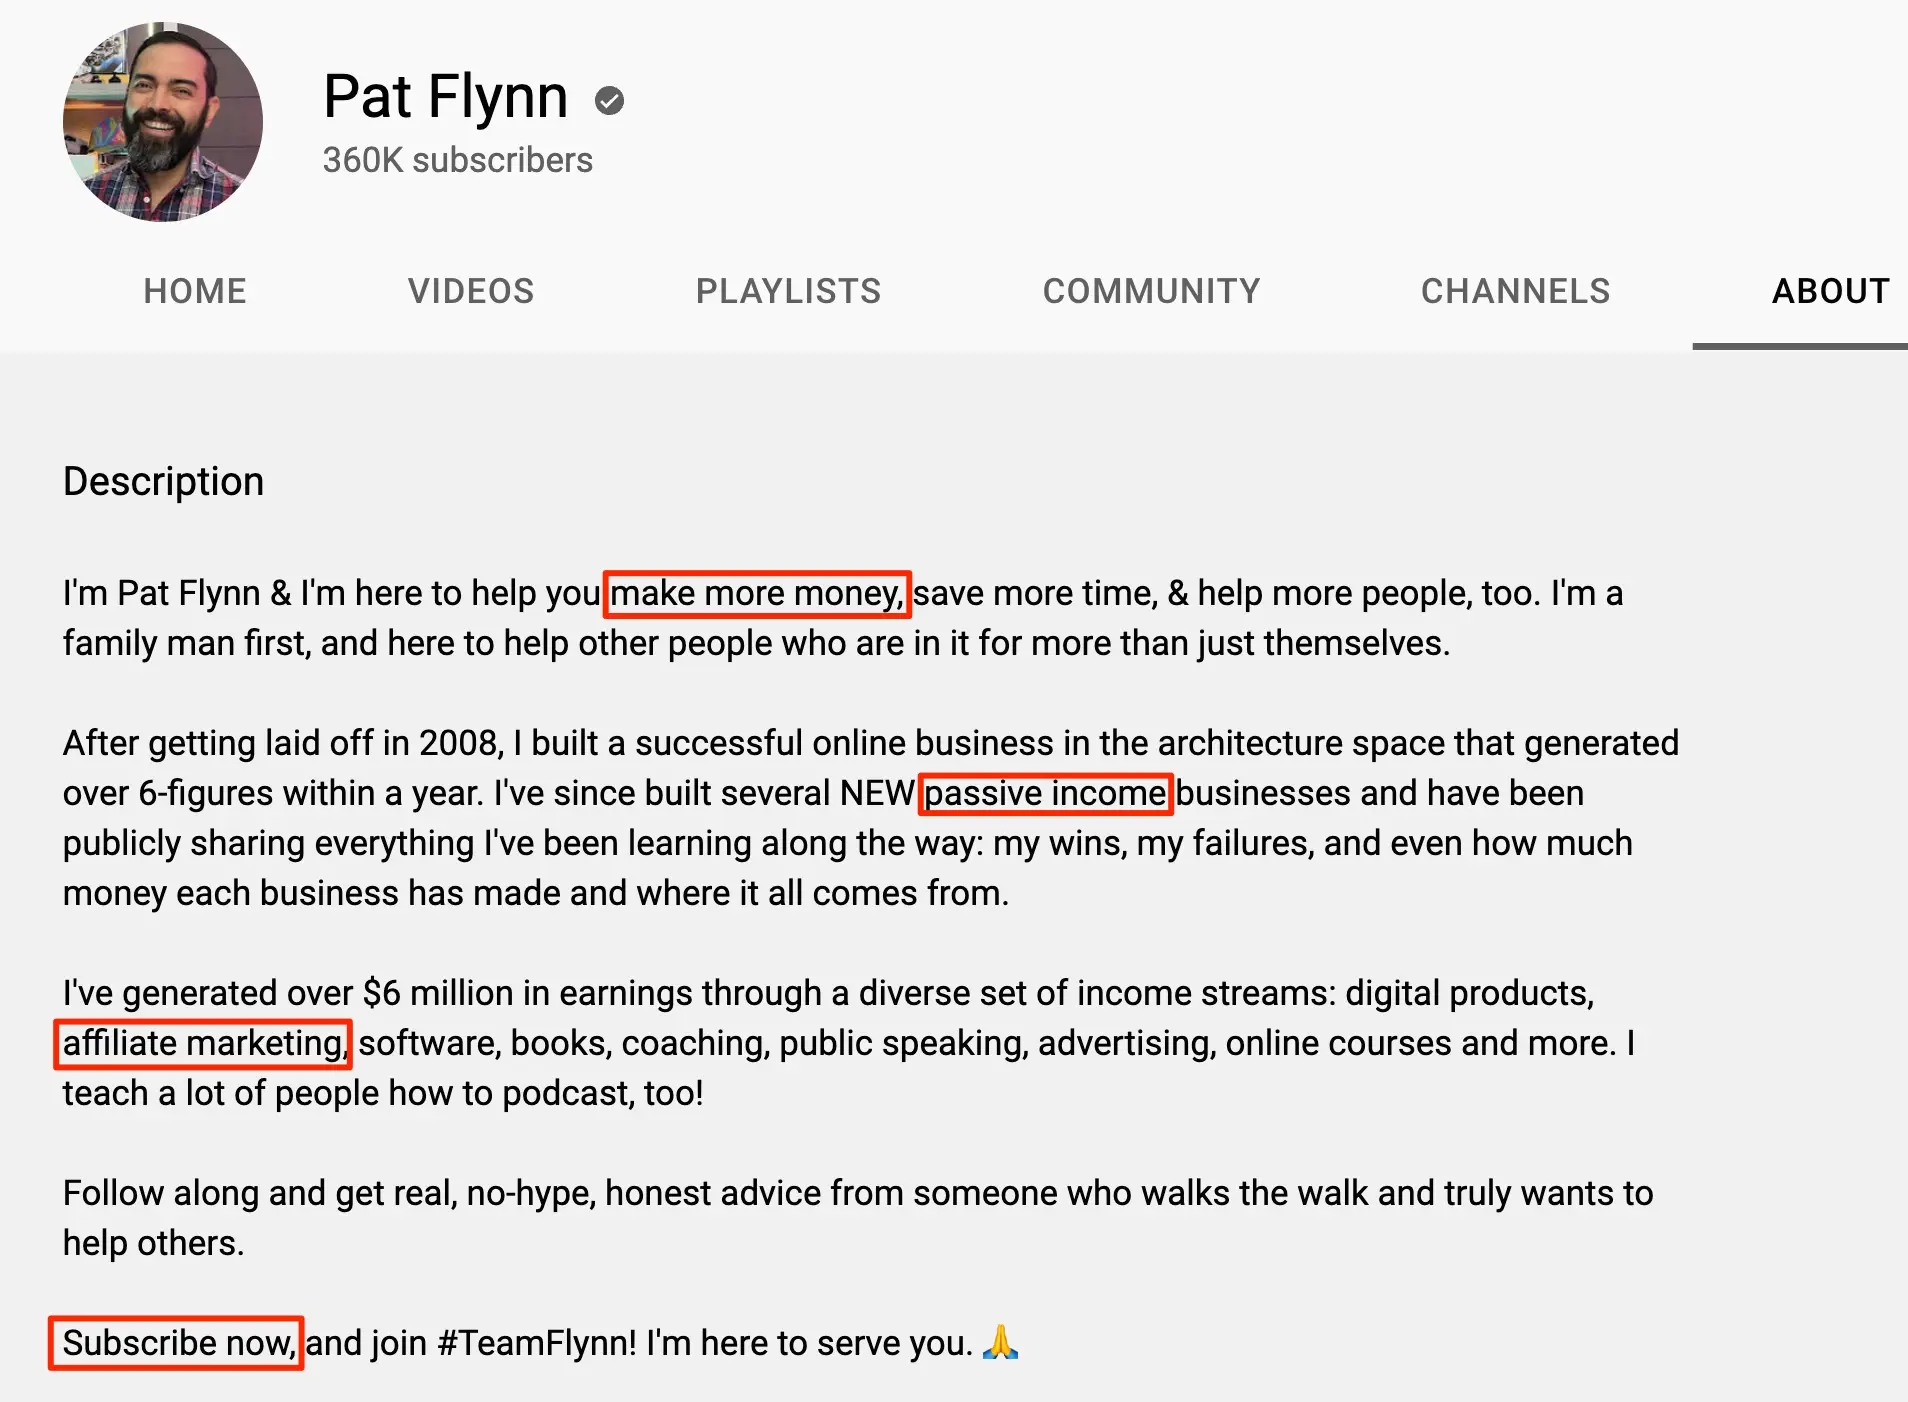
Notice how keywords are spread throughout the text and the clear call-to-action at the bottom.
4. Choose a Channel Icon
The next step is to add a channel icon. The channel icon is one of the most important elements of your channel as it is shown on your channel’s home page, below videos, on your comments, and in a lot of other places.
Channel Icon Best Practices
When choosing a channel icon, consider the following tips:
Choose an icon that represents your brand - The channel icon is a powerful way to raise brand awareness for your channel. People can easily recognize your brand when they see your icon in the YouTube search results or comments so make sure that what you choose is something that accurately represents you and your channel brand.
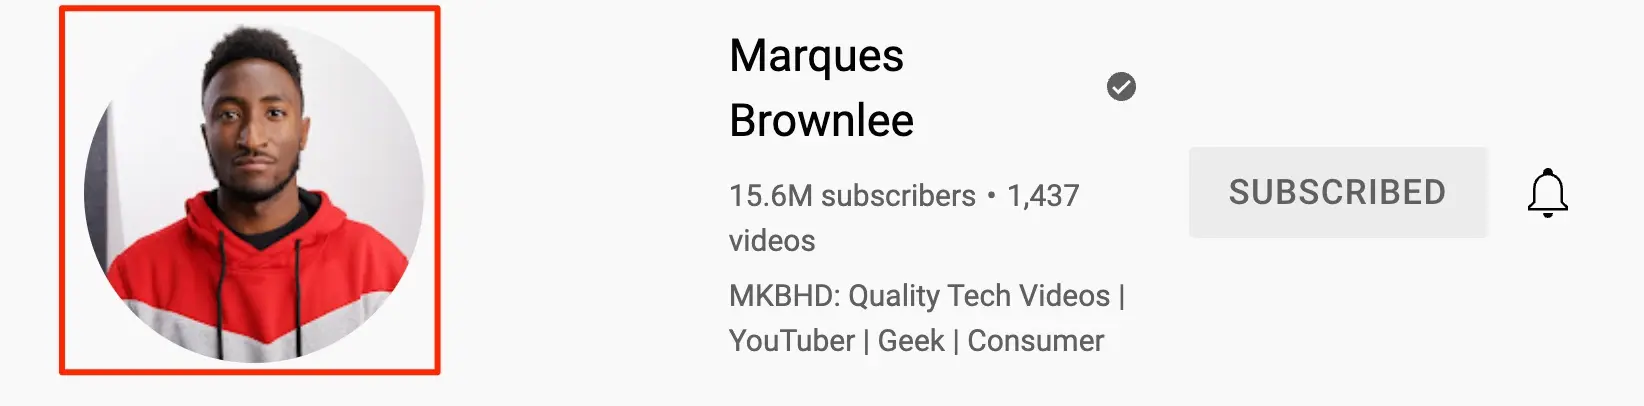
If you’re building a personal brand on YouTube then having your headshot as a channel icon is the best choice. Here is an example from Marques Brownlee, the YouTube creator behind MKBHD.
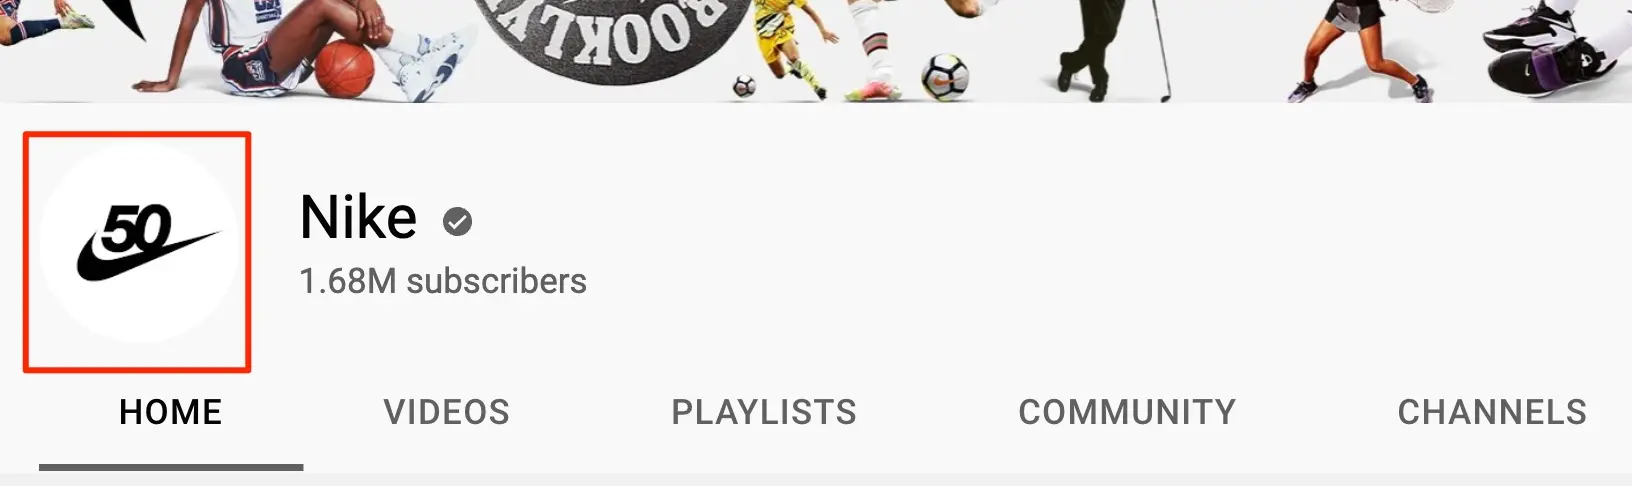
If you are representing a known brand, use your logo. Here is an example from a Worldwide brand.
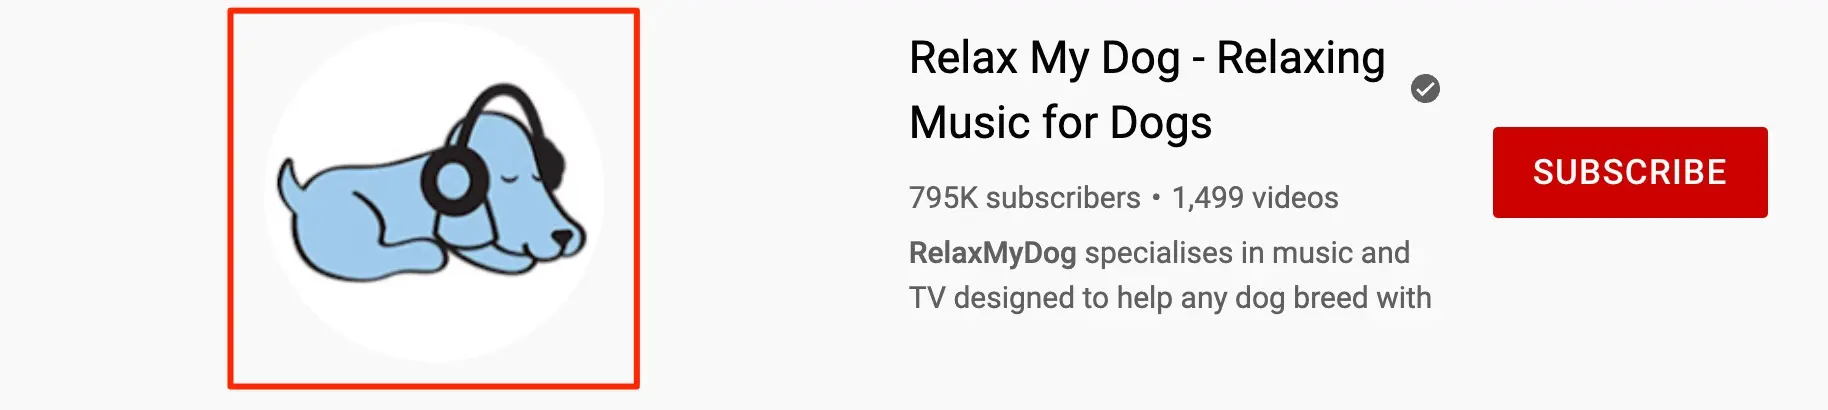
If your channel is built around a niche using a general name, for example, Relax My Dog, use an icon that is unique and easily distinguishable from other logos and icons.
Use the right dimensions - Your channel icon (YouTube calls it your profile picture) is shown as a circle and renders at 98x98 pixels. Use a JPG, PNG, BMP, or GIF file (not animated) of up to 15MB.
For better results, use an image that is at least 400x400 with enough empty space around the logo. When cropped to a smaller size and made round it will look bright and sharp.
To add a channel icon, go to Customization > Profile in YouTube Studio and click Change under Picture.

5. Customize YouTube Channel Art
The next item to add to your channel is a banner image, also referred to as channel art. Channel art is shown on top of your channel page.
It’s the only place on your channel where you can “visually” talk to users and explain to them what your channel is all about.
Your channel art can be as simple as your logo, slogan, or something more creative and eye-catching.
Let’s see some examples of different kinds of YouTube banners.
Nike a worldwide brand is using an image that matches its current campaign. It has no words but it’s certainly eye-catching and representative of their brand.
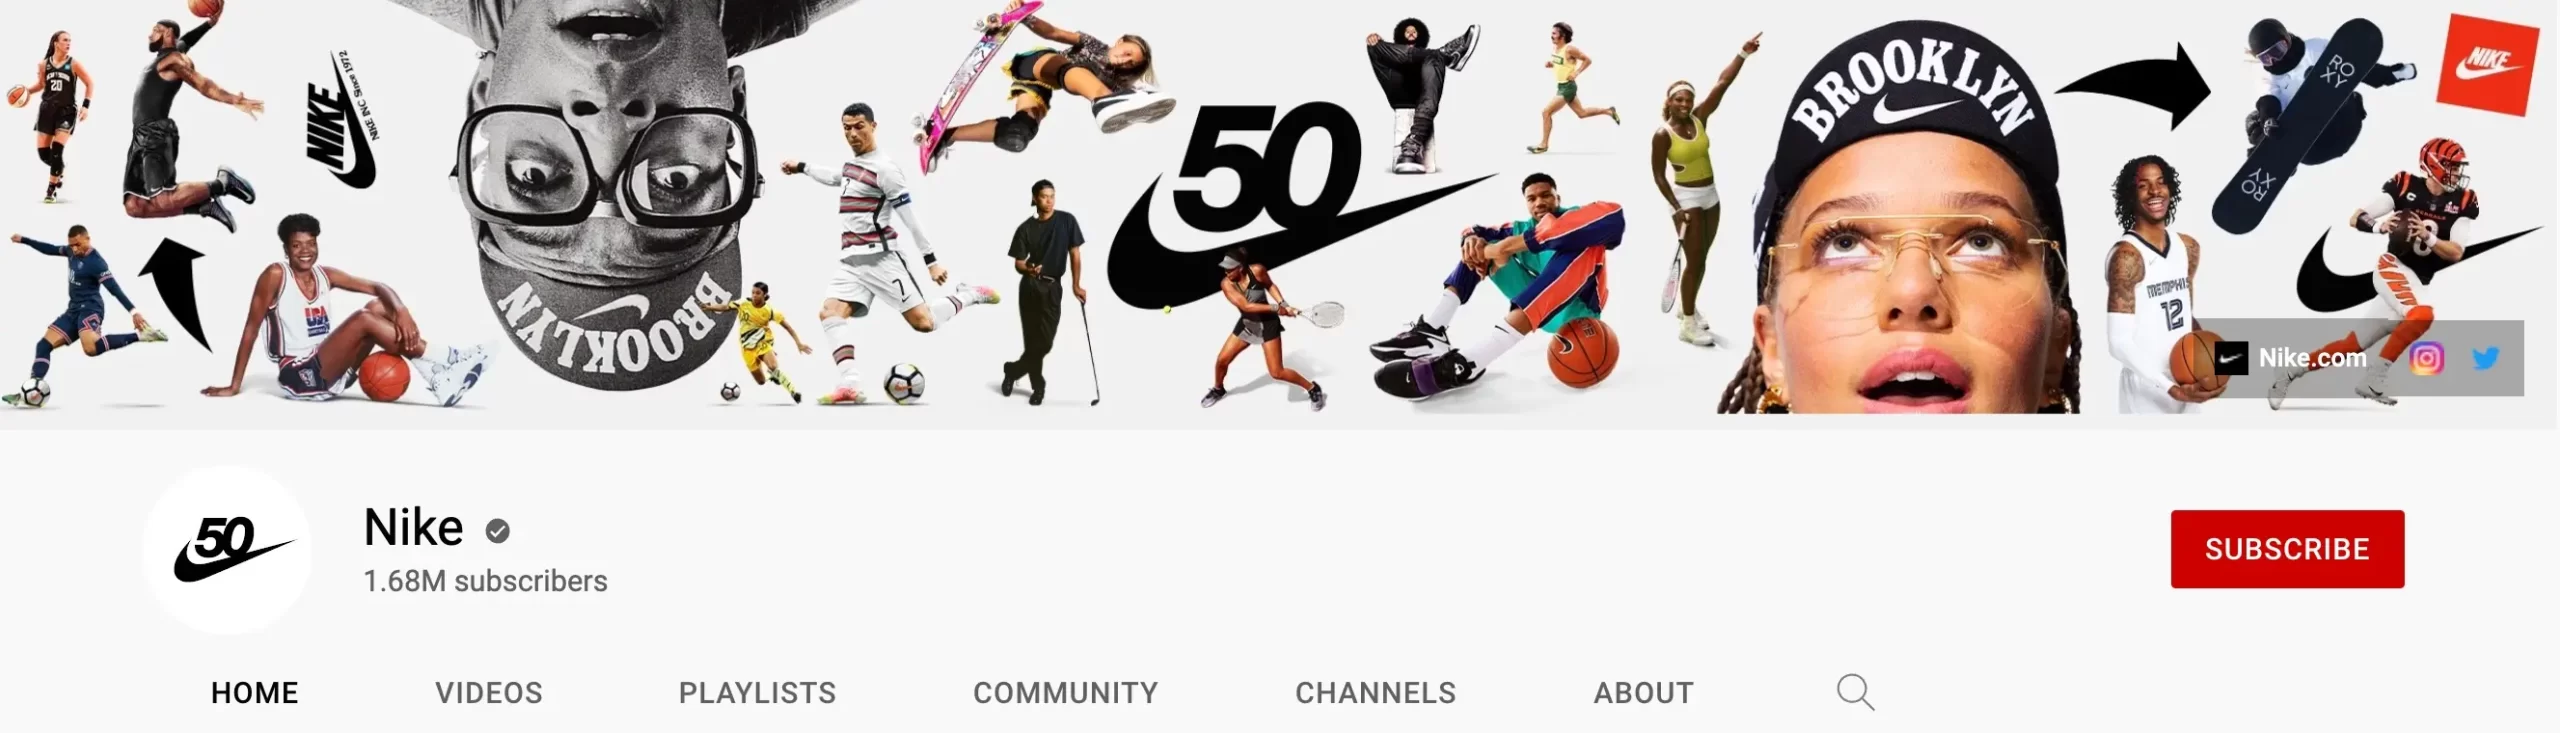
A lot of known brands follow the same approach - i.e they customize their banners based on the messaging they are currently promoting through other marketing campaigns (offline and online).
Another great example of a channel banner is coming from Master Your Charisma. Notice the arrow that points to their website links and the call-to-action text on top.
It invites people to subscribe setting clear expectations on what to expect from this channel in terms of content (one new video every Monday).

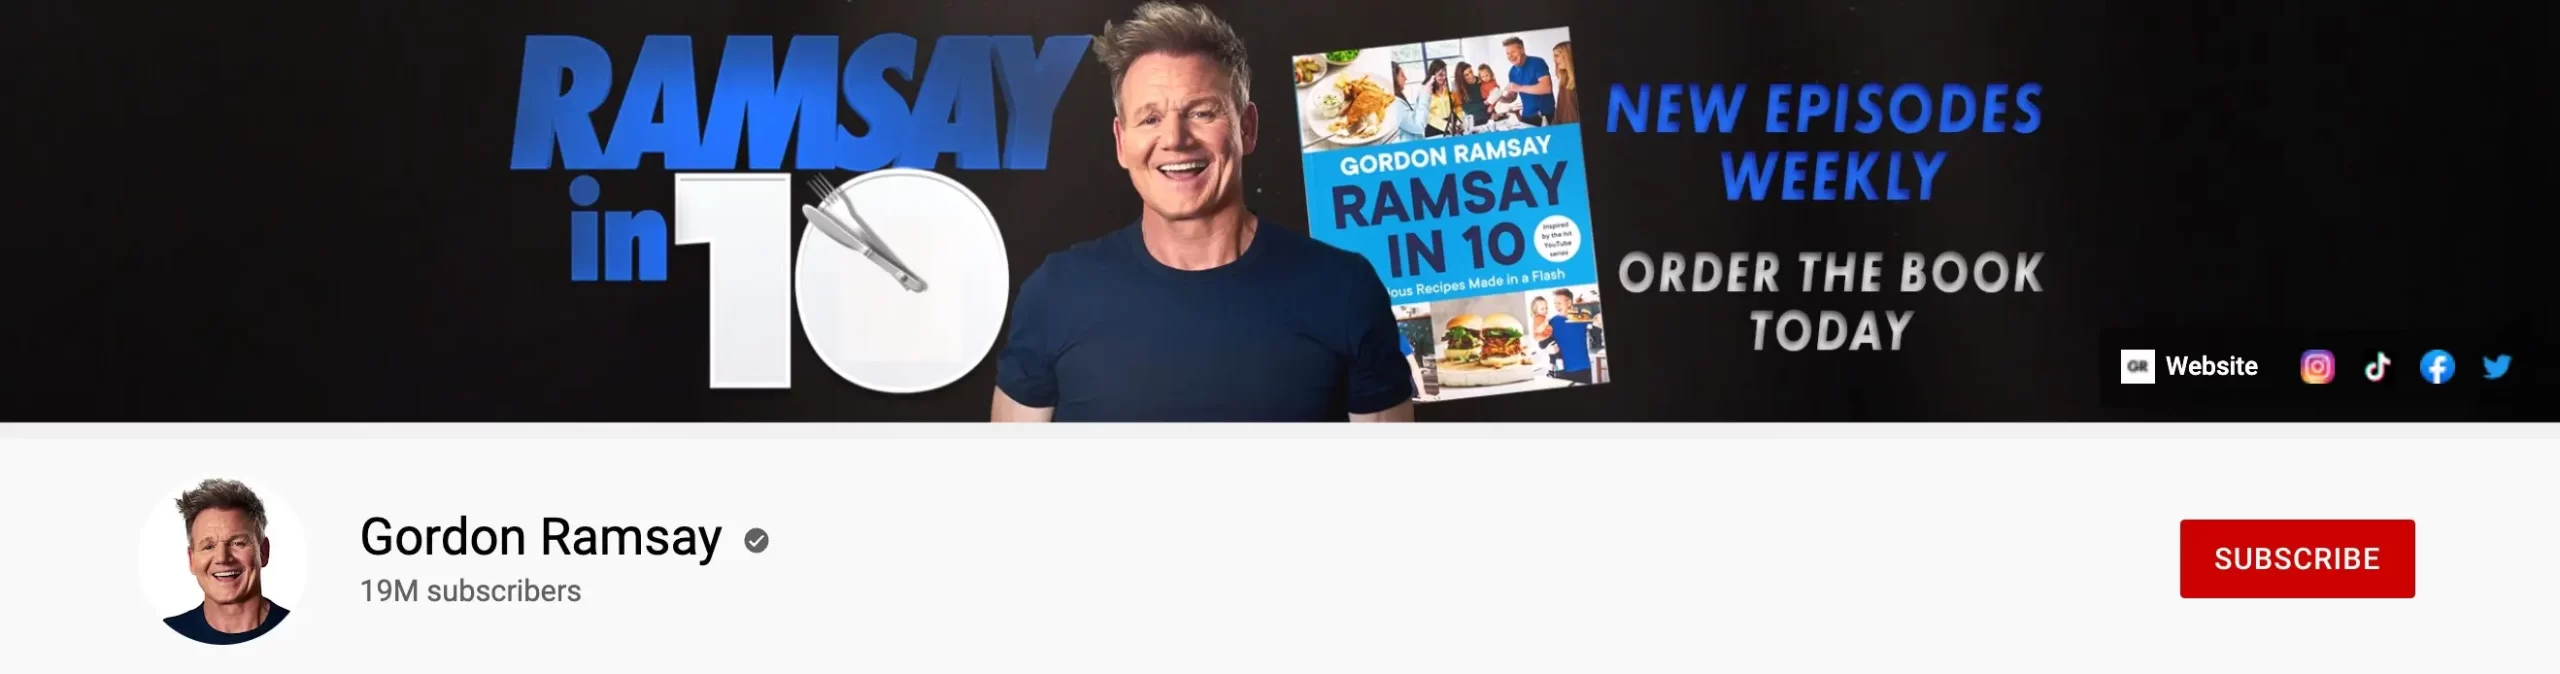
Here is another example from Gordon Ramsay. The channel art sets the expectations and has a clear call to action (Order the Book Today).
To choose a banner image for your channel, go to Customization > Profile and click Change under Banner image.

Use an image with a 16:9 aspect ratio that is at least 2048x1152 pixels and 6MB or smaller. YouTube recommends 2560x1440 pixels, especially for TV. Keep your text and logo inside the central 1235x338-pixel safe area, because the banner is cropped differently on computers, phones, and TVs. You can use this calculator to find the exact width and height for a 16:9 image.
Add Links to Your Channel
You can also add links to your website and social media profiles. Go to Customization > Profile, scroll down to Links, and add up to 14 links, each with a title. Your first link is shown in your channel header near the subscribe button, and the rest appear when viewers click to see more links, so add your most important link first.
How to Create Channel Art
To create stunning banners you can use a tool like Photoshop, hire a designer (on a marketplace like Fiverr), or use an online graphic design tool like Canva.
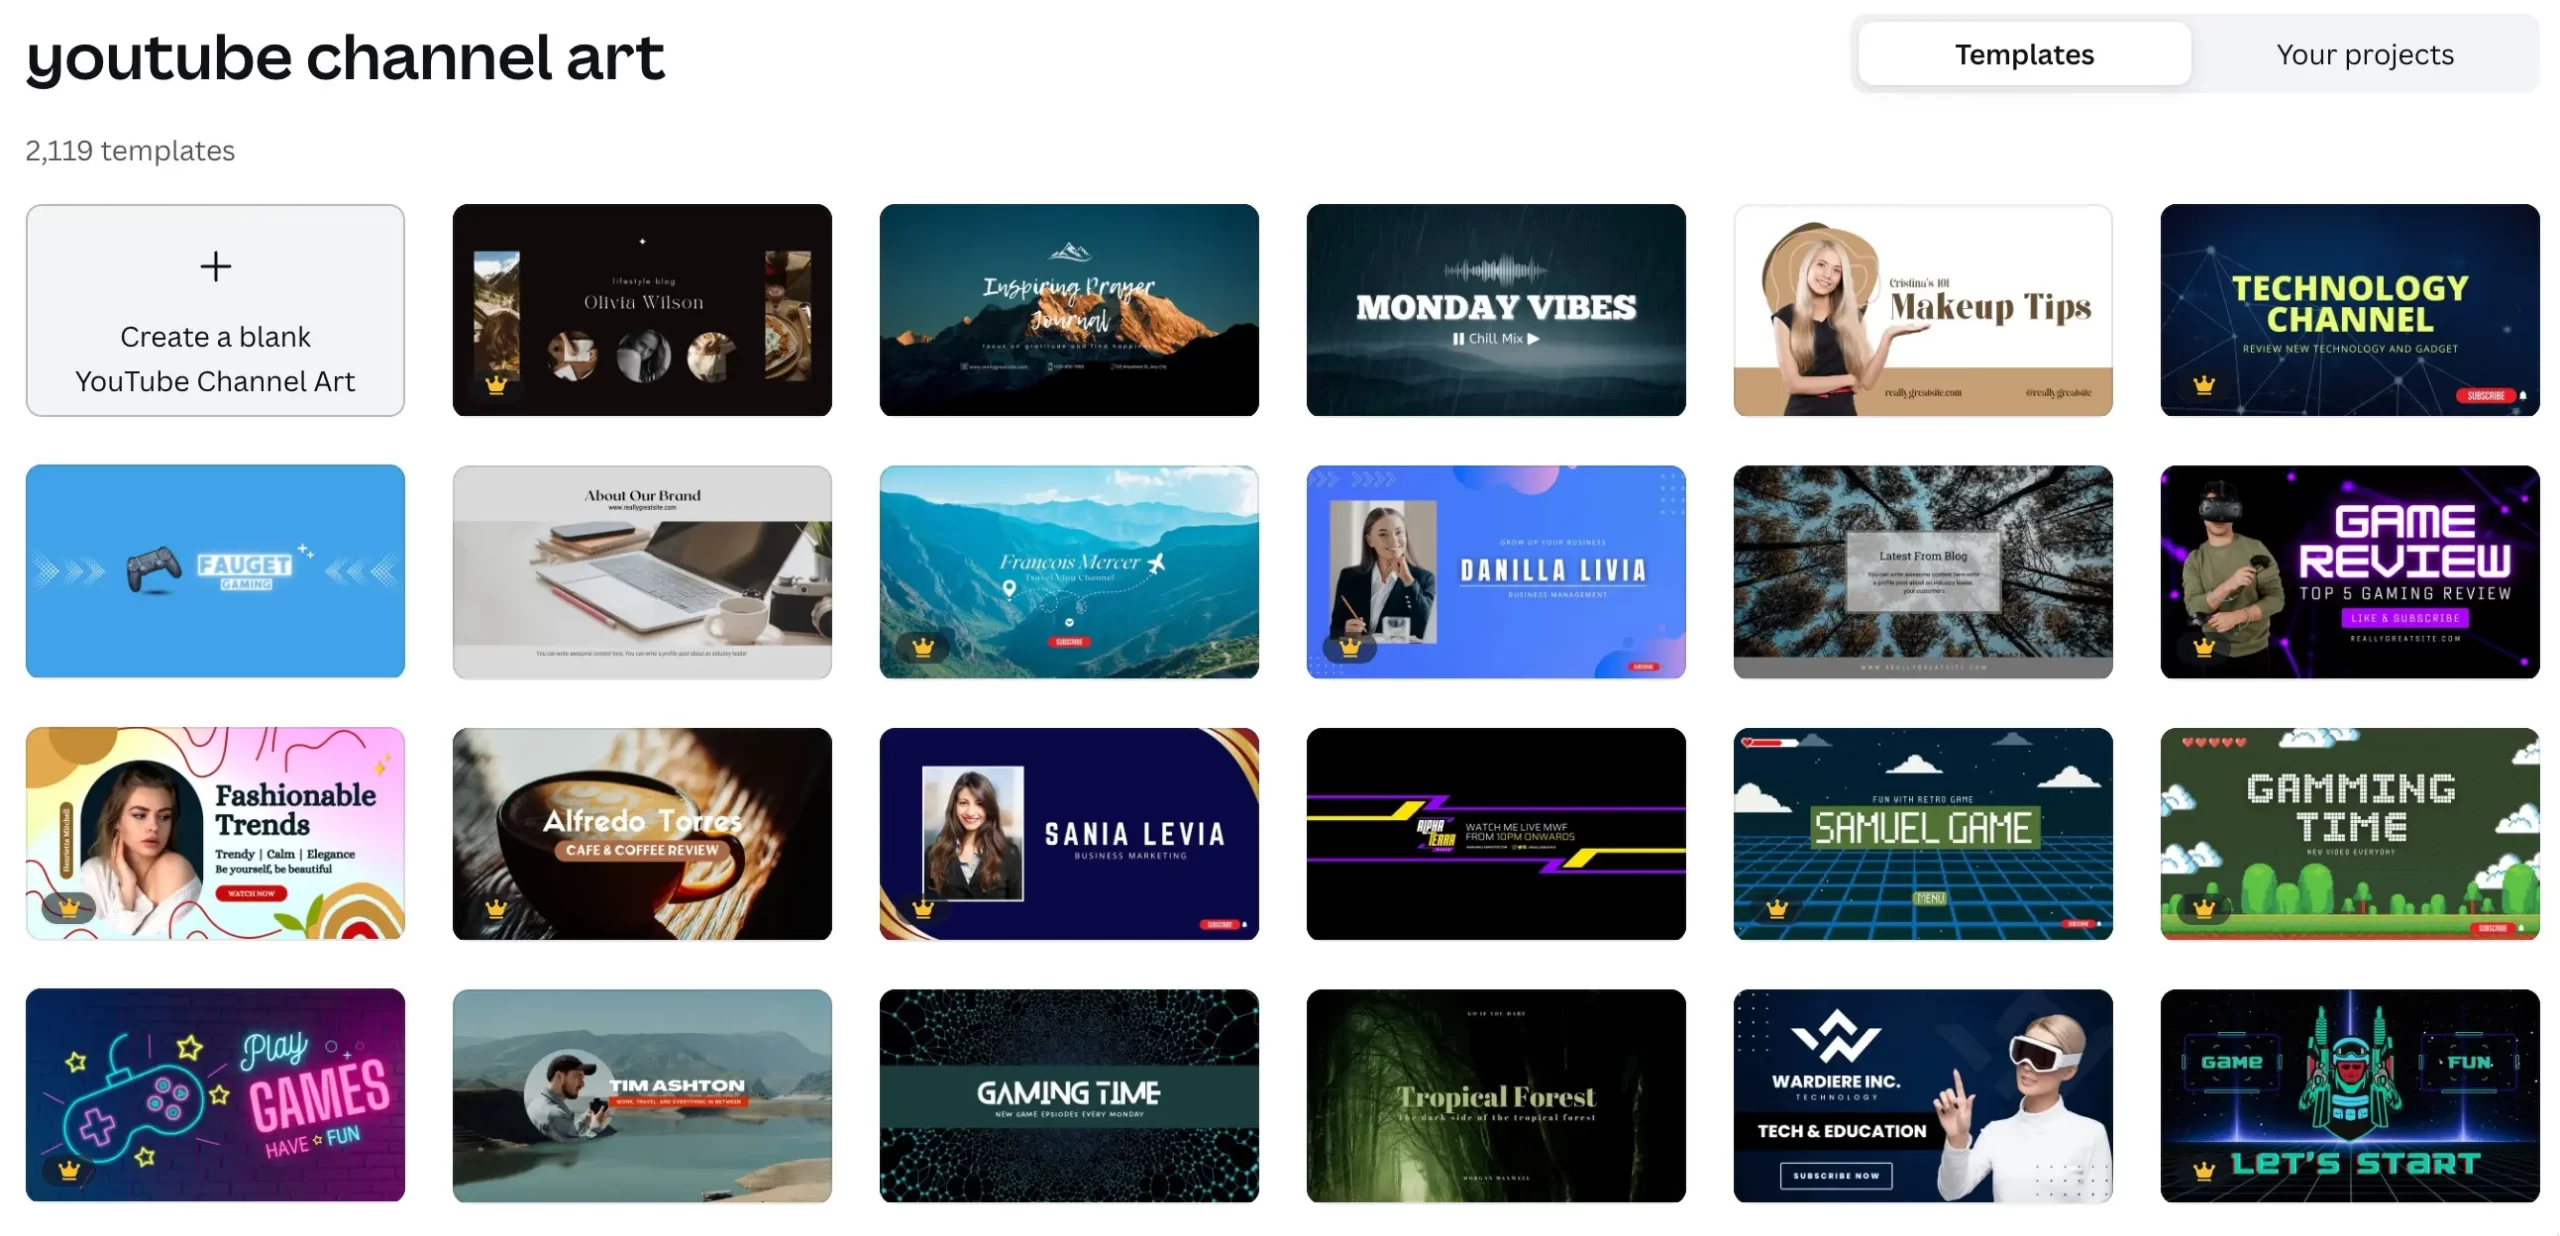
Canva has hundreds of ready-made templates you can customize and create a beautiful banner image in seconds.
Just go to Canva (register for a free account if you don’t have one) and search for YouTube Channel Art. Pick a template that you like, customize it and upload it to YouTube.
6. Add a Channel Trailer and a Featured Video
The next items to configure are the channel trailer and featured video.
When you visit any channel homepage, you’ll notice that a video is shown on top of the page, right below the banner image.
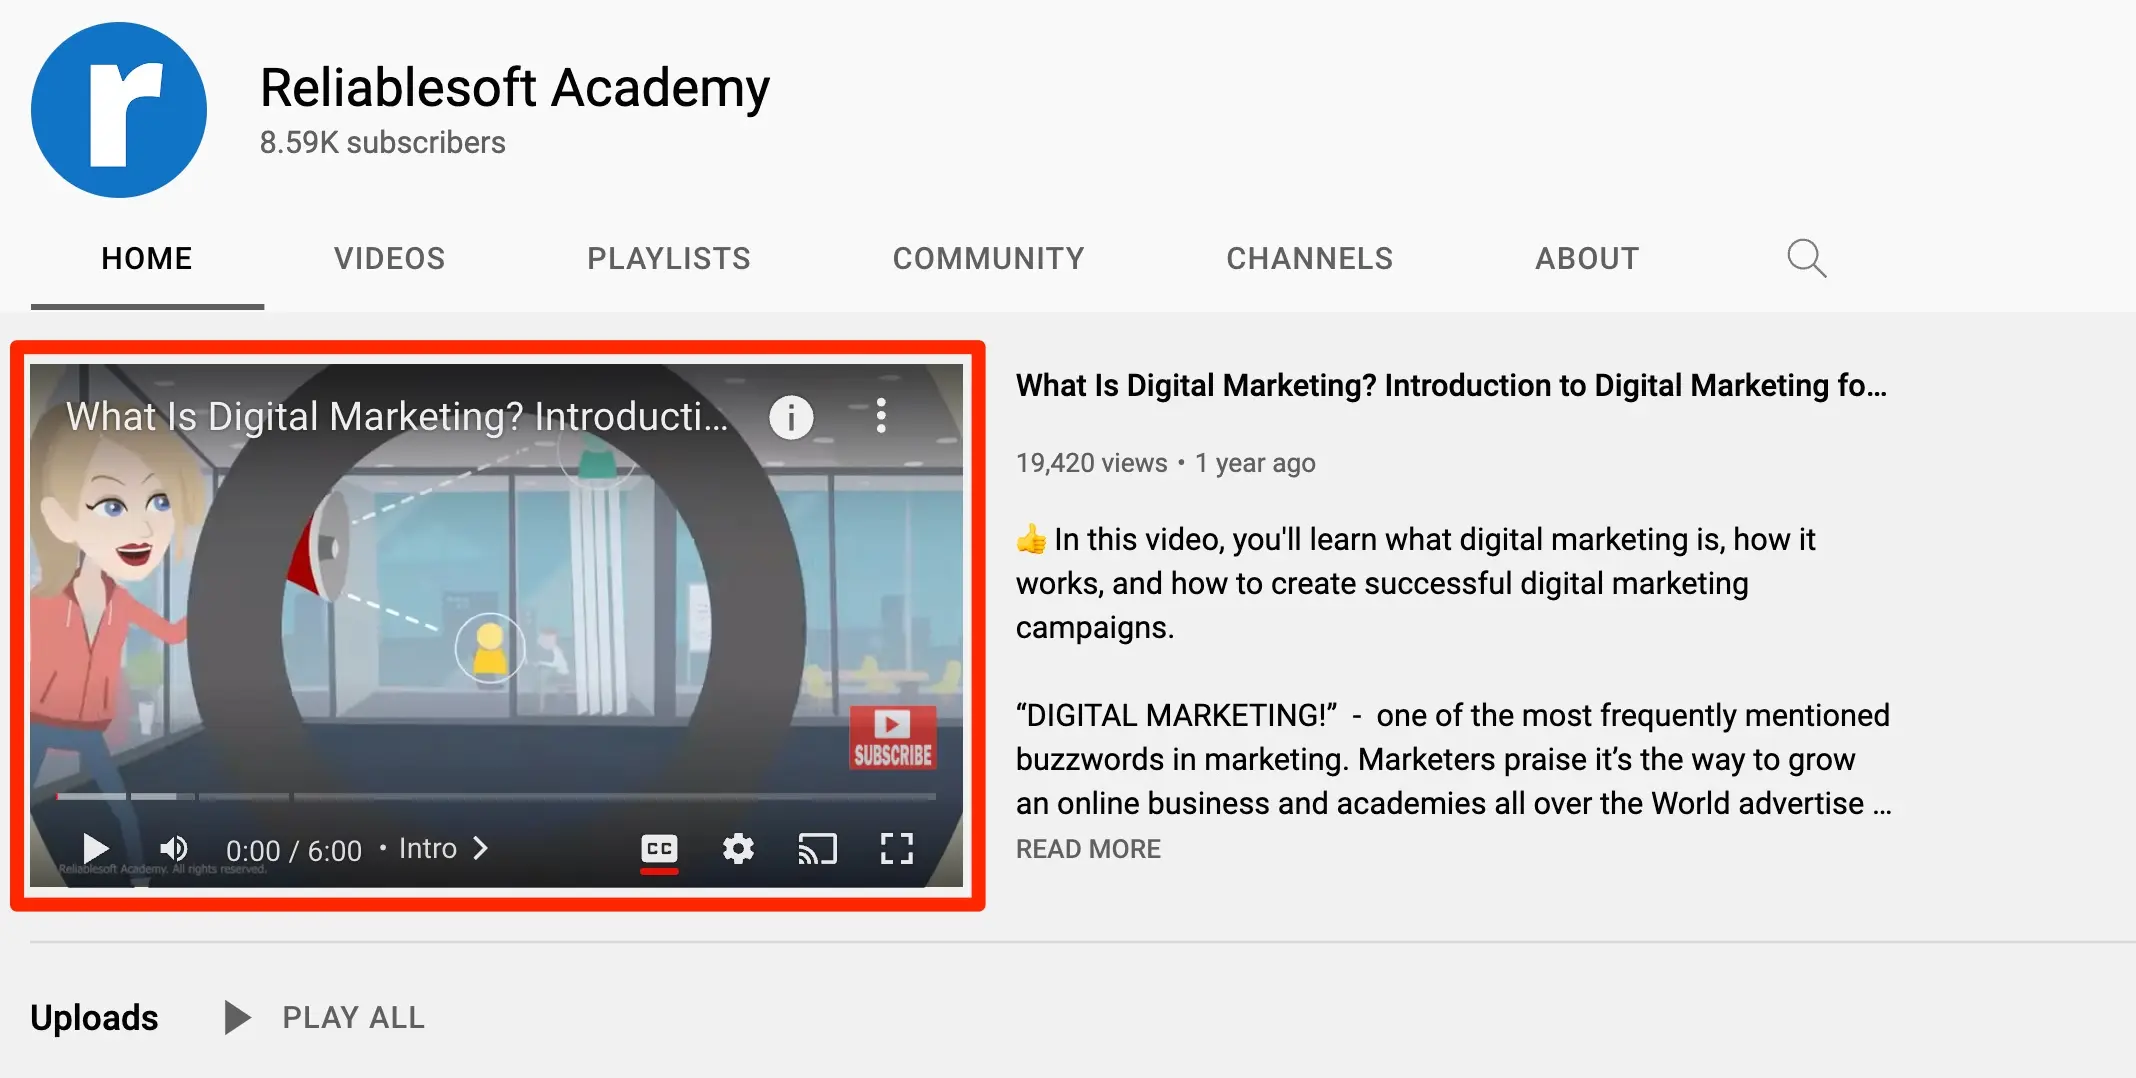
This is either a channel trailer or a featured video. A channel trailer video is shown to people who haven’t subscribed to your channel and a featured video is shown to your existing subscribers.
So, at any time, one of two videos will be shown (not both), depending on the status of the user (subscribers and non-subscribers).
To set them, go to Customization > Home tab in YouTube Studio. Under Layout, click Add section and choose Channel trailer. Then add another section and choose Spotlight to pick the featured video for returning subscribers.

Channel Trailer Best Practices
The channel trailer is intended for people that visit your channel for the first time or have not yet subscribed. Once a viewer has watched your trailer, YouTube won’t show it to them again, so make the first viewing count.
You can follow the simple guidelines below to get the user’s attention:
Add subtle background music - Background music makes your trailer more interesting to watch and listen to than a person talking with no background.
Keep it short and to the point - Your channel trailer doesn’t have to be very long. Say to potential subscribers what kind of content you create and what viewers can expect from your channel.
Keep it short, 60 seconds (or less) is more than enough to convey your message. Give them only the information that new users need to know.
Ask people to subscribe - don’t forget to invite people to subscribe to your channel. After viewing the channel trailer users need to have a clue of what to do next and asking them to subscribe is a good call-to-action option.
Update the channel trailer regularly to stay current - One of the common mistakes many YouTube creators make is to set a channel trailer and forget about it. Over time the video may include outdated info and this is bad for your channel’s reputation and drives potential subscribers away.
So for best practices make sure that any info, graphics, stats, and dates shared in the channel trailer are still relevant and up to date.
Optimize the video title and description - As you can see in the screenshot below, YouTube shows the video title and description on the right of the channel trailer.
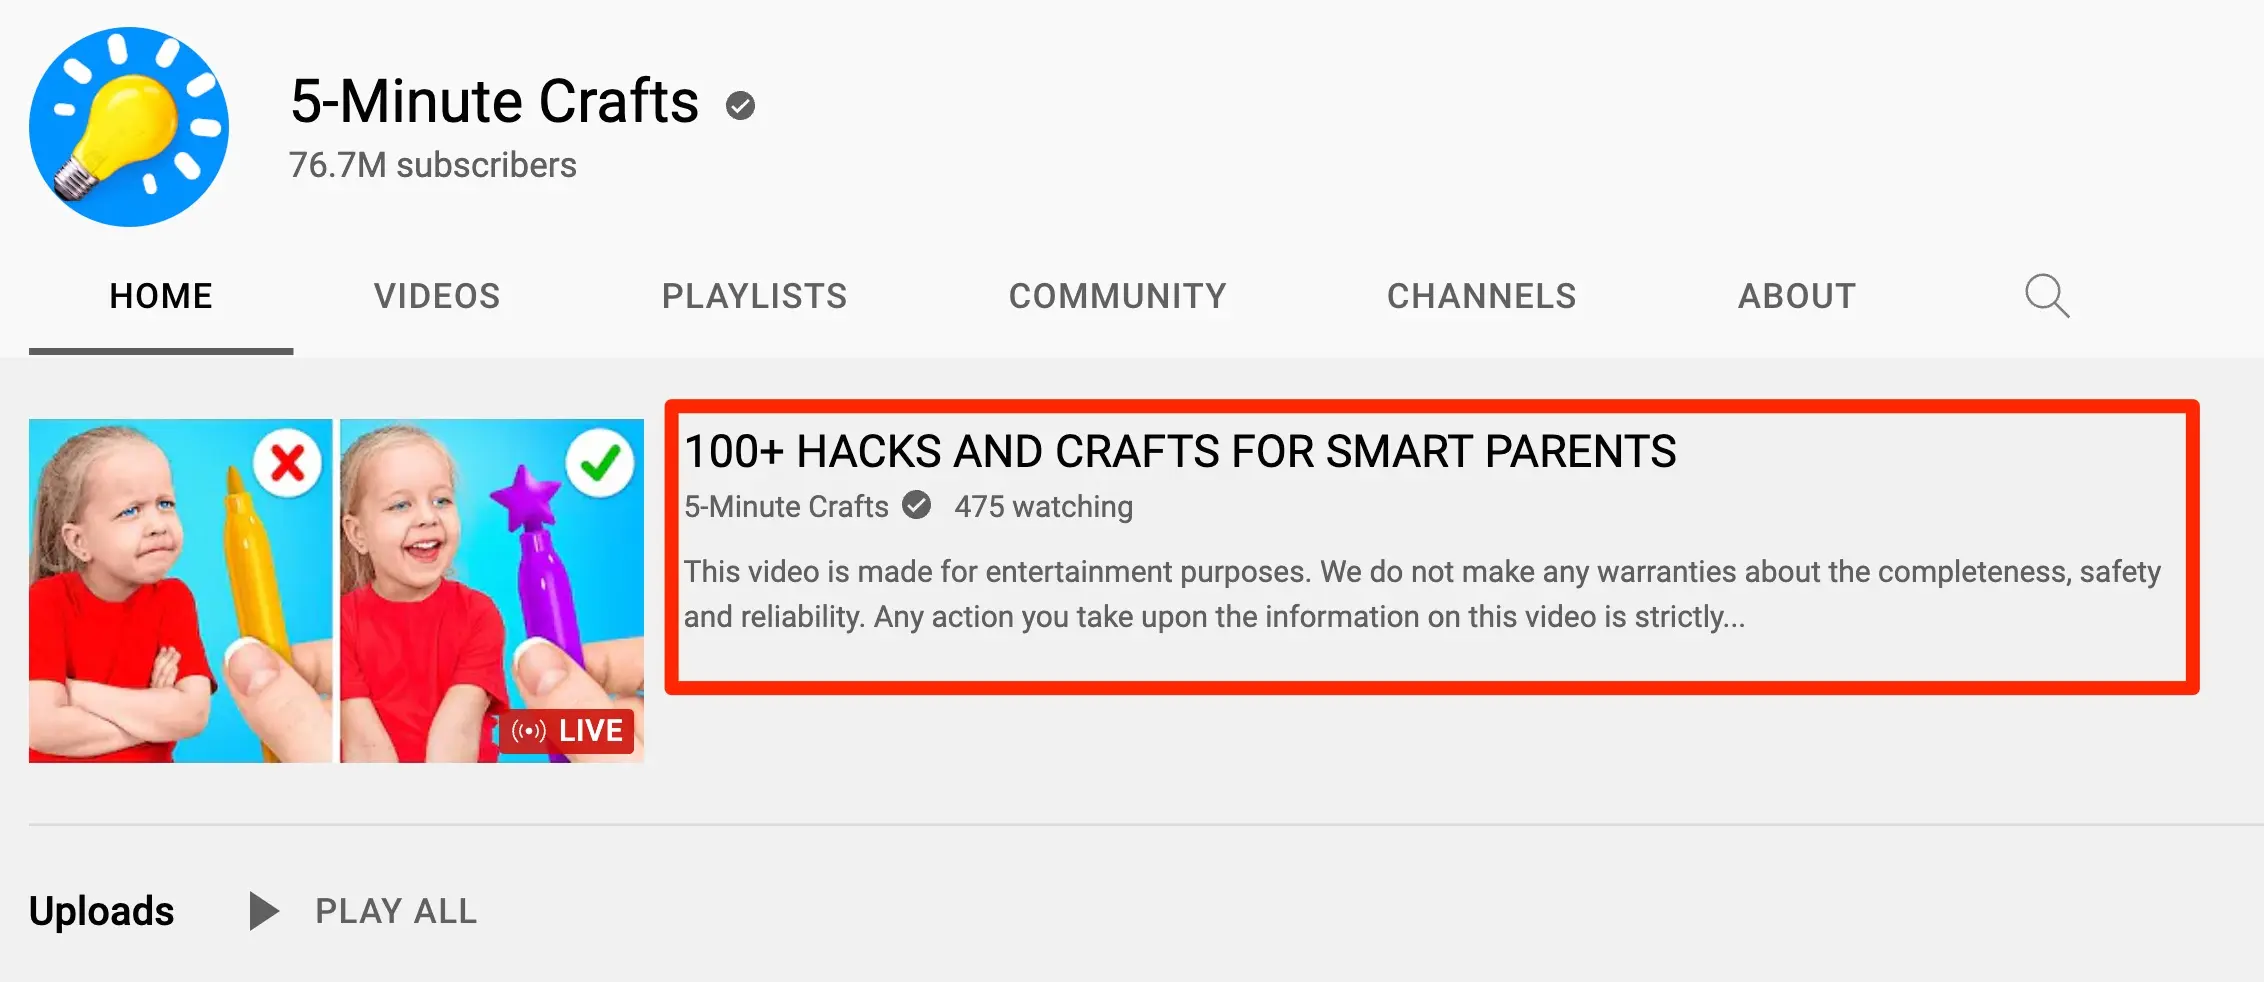
Before choosing a video for the channel trailer section, make sure that you use a short title and description. Ensure that the first characters of the description mention what the video is about.
Tip: You can select a video, PUBLISH your changes and visit your channel using a browser incognito window to see exactly what the visitors will see in the title and description areas.
Consider using one of your best videos - Some channels don’t follow the traditional way of adding a “welcome video” as a channel trailer, instead, they use one of their best videos.
If you already have videos published on your channel, you can follow the same approach i.e. add the video that is most viewed and liked by users.
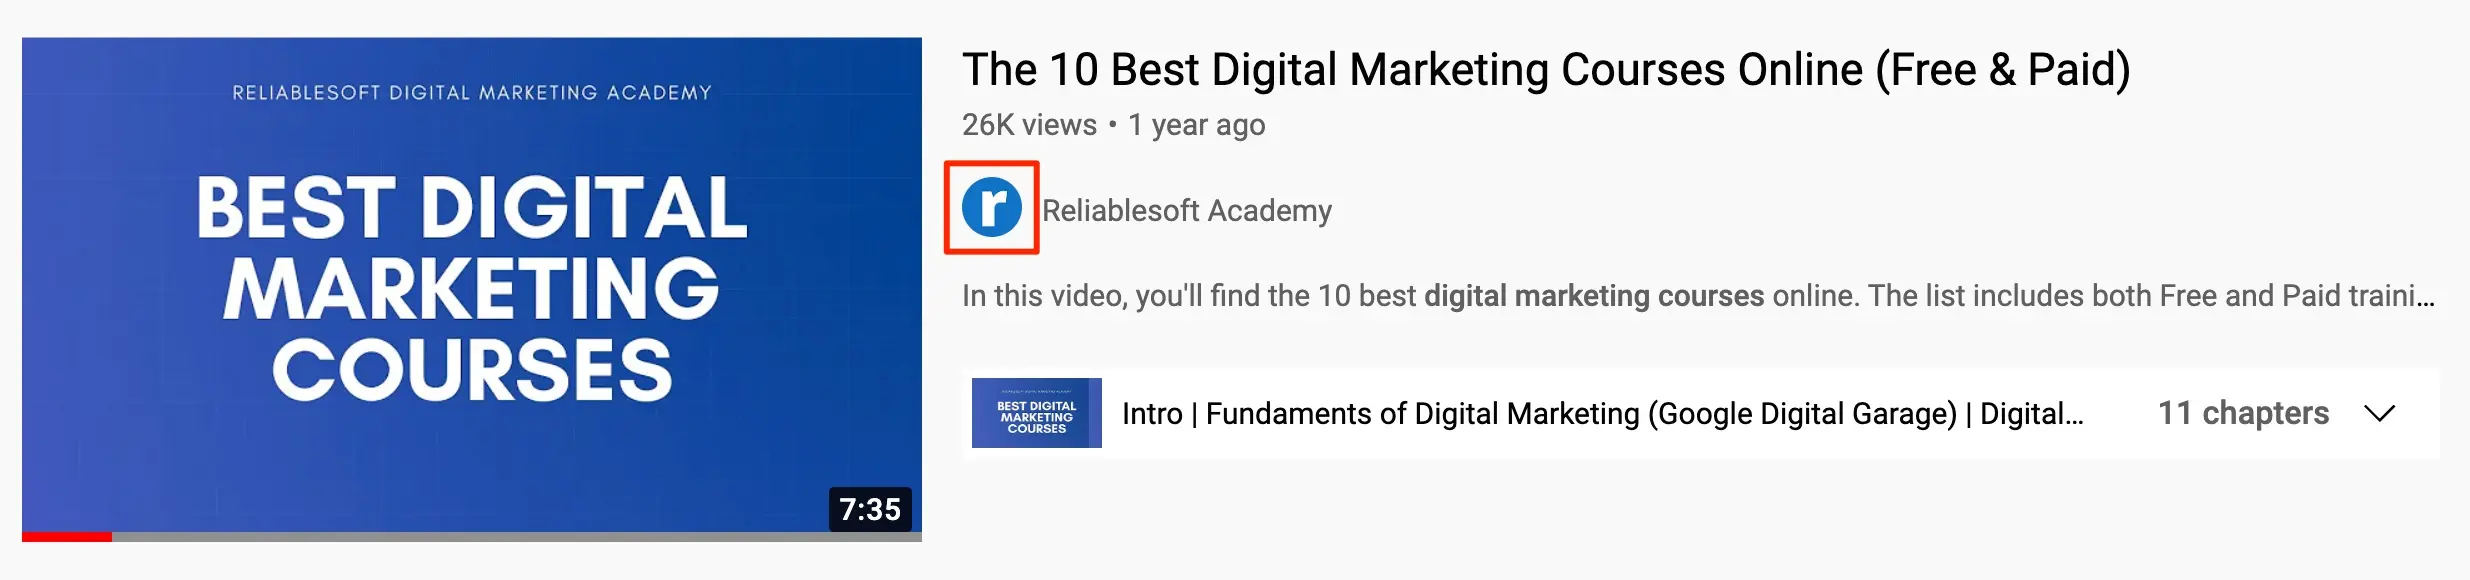
People who like the content of the video are more likely to subscribe so it still serves the purpose. It’s the same approach we use on the Reliablesoft Academy YouTube channel.
Featured Video Best Practices
Users who have already subscribed to your channel, will not see the channel trailer but the video you have selected as “featured”.
Choosing a featured video for your channel is easy: use either your best video or your latest video.
If you publish content regularly, it’s best to use the latest video. This is what users are likely to expect to see when visiting your channel.
If you don’t publish content that often, it’s better to use your best video. This way people who have not yet viewed your best work, will see it right on your channel homepage.
7. Choose Your Channel Handle
Every YouTube channel has a handle: a unique name that starts with @, like @ReliablesoftAcademy. Your handle also gives your channel a short URL that is easy to remember and share:
https://www.youtube.com/@ReliablesoftAcademy
That’s much friendlier than the long URL YouTube creates from your channel ID, which looks like this:
https://www.youtube.com/channel/UCUb26GfZqw6S0RhNYTqd2ag
You choose a handle when you create your channel, and you can change it later. In YouTube Studio, go to Customization > Profile, change your handle under Handle, and click PUBLISH. You can change your handle twice within a 14-day period.
For best practices, choose a handle that accurately represents your brand and matches your other social media profiles. It can be the same as your channel name (without spaces).
Older channels may also have a custom URL (youtube.com/c/name). Those still work, but new custom URLs can no longer be set up, so your handle is the URL to share.
8. Add Sections to Your Channel Homepage
Featured sections allow you to customize your channel homepage content and what users will see below the channel trailer.
YouTube allows the creation of different sections to show your latest videos, playlists, or custom content. Here is an example of a well-organized homepage.
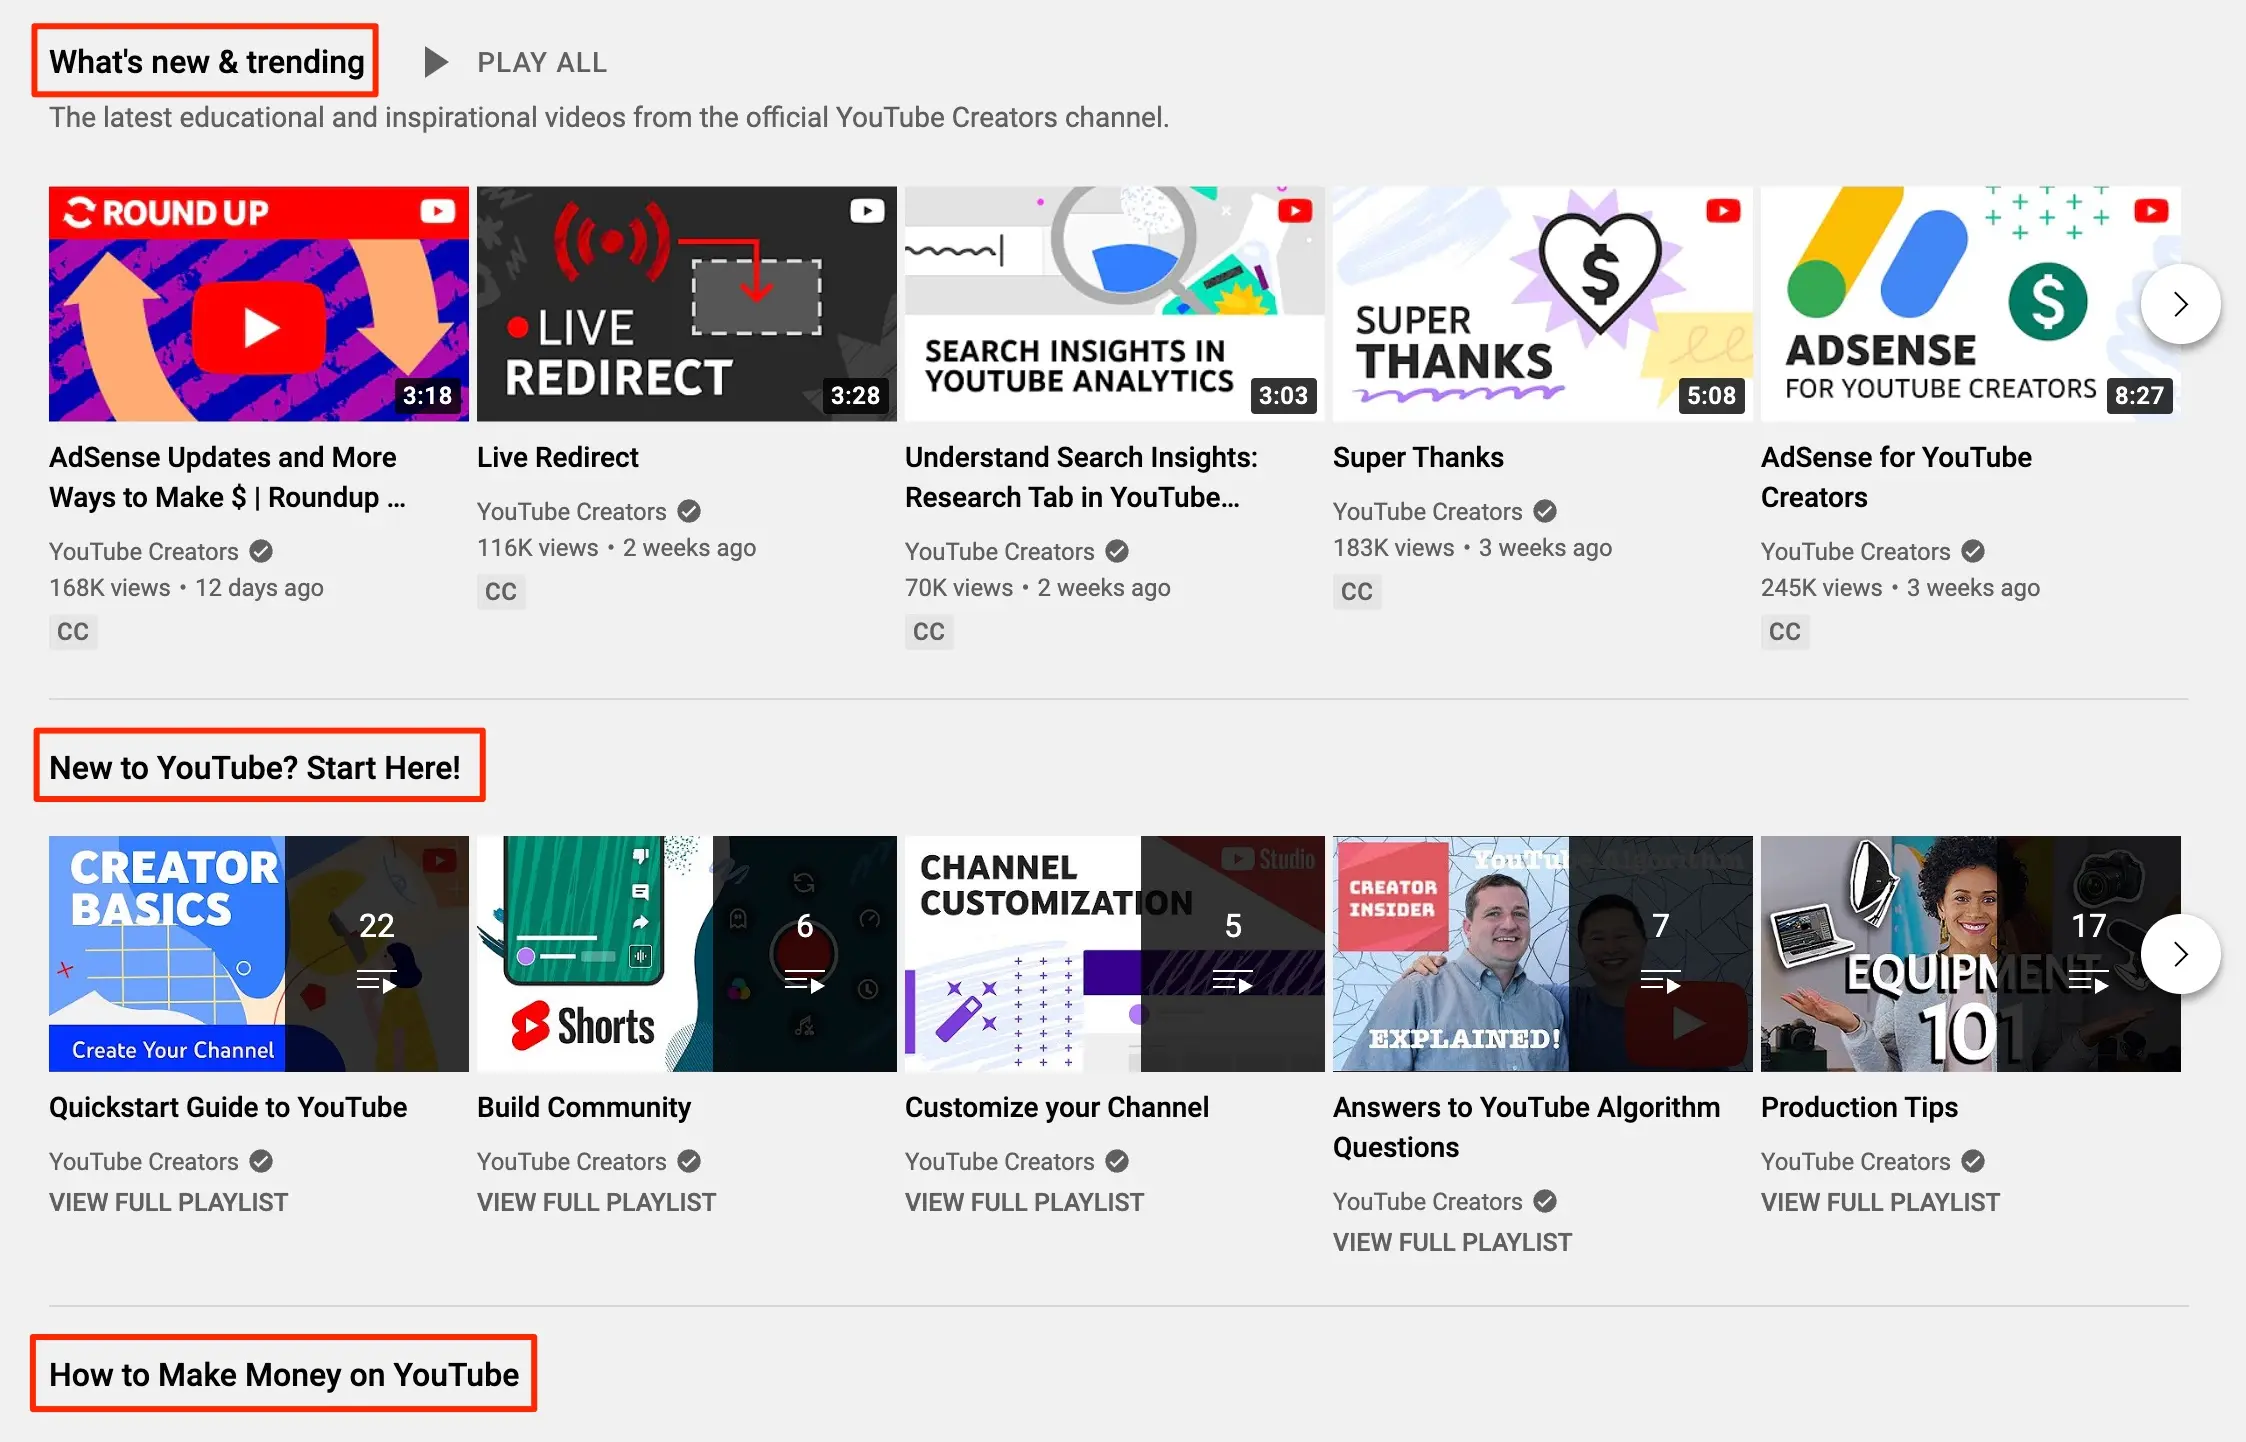
Notice how the page is organized in sections (What’s new & trending, New to YouTube? Start Here!, How to Make Money on YouTube), that make it very easy to find what videos to watch.
To choose what to show in the different sections, go to Customization > Home tab in YouTube Studio, click Add section under Layout, and select how you want to organize your page. You can add up to 12 sections.
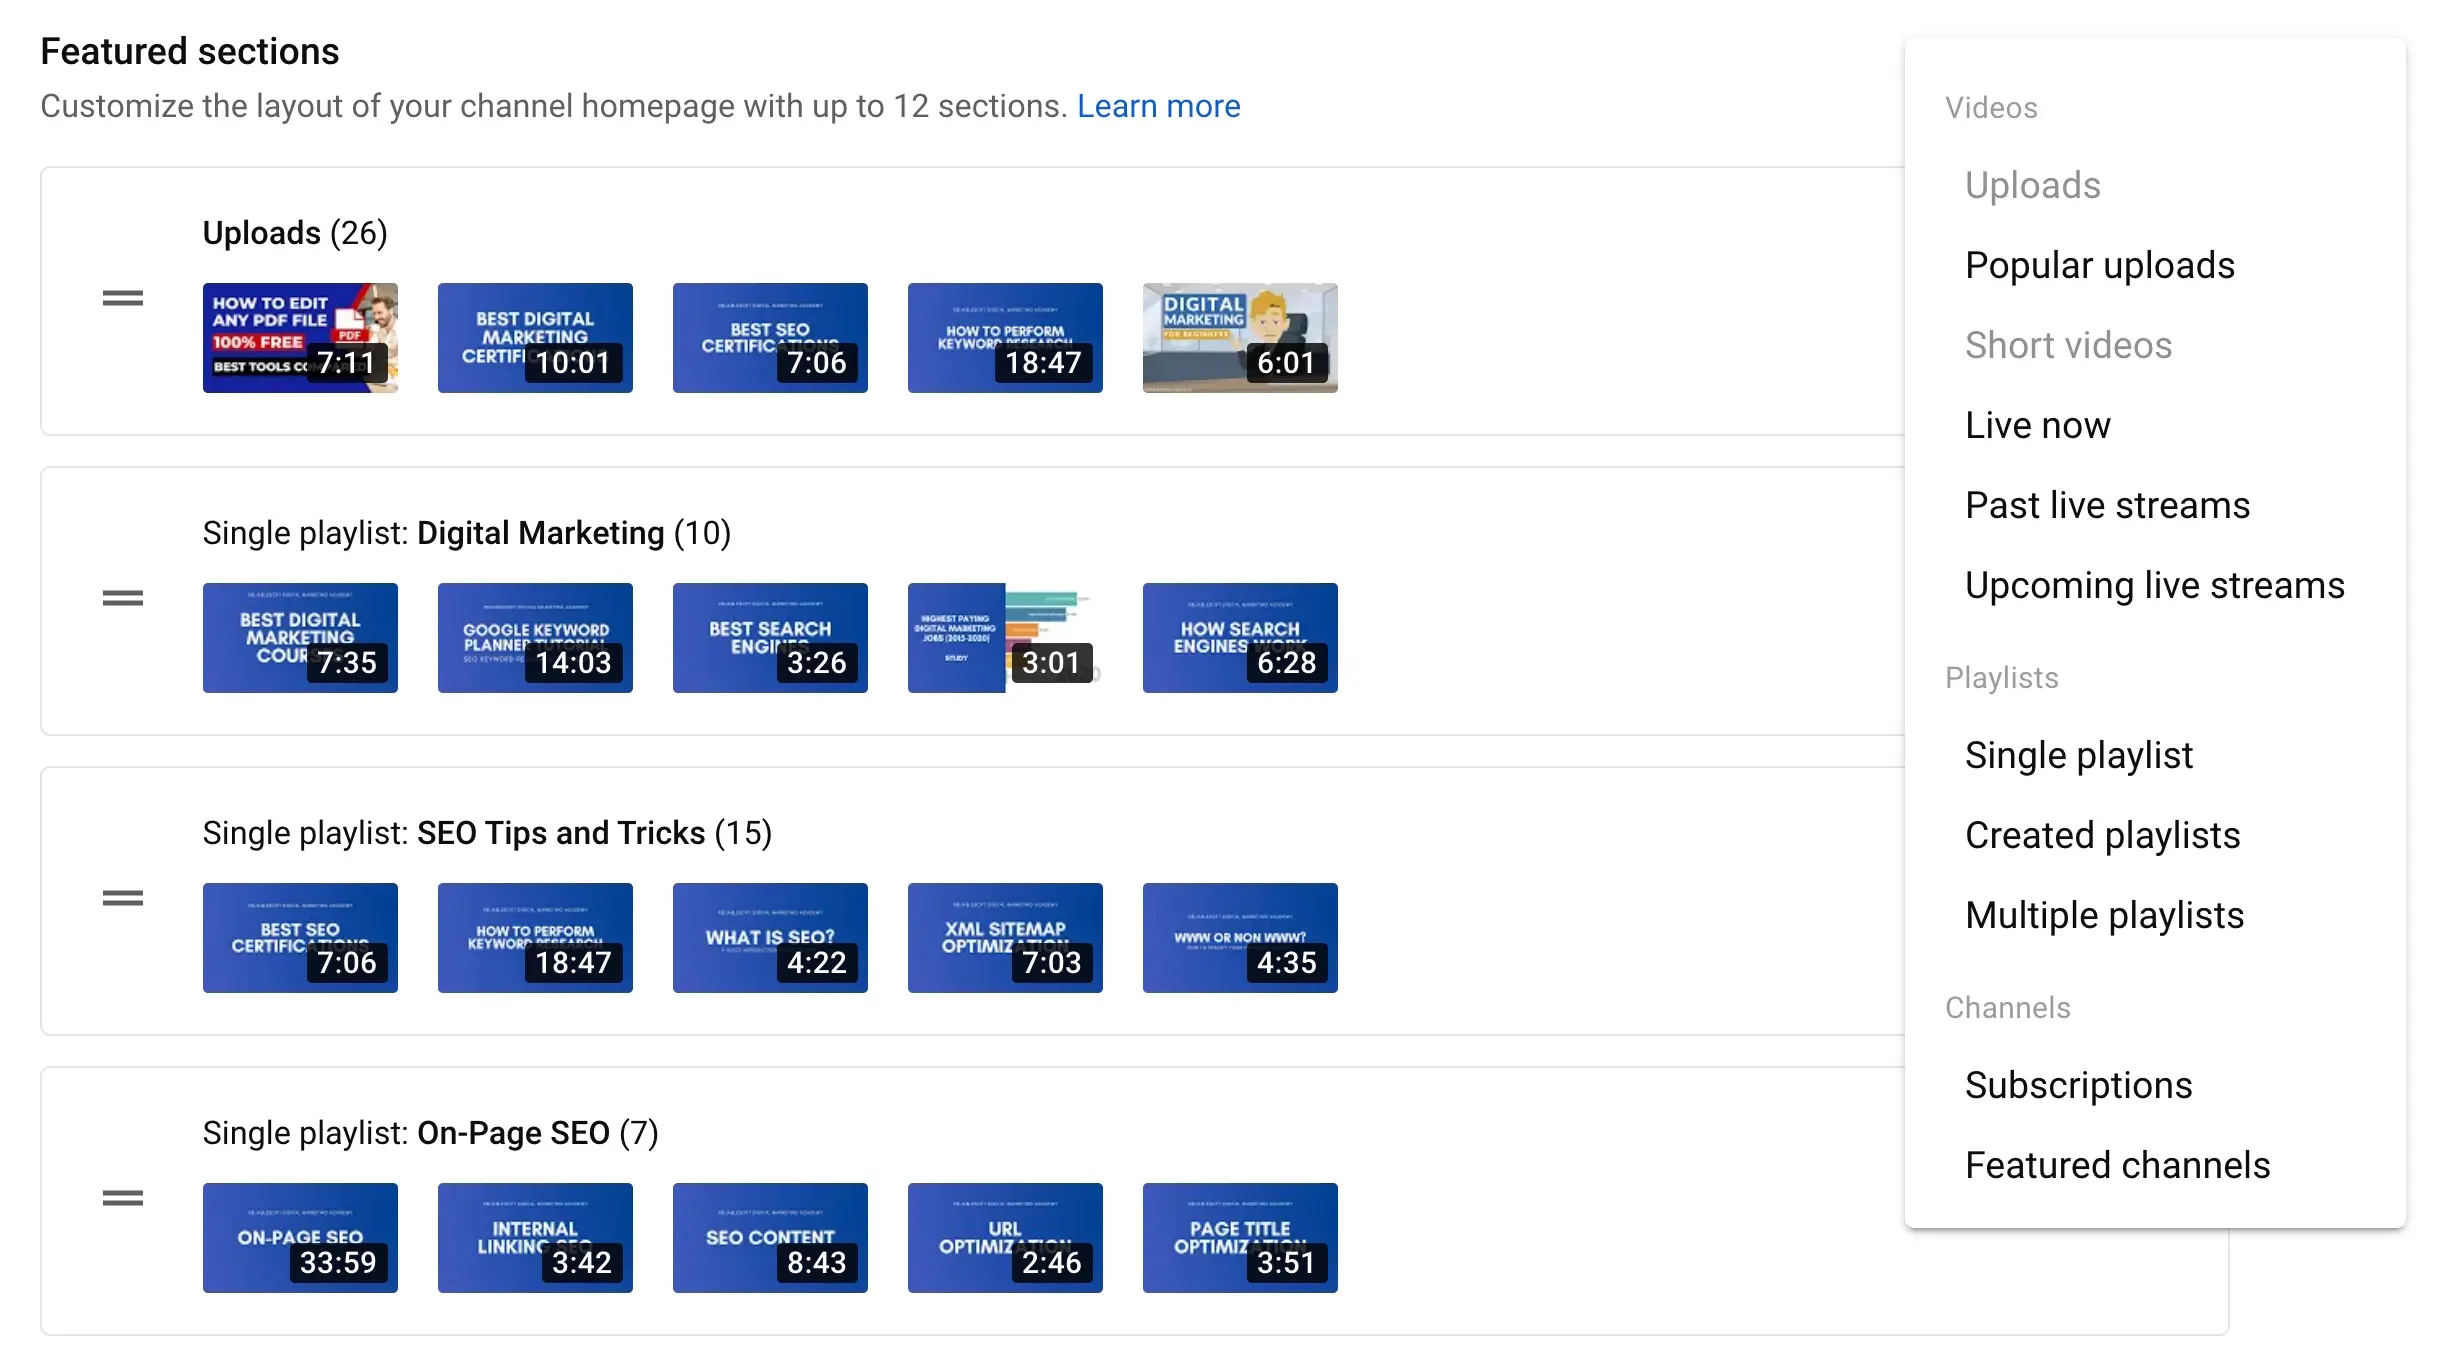
The main options are:
- Videos - highlight your videos, Shorts, or live streams, such as your latest or most popular uploads
- Playlists - show one or more playlists you created
- Channels - feature other channels you own or channels you want your viewers to know about
- For you - recommend your content to each viewer based on their interests
You can visit channels you follow to get some inspiration but as a rule of thumb, you should organize your sections based on your content.
You can think of this as the categories you have on a blog. Group your videos into sections that make sense and help users find what they want in the fastest possible way.
9. Upload Your First Video
Now that you have created and optimized your YouTube channel, it’s time to start uploading high-quality content to engage with your customers and subscribers.
Uploading your first video is super easy, just click the Create button (top right corner), then Upload videos, and select your video file. Then customize the basic settings.
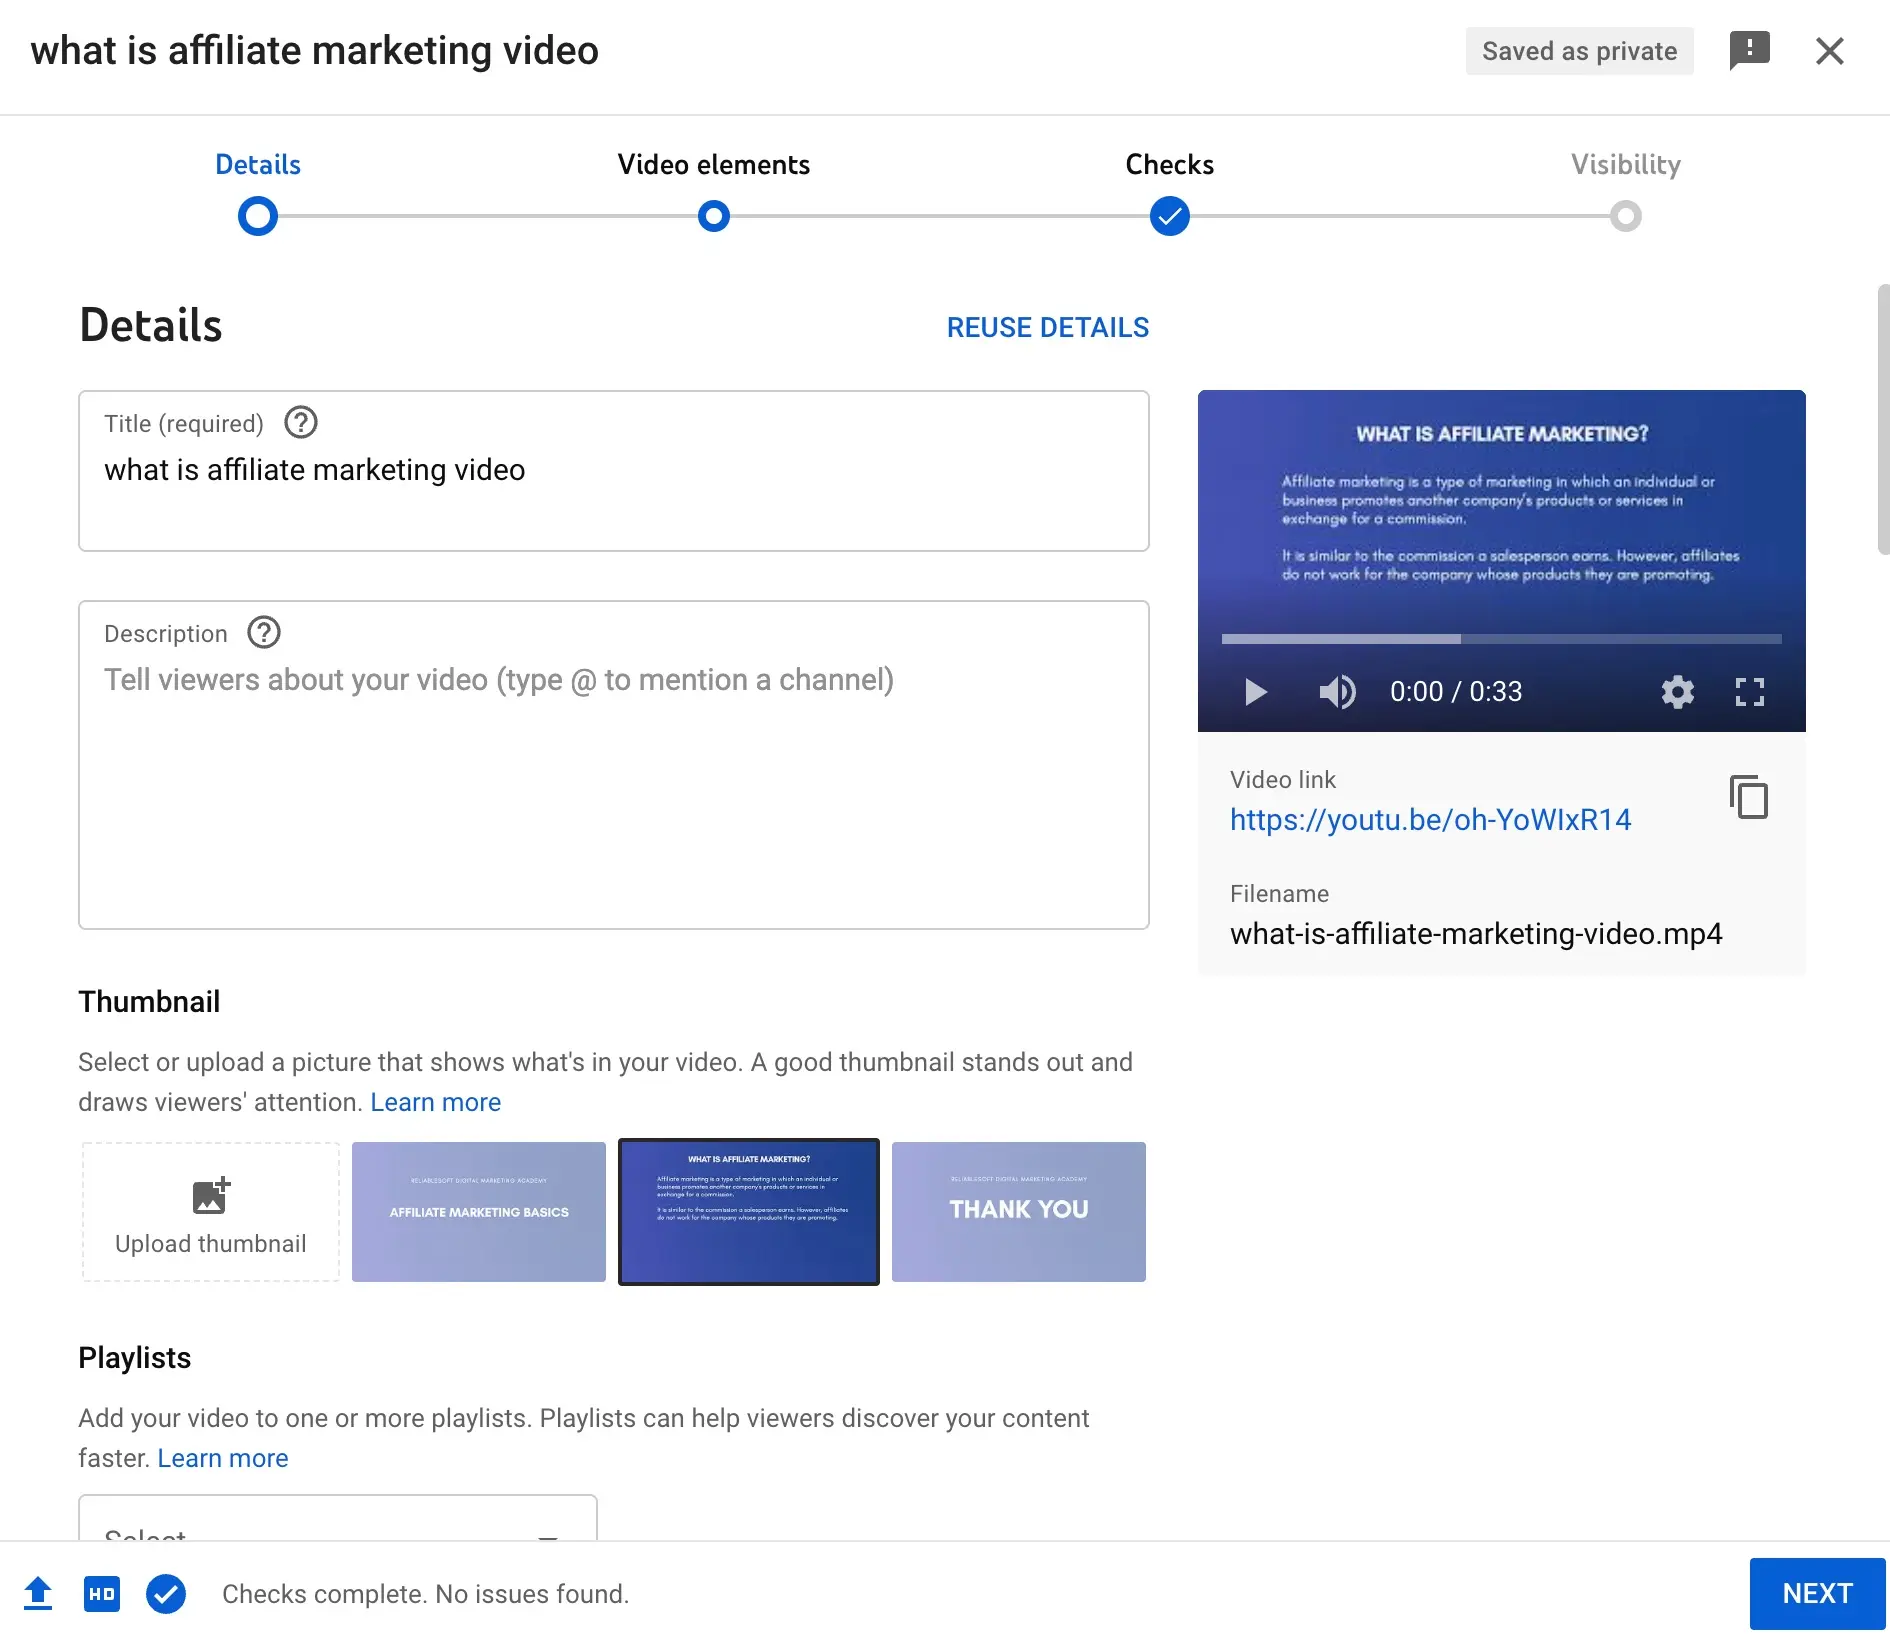
There are a few things to customize before making a video publicly available on your YouTube channel. The most important are:
Video title - This is shown below your video and it’s one of the most important elements to optimize for SEO purposes.
Use a catchy title to hook viewers and include keywords people are likely to use when searching for videos like yours on YouTube and Google. Do some YouTube keyword research to find the exact keywords to use in your titles and descriptions.
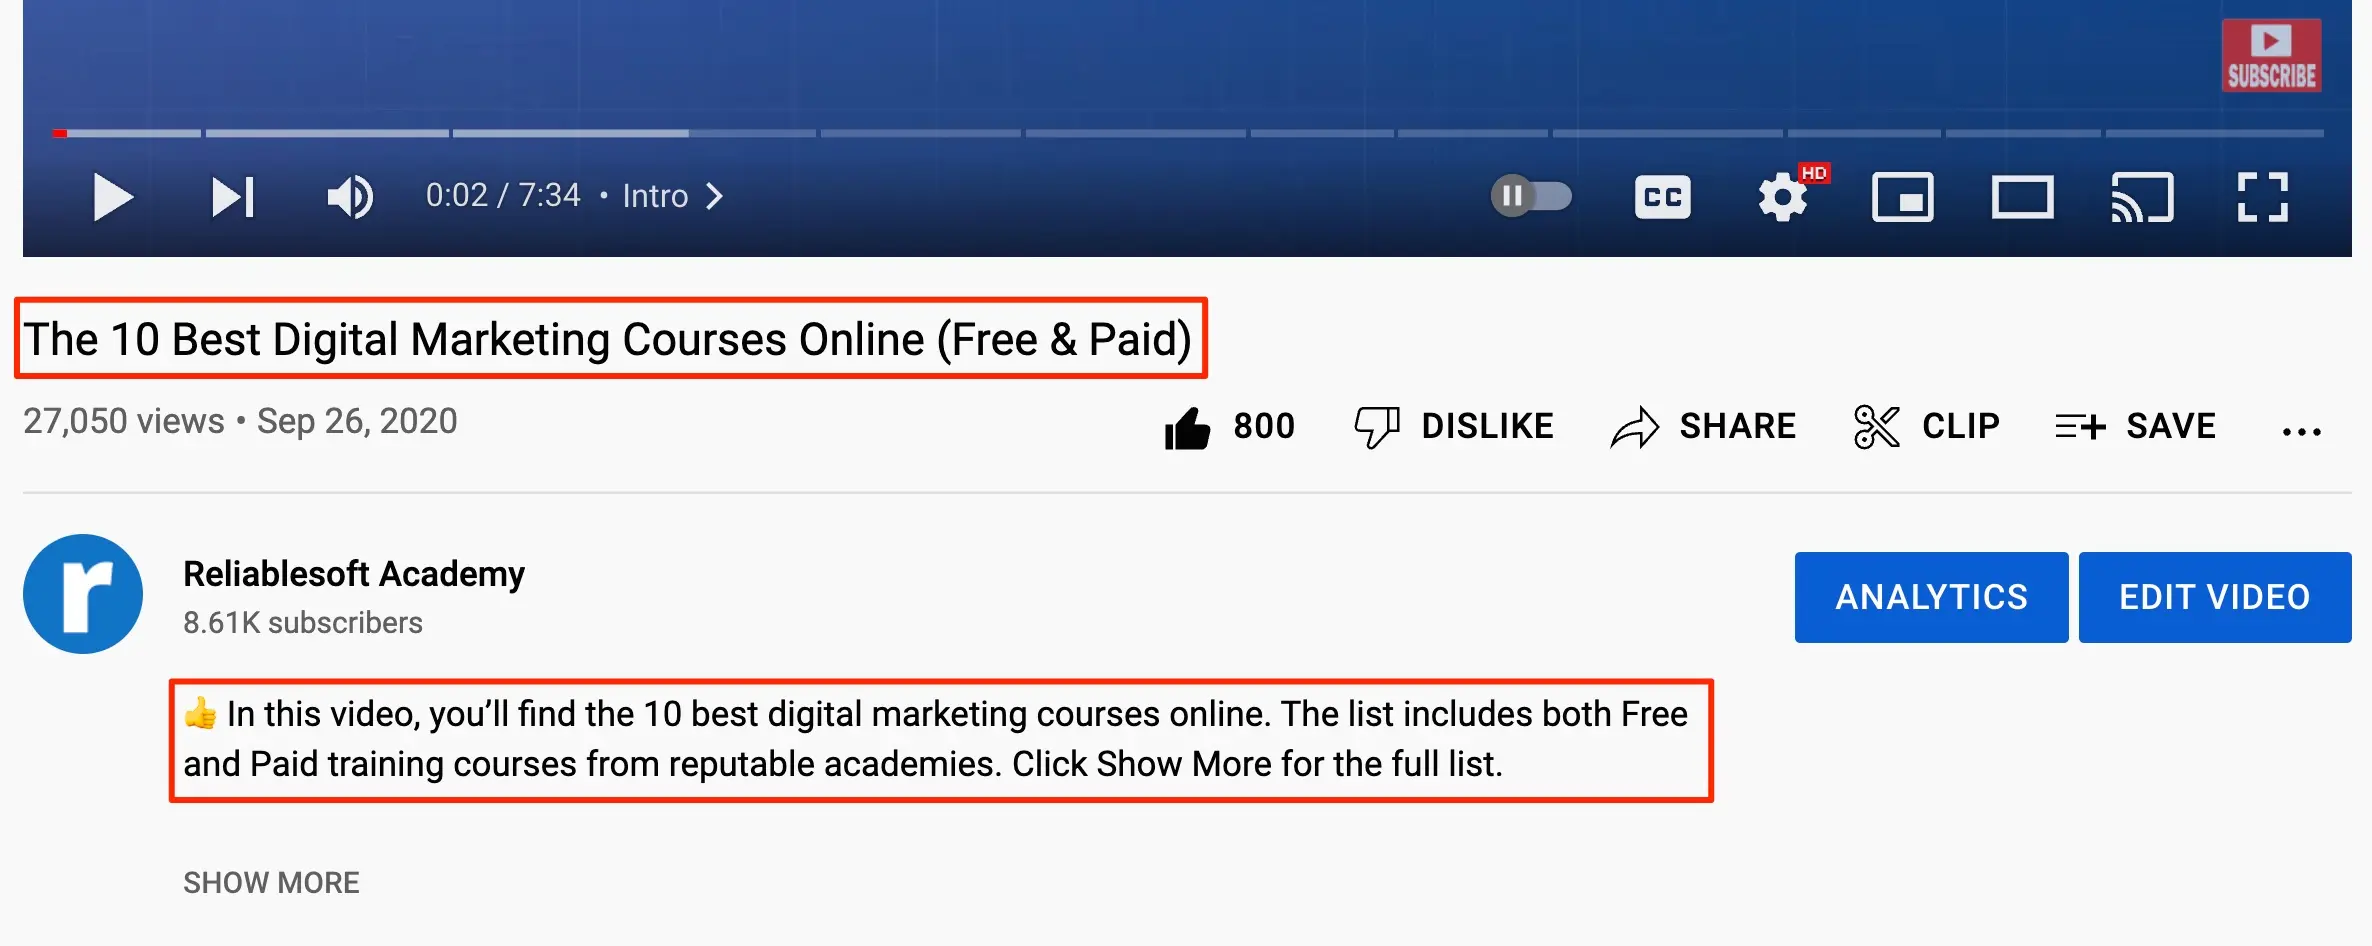
Video description - The video description is shown below your channel name. By default, YouTube shows the first 150-200 characters and then adds a Show More button to read the rest of the description.
Make sure that in the first 200 characters, you explain to users what the video is about and why they should watch it. See a nice example from one of our popular videos.
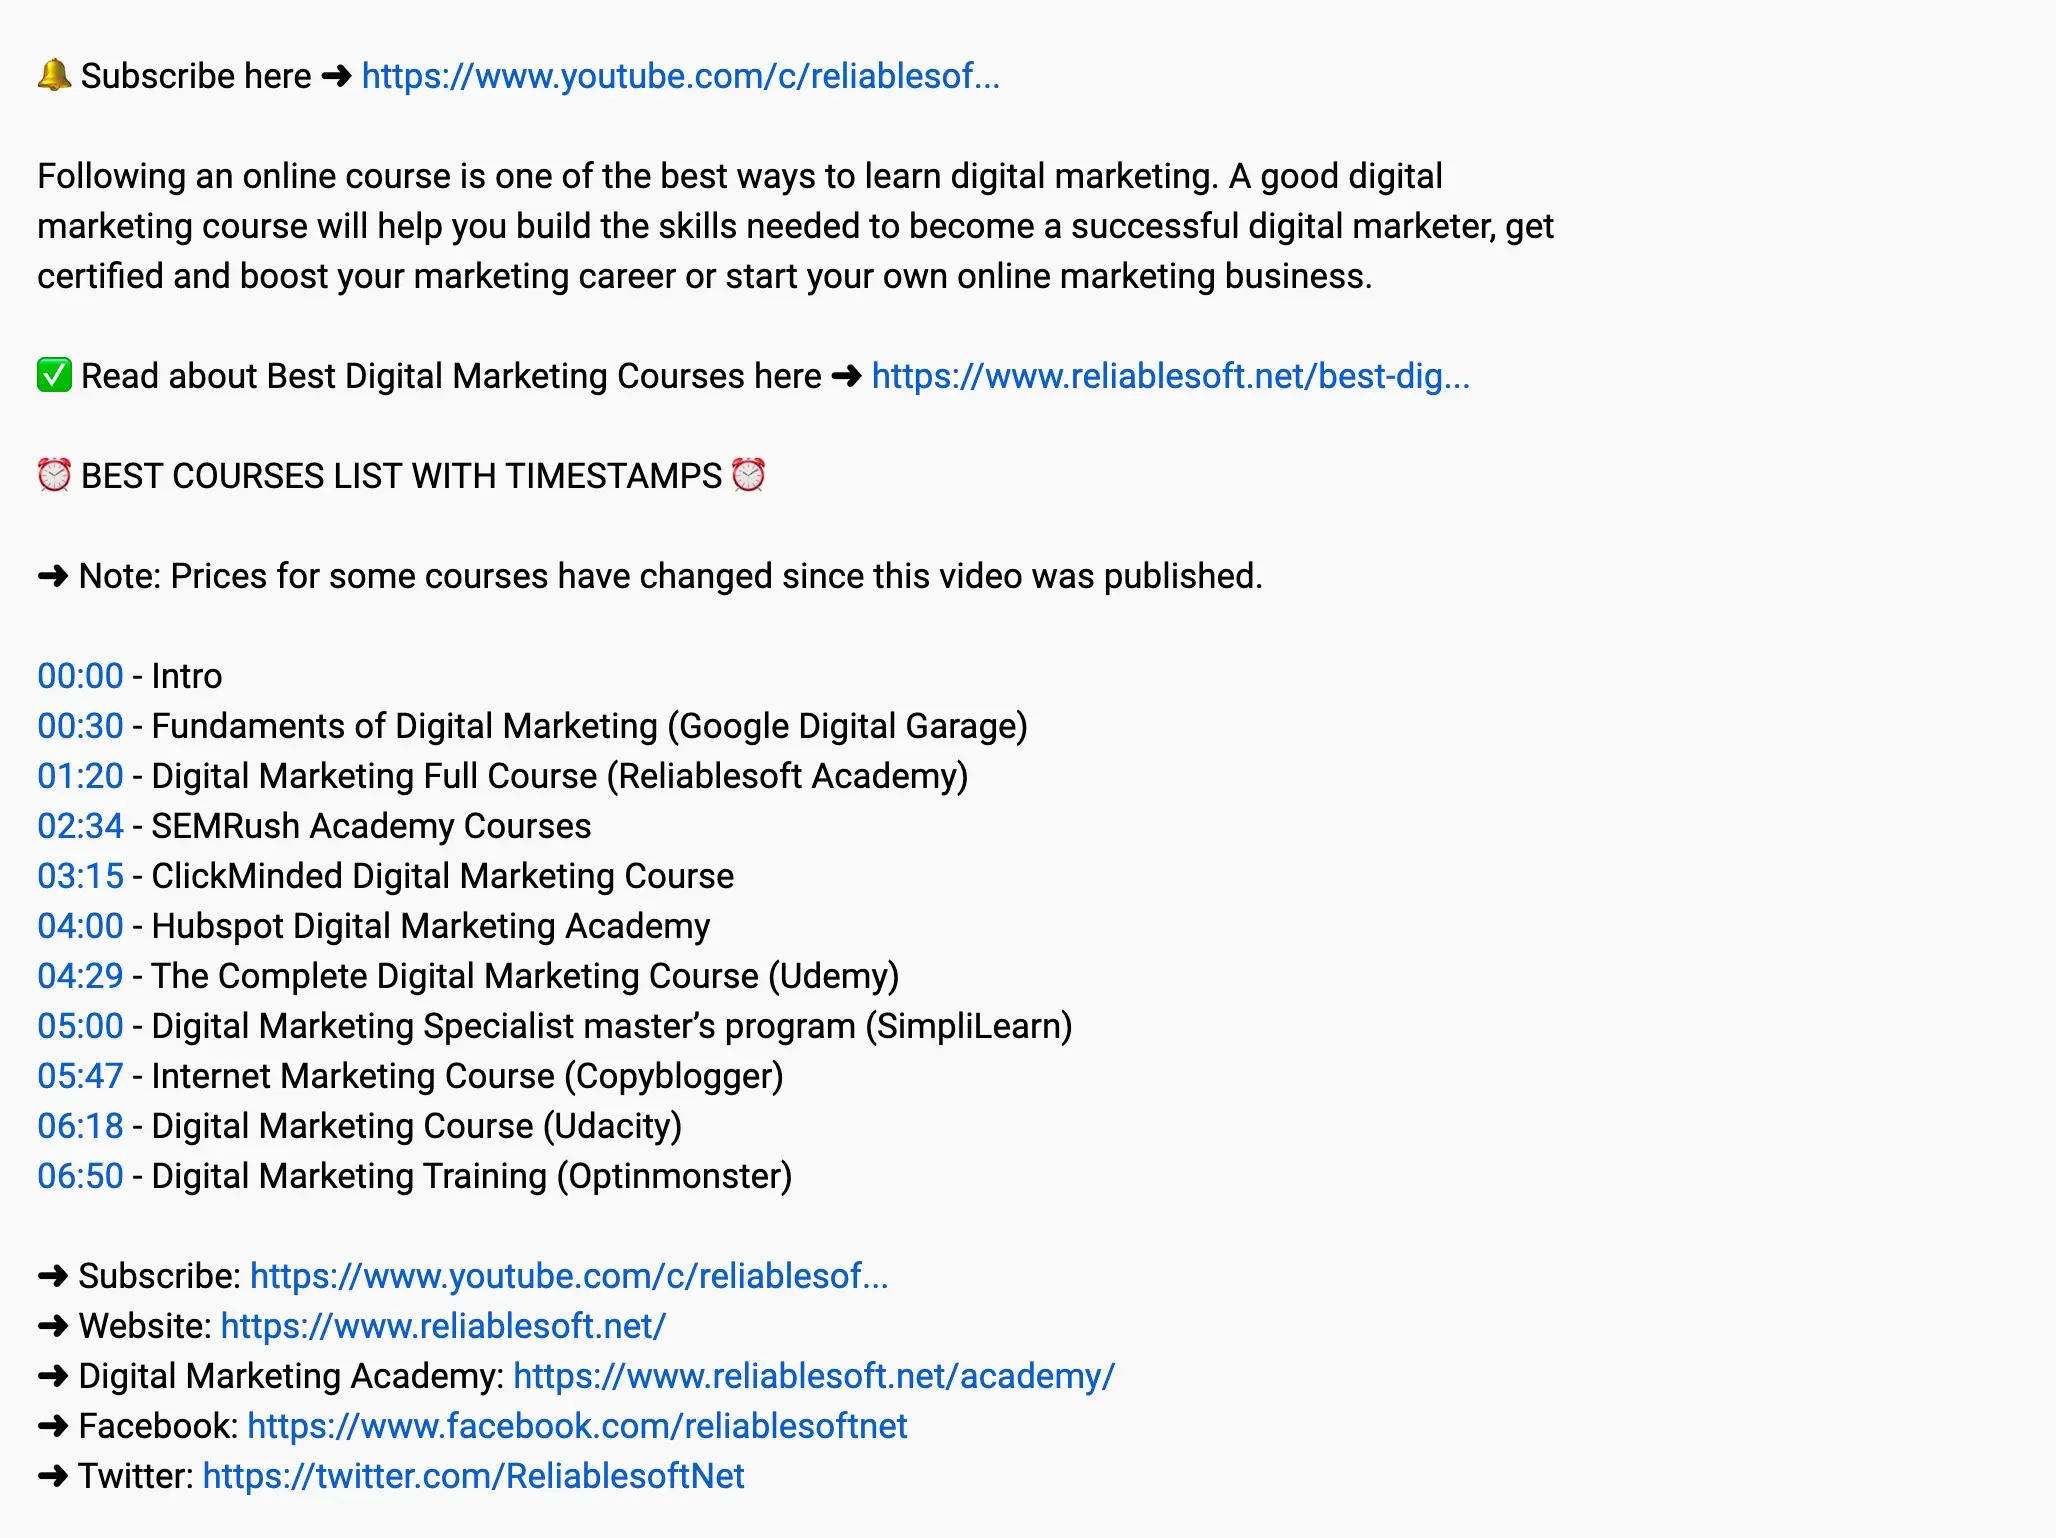
In the rest of the description give more details about the video, use text with keywords, and add any relevant call-to-action buttons.
Here is what an optimized video description looks like:
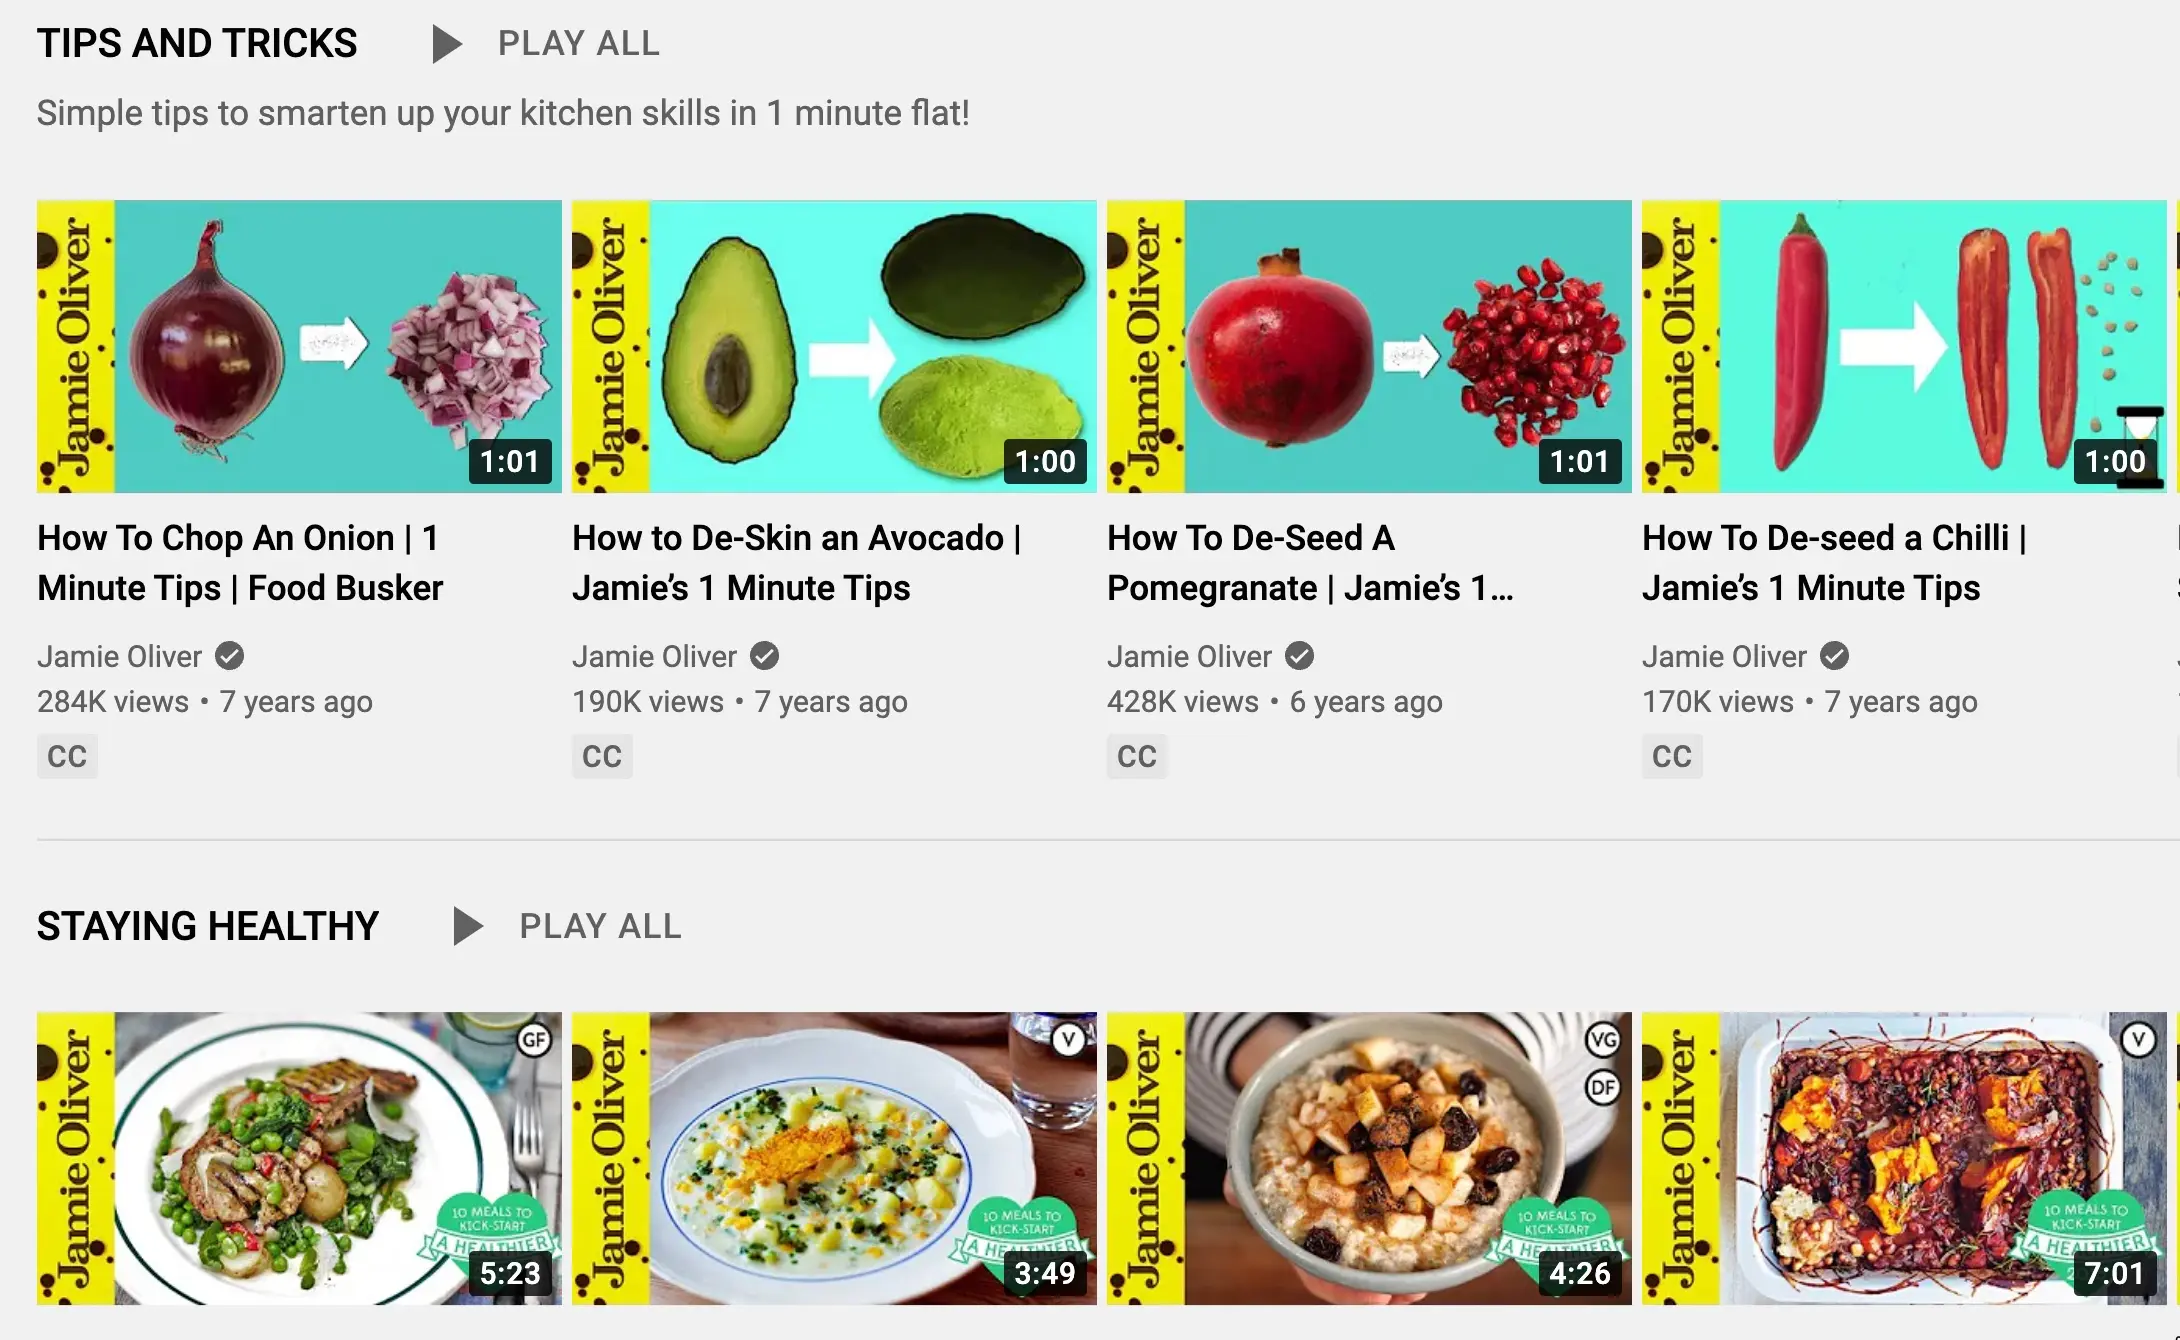
Video thumbnail - Video thumbnails are shown on YouTube search results and should be eye-catching and representative of your video and channel.
To upload a custom thumbnail, you first need to verify your phone number (see step 2). For branding purposes, it is best to come up with a thumbnail theme and use the same layout and colors across all your videos.
Here is a great example from Jamie Oliver. Notice that all his video thumbnails have the same branding with his name on the left side.
Once you’re done go through the rest of the settings (Playlists, Audience, Age restriction) and then click NEXT.
In the Video Elements screen choose to upload subtitles or configure what you want to show at the end of your video (Add an end screen) and click NEXT.
In the Checks screen click NEXT.
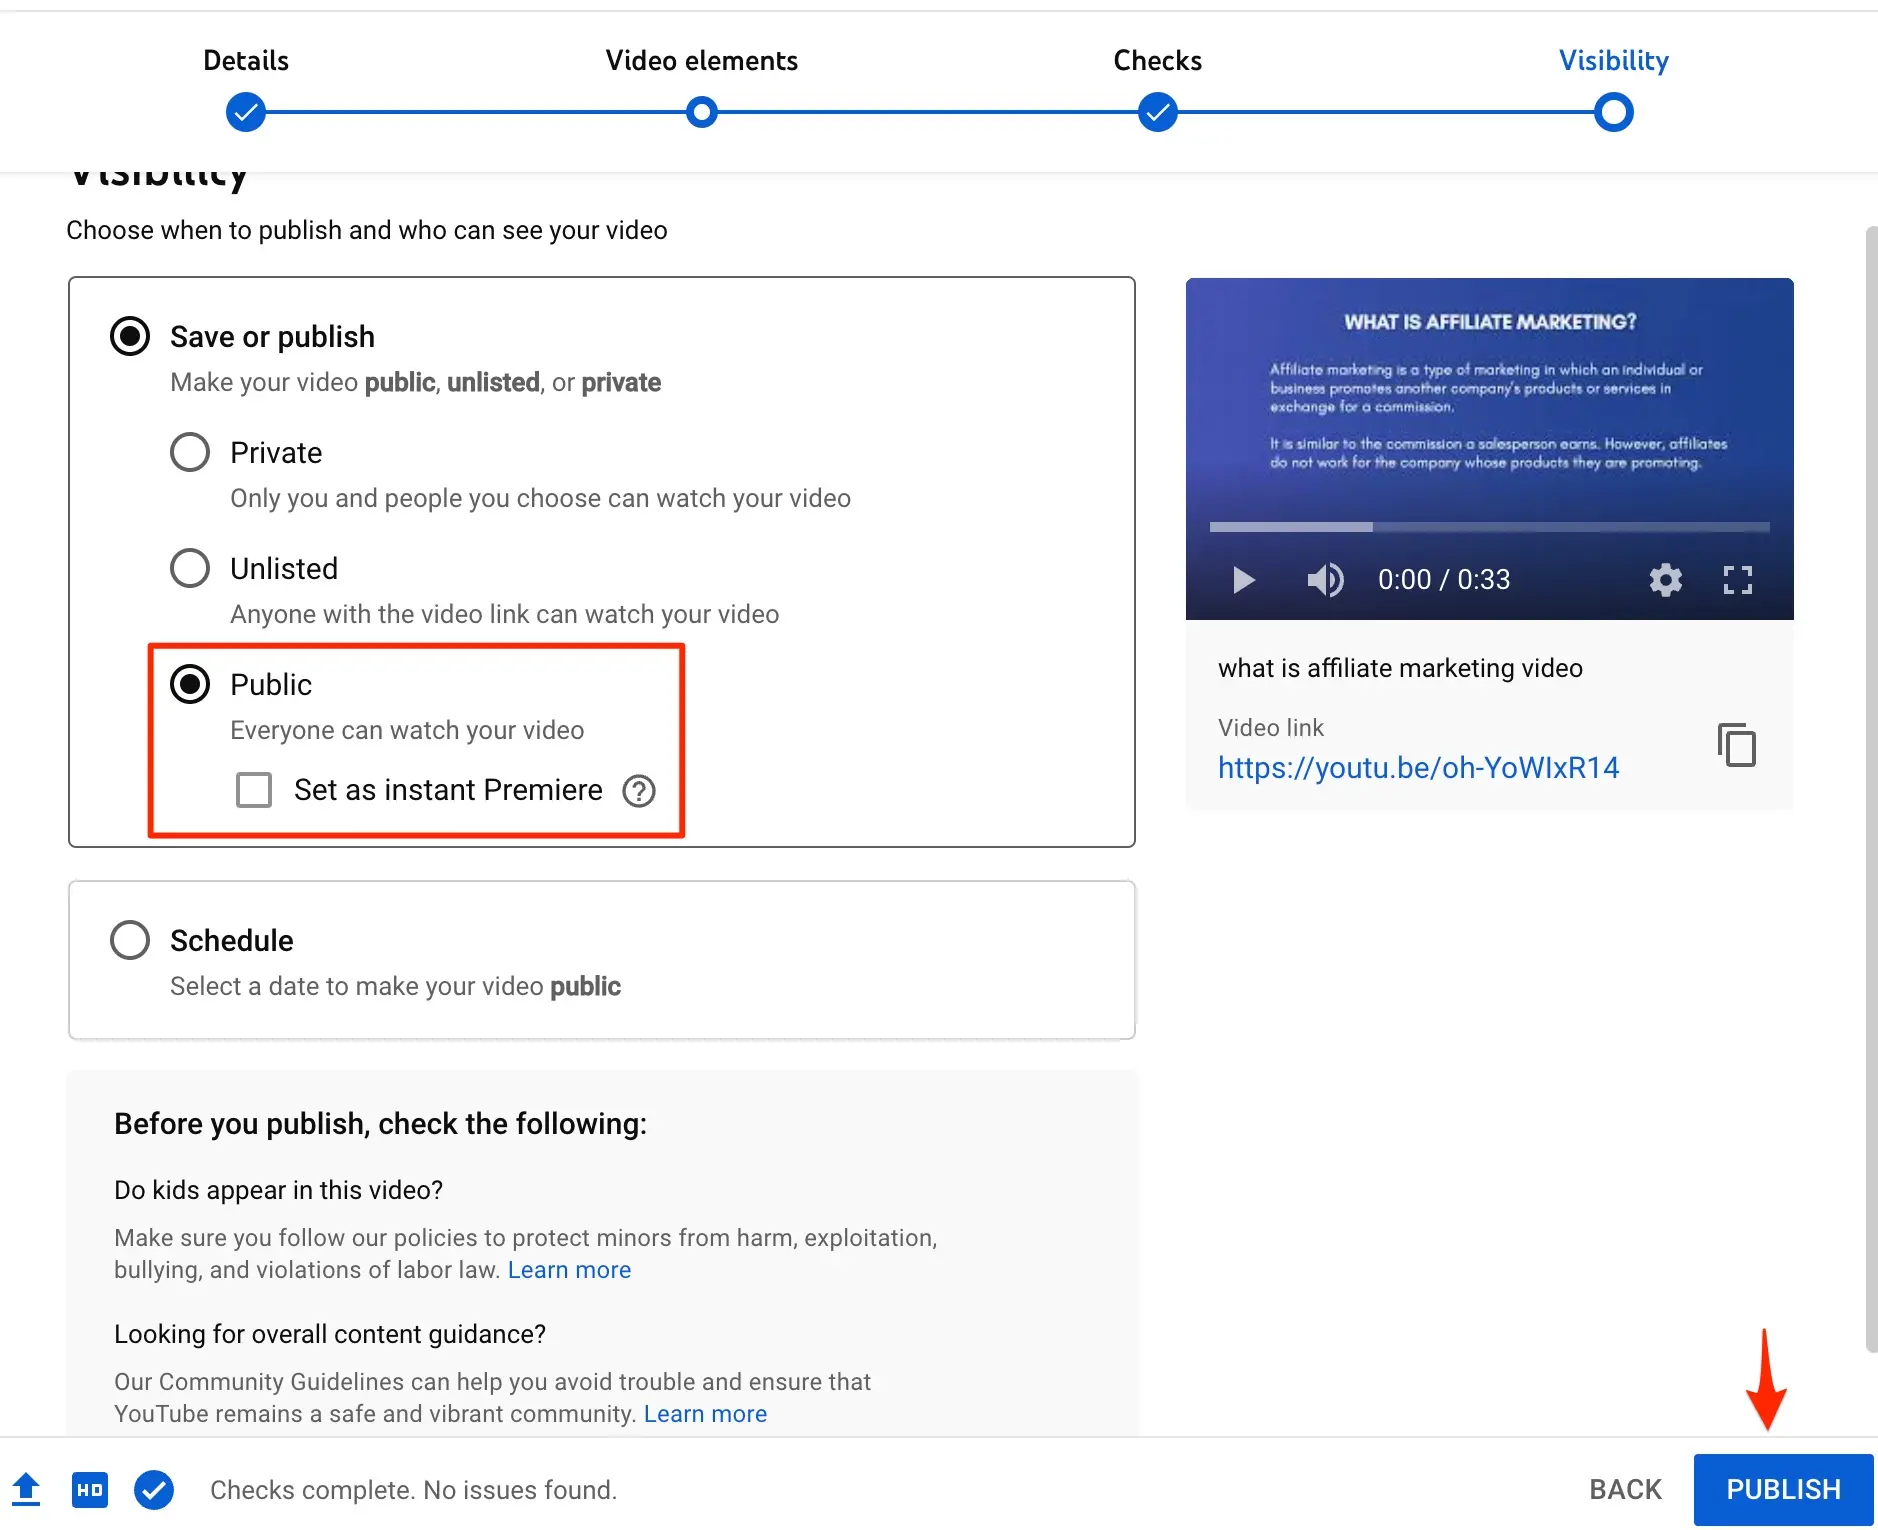
In the Visibility screen, choose PUBLIC under Visibility and hit the PUBLISH button. In a few seconds, your video will be publicly available on YouTube!
Next Steps: Growing a YouTube Channel
While the main factor that will determine your channel's success is the quality of the videos you’ll be uploading, there are also a few other things to consider. The most important are:
YouTube SEO - YouTube SEO is the process of optimizing your videos (both the actual content of the video and the video meta tags - title, description, tags, thumbnail) for the YouTube search engine and Google Search.
Optimized videos have more chances of appearing on YouTube when people search for keywords related to your content and are more likely to be shown in the Recommended Videos section.
Mastering YouTube SEO is vital for the success of any channel and this should be your next step. A good YouTube course is a great way to become an expert in YouTube SEO.
YouTube Ads - Besides waiting for your channel to grow organically you can use Video campaigns in Google Ads to advertise your videos (and channel) to your target audience.
This is an extremely effective way to grow a YouTube channel fast without having to wait until you get results organically. YouTube advertising has a cost but in the majority of cases (depending on the nature of your business), it’s money well spent.
Monetize Your Channel - Another area to consider is how to make money on YouTube. Depending on the popularity of your channel, nature of business, and type of products, there are several ways to monetize your content and make money from it.
Whether it’s ads, affiliate marketing, or sponsored content, YouTube can be a great source of income for your business.
Even if your channel is still new and unpopular, knowing what monetization options you have will help you make the right plan to reach your goals faster.
To earn a share of ad revenue, you need to join the YouTube Partner Program. You’re eligible with 1,000 subscribers plus either 4,000 public watch hours in the last 12 months or 10 million Shorts views in the last 90 days. You also need 2-Step Verification turned on and access to advanced features.
Conclusion
The process to create a YouTube Channel is simple. You first need to create a channel with a name and handle, verify it, and then add a description, icon, banner image, links, channel trailer, and sections.
It’s a process you have to do once and review every few months to make sure that all the info is still relevant and up to date.
Once you have your own channel, the possibilities are endless. To turn it into a marketing channel for your business, follow our YouTube marketing guide. Get on stage and impress your audience with great videos and become the next YouTube influencer!